Positioning device
130
Service Instructions 745-35-10 D - 00.0 - 10/2017
3.
Set the throttle valves.
• Throttle valve 1 (3): Pattern shift correction
• Throttle valve 3 (1): Turn the positioning/turning device to the sewing
position
• Throttle valve 5 (5): Turn the positioning/turning device to its initial
position or to the loading position
13.4 Setting the pocket bag feed
13.4.1 Setting the loading position
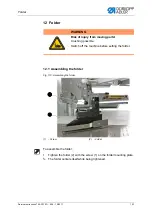
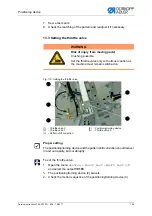
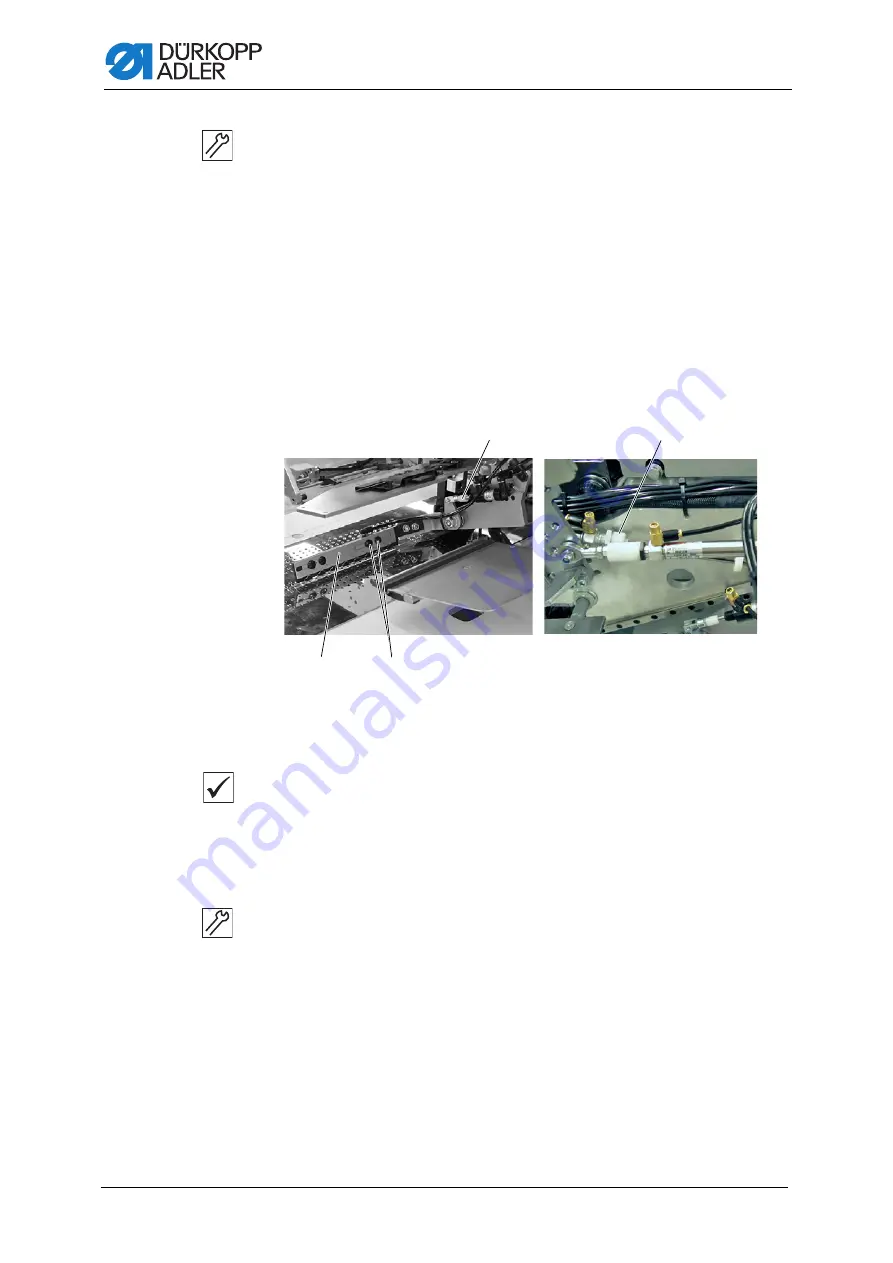
Fig. 116: Setting the loading position
Proper setting
The pocket bag feed safely transports the pocket bags to the middle of the
pocket opening at the folder.
The assembly strip moves to the middle of the pocket opening and is in
parallel position above the workpiece at a distance of approx. 2 - 3 mm.
To set the loading position:
1.
Loosen the screws (2).
2.
Align the height of the assembly strip (1) in parallel position to the
sliding plate.
3.
Tighten the screws (2).
4.
Turn the piston rod (4) to fine-tune the height.
5.
Align the assembly strip (1) parallel to the middle knife incision.
6.
Line up the front of the pocket bag with the middle knife line.
7.
Turn the sleeve (3) to set the loading position in relation to the middle
knife.
(1)
- Assembly strip
(2)
- Screw
(3)
- Sleeve
(4)
- Piston rod
④
③
①
②
Summary of Contents for 745-35-10 D
Page 1: ...745 35 10 D Service Instructions...
Page 6: ...Table of Contents 4 Service Instructions 745 35 10 D 00 0 10 2017...
Page 10: ...About these instructions 8 Service Instructions 745 35 10 D 00 0 10 2017...
Page 74: ...Machine head 72 Service Instructions 745 35 10 D 00 0 10 2017...
Page 84: ...Transport carriage 82 Service Instructions 745 35 10 D 00 0 10 2017...
Page 116: ...Light barriers 114 Service Instructions 745 35 10 D 00 0 10 2017...
Page 122: ...Aligning the machine head 120 Service Instructions 745 35 10 D 00 0 10 2017...
Page 128: ...Folder 126 Service Instructions 745 35 10 D 00 0 10 2017...
Page 146: ...Throw over stacker 144 Service Instructions 745 35 10 D 00 0 10 2017...
Page 282: ...Programming 280 Service Instructions 745 35 10 D 00 0 10 2017...
Page 292: ...Maintenance 290 Service Instructions 745 35 10 D 00 0 10 2017...
Page 294: ...Decommissioning 292 Service Instructions 745 35 10 D 00 0 10 2017...
Page 296: ...Disposal 294 Service Instructions 745 35 10 D 00 0 10 2017...
Page 308: ...Troubleshooting 306 Service Instructions 745 35 10 D 00 0 10 2017...
Page 337: ......


