


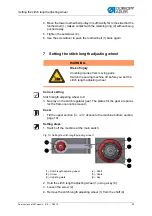


Setting the stitch length adjusting wheel
24
Service manual 567 classic - 01.0 - 10/2015
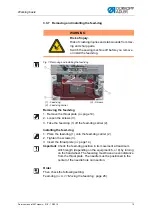
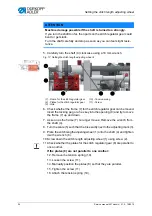
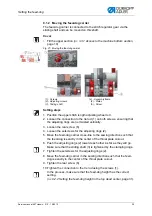
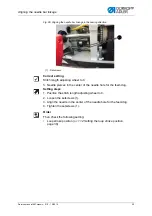
5. Carefully turn the shaft (4) clockwise using a 10 mm wrench.
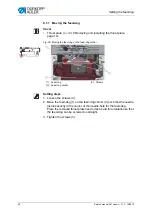
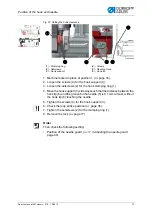
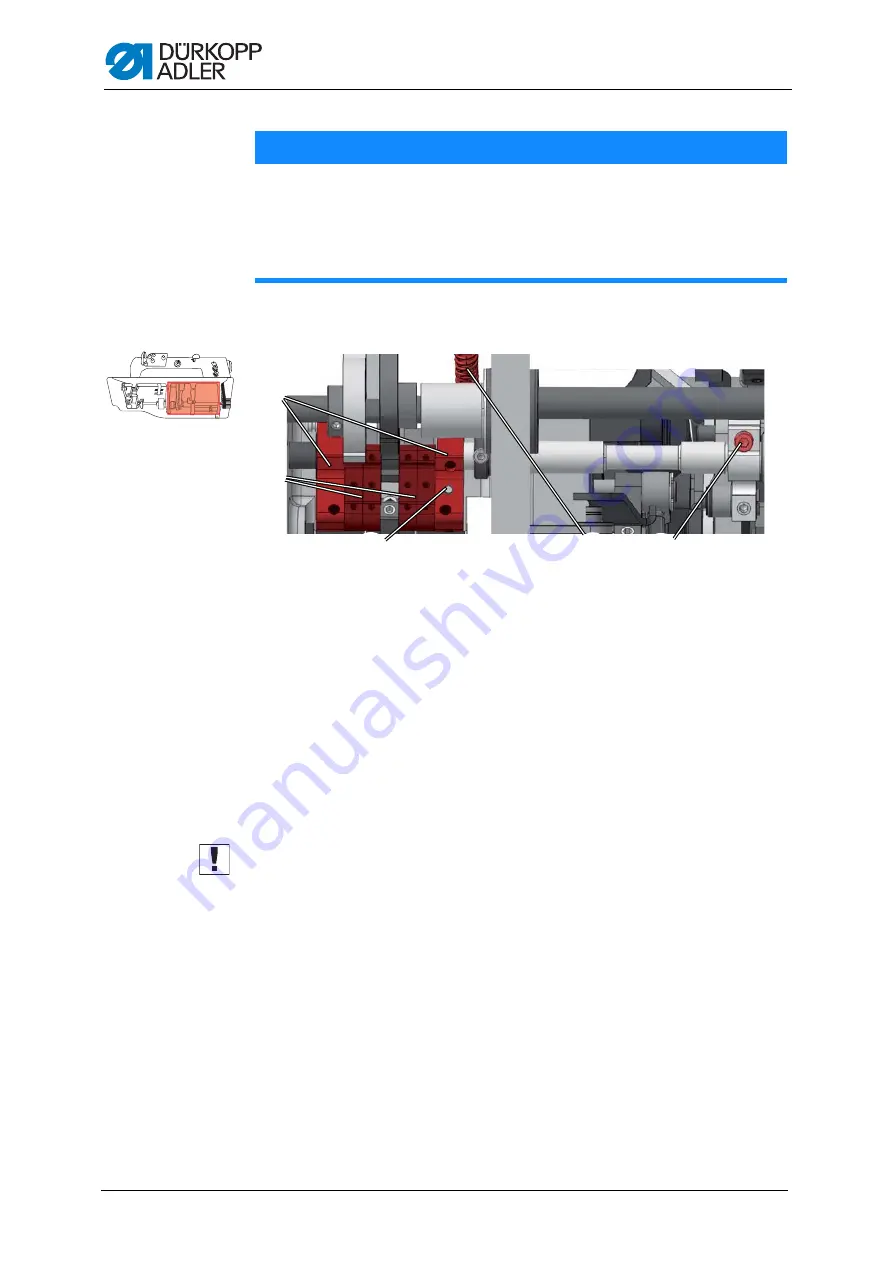
Fig. 17: Setting the stitch length adjusting wheel II
6. Check whether the frame (7) for the stitch regulator gear can be moved.
Insert the locking peg or a hex key into the opening (9) and try to move
the frame (7) up and down.
7. As soon as the frame (7) no longer moves: Remove the wrench from
the shaft (4).
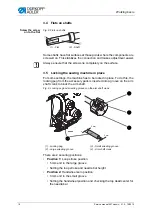
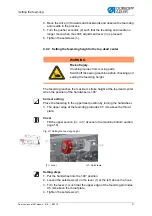
8. Turn the scale (5) such that the 0 is exactly next to the adjusting mark (3).
9. Place the stitch length adjusting wheel (1) onto the shaft (4) and tighten
it with a wrench (6).
10.Screw down the stitch length adjusting wheel (1) using screw (2).
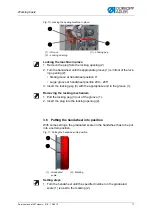
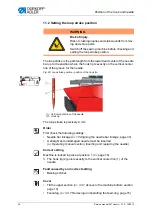
11.Check whether the plates for the stitch regulator gear (8) are parallel to
one another.
If the plates (8) are not parallel to one another:
12. Remove the tension spring (10).
13. Loosen the screw (11).
14. Manually position the plates (8) so that they are parallel.
15. Tighten the screw (11).
16. Attach the tension spring (10).
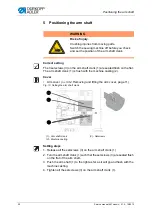
ATTENTION
Machine damage possible if the shaft is turned too strongly.
If you turn the shaft too far, then parts on the stitch regulator gear could
bend or get stuck.
Turn the shaft carefully and stop as soon as you can feel slight resis-
tance.
(7) - Frame for the stitch regulator gear
(8) - Plates for the stitch regulator gear
(9) - Hole
(10) - Tension spring
(11) - Screw
⑨
⑪
⑩
⑦
⑧
Summary of Contents for 567 CLASSIC
Page 1: ...567 classic Service manual...
Page 20: ...Working basis 18 Service manual 567 classic 01 0 10 2015...
Page 79: ......


