


Position of the hook and needle
Service manual 567 classic - 01.0 - 10/2015
37
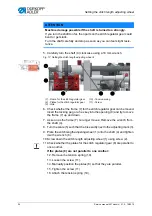
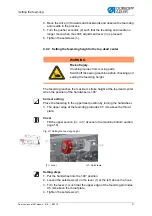
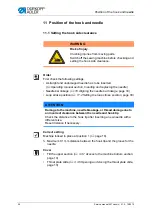
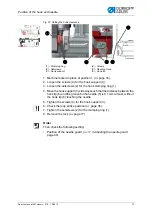
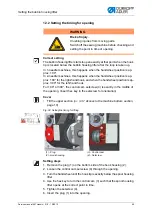
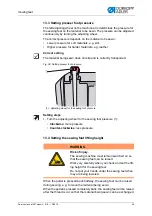
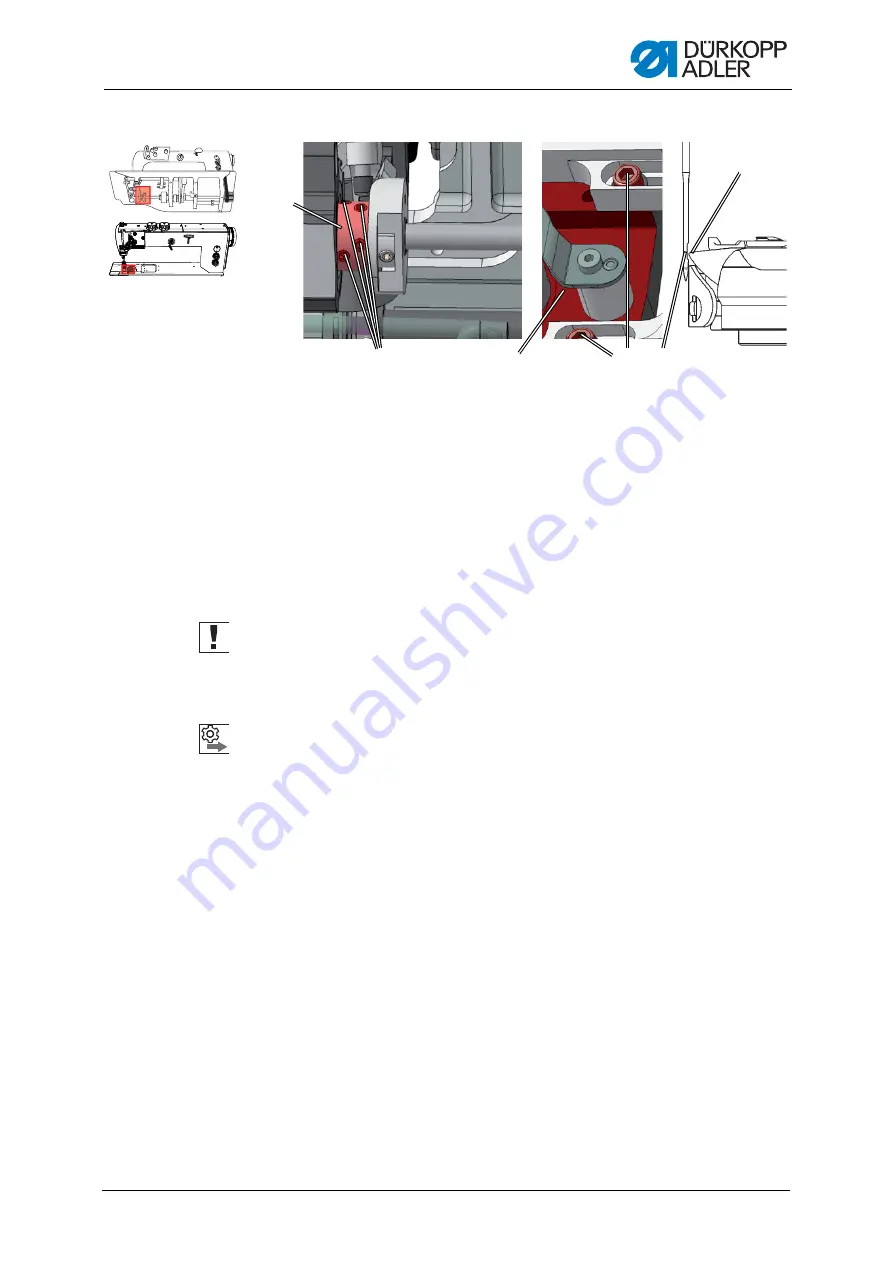
Fig. 27: Setting the hook clearance
1. Machine locked in place at position 1 (
2. Loosen the screws (4) for the hook support (3).
3. Loosen the setscrews (2) for the hook clamping ring (1).
4. Move the hook support (3) sideways such that the distance between the
hook tip (6) and the groove for the needle (5) is 0.1 mm at most, without
the hook tip (6) touching the needle.
5. Tighten the screws (4) for the hook support (3).
6. Check the loop stroke position (
page 38).
7. Tighten the setscrews (2) for the clamping ring (1).
8. Remove the lock
.
Order
Then check the following setting:
•
Position of the needle guard (
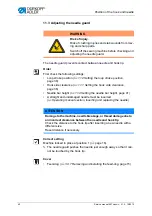
11.3 Adjusting the needle guard
(1) - Clamping ring
(2) - Setscrews
(3) - Hook support
(4) - Screws
(5) - Needle groove
(6) - Hook tip
①
③
⑤
⑥
②
④
Summary of Contents for 567 CLASSIC
Page 1: ...567 classic Service manual...
Page 20: ...Working basis 18 Service manual 567 classic 01 0 10 2015...
Page 79: ......


