-11-
MAINTENANCE
MAINTENANCE
1) To prolong the weld tip life and improve the weld quality, it is imperative that the weld tips and lower ground
bar always be kept clean. For best results, use a solvent to remove any built-up adhesive; a wire brush to
remove any galvanizing deposits; and a fine emory cloth to smooth the tip and ground bar surfaces.
2) When lower weld tip becomes worn in one area, loosen the locking cap screw and rotate the point of wear
away from the point of contact. Additional lower weld plates can be ordered from your local distributor.
3) Depending on usage and maintenance, the upper welding tip plate will have to be periodically replaced. Re-
placement weld tip plates can be ordered from your local distributor. To replace the upper weld tip, loosen
the locking cap screw and remove the weld tip. Remove the plate by loosening three (3) brass screws.
Throw away the screws and attach the new plate to the tip using the three brass screws supplied. Be
sure to align the angled section of the plate so it faces the feed mechanism. Then lock the tip in place.
Cycle the machine to check the feeding.
4) If feeding is erratic, re-adjust the upper weld tip height by loosening the lock nut on bottom of the dwell
cylinder shaft and then turning the dweld cylinder shaft clockwise to raise the tip; counter-clockwise to
lower the tip. Lock the tip in place with the locking nut.
STARTING OPERATION (continued)
Weld time is the length of time the welding transformers are on. A fraction of a second is generally all the
time needed for a quality weld. Unnecessary weld time not only wastes energy but can also burn up the
pins. (If the pins glow red up to the washer, the weld time is set too high.) Always set the weld timer to
the minimum time required for a good weld.
3) Before beginning production, always “pre-test” with smaller pieces of the same gauge sheet metal thickness
and the liner density you intend to use in the final production. The different densities and thicknesses of the
liner may require adjustments of the weld timer setting. For example: heavier gauge steel, thicker liner,
higher density liner and/or longer weld pins may require longer weld time. To make sure, always pre-test
any adjustment before you begin “final production.” However, only change the weld timer settings when a
change in the materials results in inefficient welding or a poor quality weld.
EXTERNAL HAND-HELD WELD GUN & GROUND CABLE
EXTERNAL HAND-HELD WELD GUN & GROUND CABLE
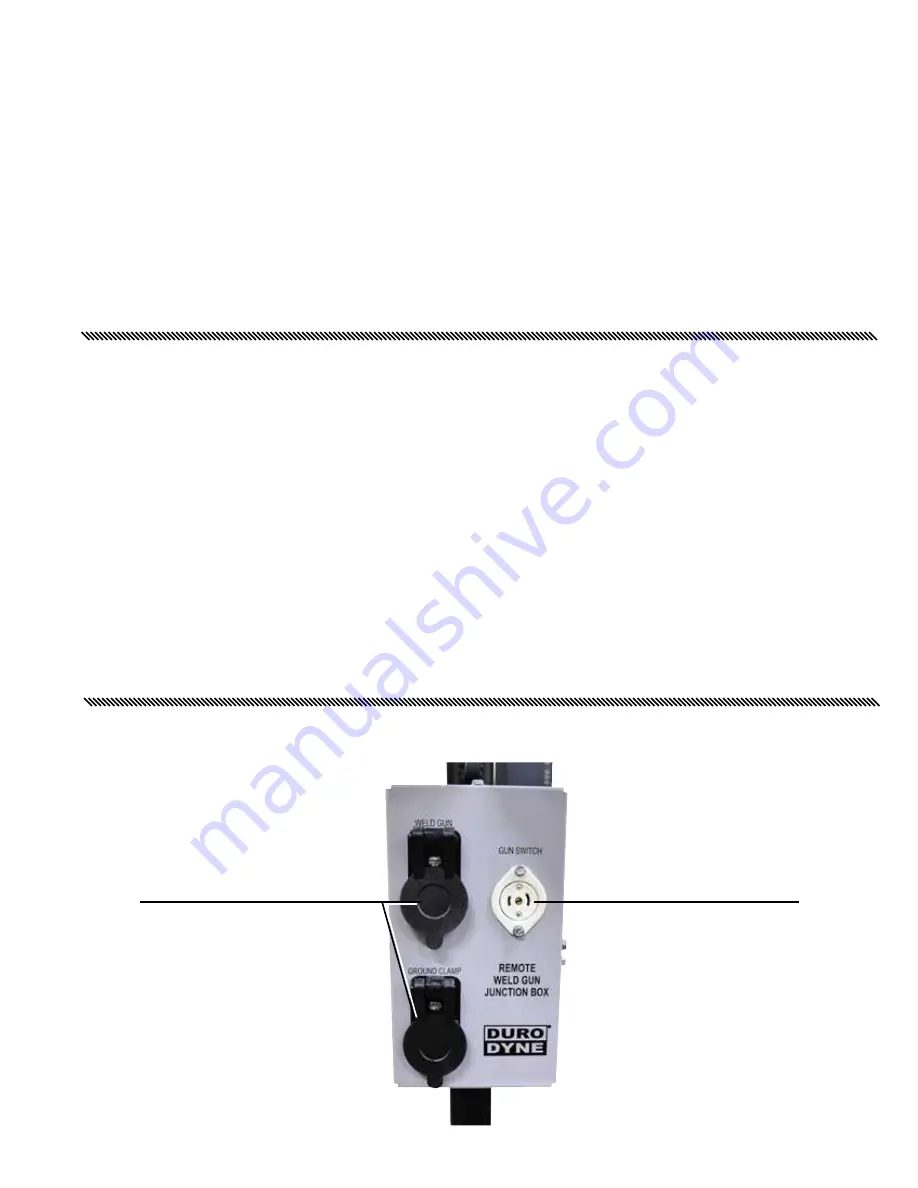
The RH Mach 70 Pinspotter is provided with a Junction Box to accommodate an External Hand-Held Weld
Gun & Ground Cable (sold separately).
17327 Switch Cable Receptacle
27213 Female Flush Mount Camlock
27343 Socket Cover


