- -
EXTENDED CLEAN-UP
NOTE: If the machine is to be idle for several days there are additional clean-up procedures which must
be followed.
1)
With power off remove the exit rack and metering bar. With a long handled brush wipe down the trough.
At this time the trough should still contain water.
2)
Cover the 55 gallon drum of water. Turn the air on and empty the adhesive from the storage tank to the
55 gallon drum. Cover the adhesive in the 55 gallon drum with a thin coat of water and cap the drum.
See Fig. A
3)
Set the multi-port valves so that the water empties from the trough to the storage tank.
See Fig. A and B
4)
With the power off remove the feed table and tank cover. Set the multi-port valves to fill the storage tank
from a convenient water bath, and with a long handled brush wipe the side of the storage tank.
See Fig. A
5)
Set the multi-port valves so that the water empties from the storage tank to a convenient water con-
tainer.
See Fig. A
6)
Disconnect the air and power. Wipe the adhesive roll dry and return the feed table, exit rack, and metering
bar to their proper position.
MAINTENANCE
1)
Periodically grease the end bearings on the adhesive roll as well as the metering bar gearing.
2)
The metering bar wiper blade can be removed and rotated 180° (end over end) as the blade shows wear.
AIR SUPPLY UNIT
1)
To provide uninterrupted service, the air regulator assembly must be kept clean. Turn the drain valve clock-
wise to drain off any filter bowl accumulation before it becomes full. A visible coating of dirt or condensate
on the filter element or erratic operation indicates cleaning is necessary. Wash the filter element and
the regulator, in denatured alcohol and blow them out with compressed air. Clean the Filter Bowl With
Household Soap Only.
2)
Check for leaks in all air hoses.
3)
Check and adjust the air pressure to 80 psi minimum. When reducing regulator pressure, pull the knob
upward and turn the knob counter-clockwise. Cycle the machine before reading the gauge. To increase air
pressure repeat the procedure turning the knob clockwise.
Fig. E
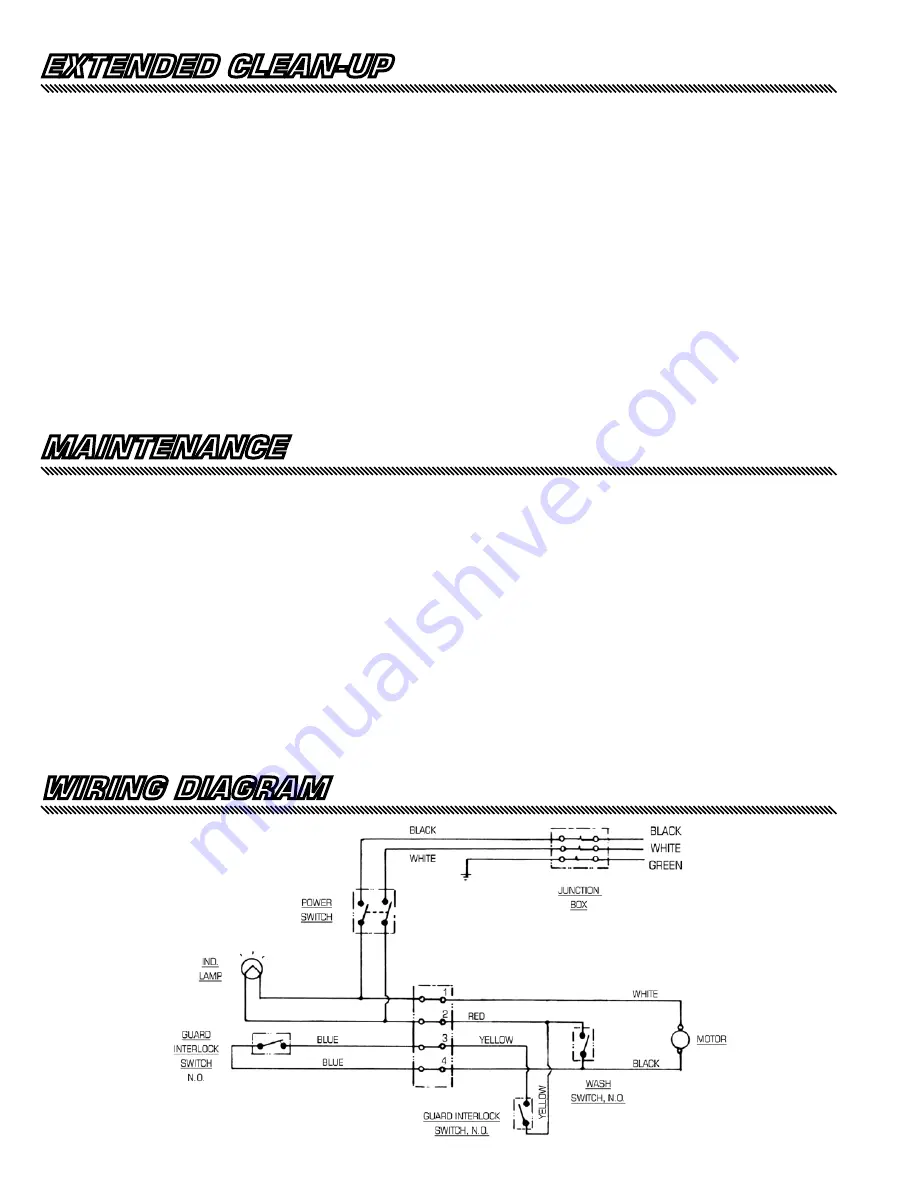
WIRING DIAGRAM
H. WEISS MACHINERY & SUPPLY
H. WEISS MACHINERY & SUPPLY
PHONE: (718) 605-0395 - www.hweiss.com


