27
Step 6 - Grounding the Generator
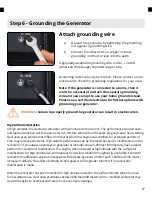
Attach grounding wire
a.
Ground the generator by tightening the grounding
nut against a grounding wire.
b.
Connect the other end to a copper or brass
grounding rod that’s driven into the earth.
A generally acceptable grounding wire is a No. 12 AWG
(American Wire Gauge) stranded copper wire.
Grounding codes can vary by location. Please contact a local
electrician to check the grounding regulations for your area.
Note
:
If the generator is connected to a home, then it
won’t be necessary to attach the separate grounding
wire and you can opt to use your home ground instead.
Please see a certified electrician for further options with
grounding your generator.
WARNING
: Failure to properly ground the generator can result in electrocution.
High Altitude Operation
At high altitudes, the standard carburetor air/fuel mixture will be too rich. The performance will decrease,
and fuel consumption will increase. A very rich mixture will also foul the spark plug and cause hard starting.
Operation at an altitude that differs from that at which this engine was certified, for extended periods of
time, may increase emissions. High altitude performance can be improved by specific modifications to the
carburetor. If you always operate your generator at altitudes above 3,000 feet (900 meters), have a dealer
perform this carburetor modification. This engine, when operated at high altitude with the carburetor
modifications for high altitude use, will meet each emission standard throughout its useful life. Even with
carburetor modification, engine horsepower will decrease by about 3.5% for each 1,000-foot (300-meter)
increase in altitude. The effect of altitude on horsepower will be greater than this if no carburetor
modification is made.
When the carburetor has been modified for high altitude operation, the air/fuel mixture will be too lean
for low altitude use. Operation at altitudes below 3,000 feet (900 meters) with a modified carburetor may
cause the engine to overheat and result in serious engine damage.
Summary of Contents for DuroStar DS13000DX
Page 2: ......
Page 5: ......
Page 20: ...20 ...
Page 28: ...28 ...
Page 37: ...37 ...
Page 40: ...40 ...
Page 44: ......
Page 50: ...50 ...
Page 76: ...WIRING DIAGRAM 76 ...
Page 77: ...77 ...
Page 83: ......
Page 84: ...5800 Ontario Mills Parkway Ontario CA 91764 United States 844 DUROMAX REV DS13000DX 06202022 ...

