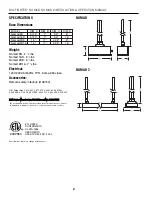
BIO-FIGHTER
®
NOMAD, NOMAD 2 INSTALLATION & OPERATION MANUAL
4
INSTALLING THE NOMAD
Perpendicular/Parallel Mount
(Fig.3)
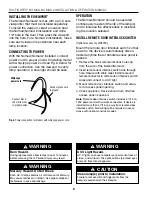
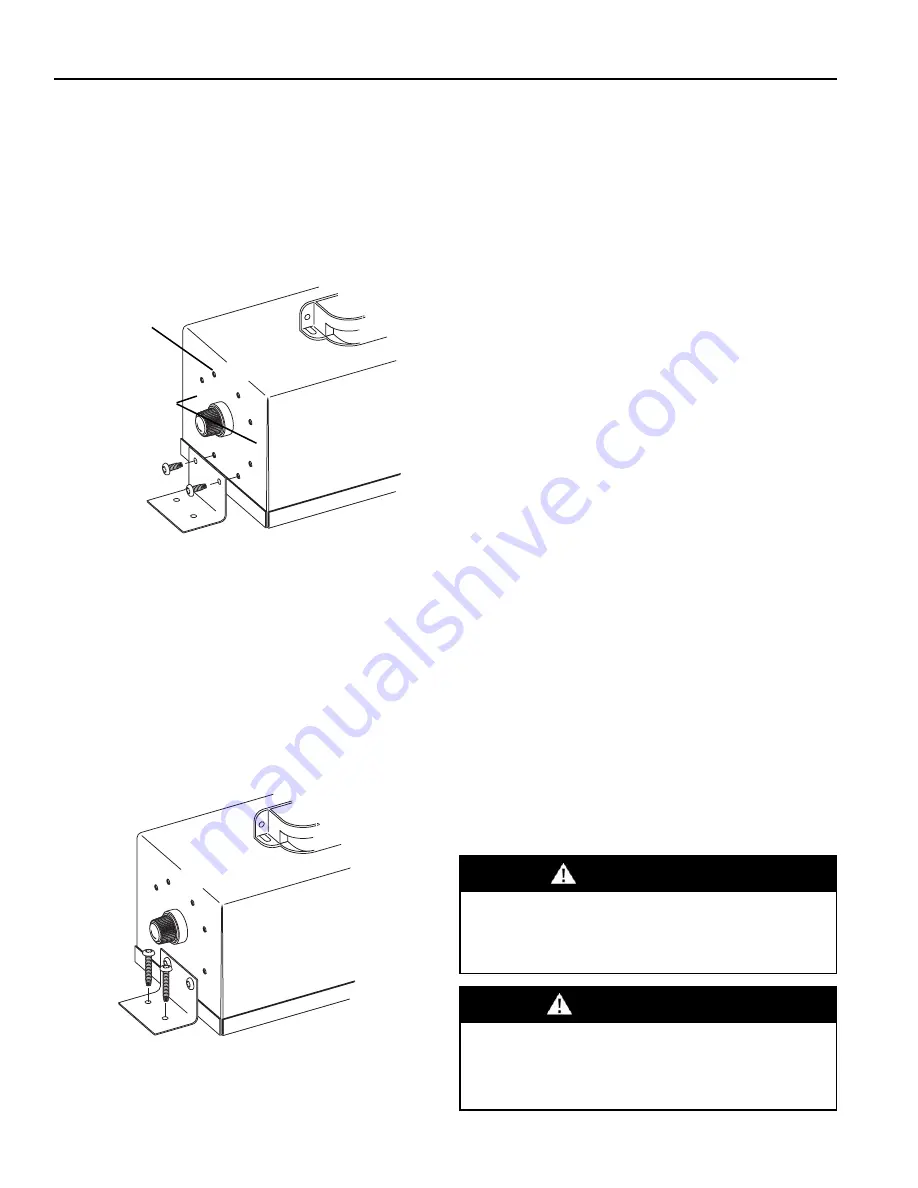
With the brackets attached, place the Nomad
at the desired installation location/orientation
and secure the brackets to the duct using the
1" mounting screws.
ADJUSTING THE LAMPS
(Nomad 2 Only)
The Nomad 2 may have its lamp centers
adjusted over a range of 7"-17.5" to fit your
application. The Nomad 2 comes from the fac-
tory with its lamps set at 14.5" centers.
To adjust lamp centers remove the screws
securing the lamp to the chassis and reposi-
tion in any of the adjustment holes. If shorten-
ing the centers from the factory setting, the
lamps will have to be pivoted around to the
inside set of adjustment holes to clear the
lamp wires.
Fig. 3
Mount the Nomad to the duct using the 1" mounting
screws.
FUSE
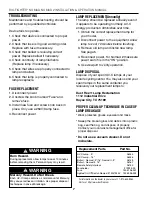
Sharp Edge Hazard.
Be careful of sharp edges on device and HVAC equip-
ment while installing the device. Personal injury may
result.
CAUTION
Insert Mount
If installing the Nomad as an insert-mount:
1. Make a 3" diameter lamp hole in the duct.
2. Install lamp as shown on page 5.
3. Insert the Nomad lamp through the holes
and secure brackets to the duct using the pro-
vided 1" mounting screws.
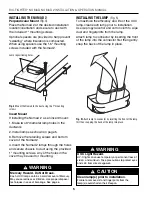
Fig. 2
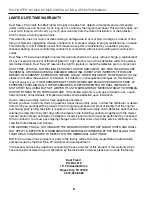
Mount the brackets to the Nomad using the 3/8" mounting
screws. Illustration shows perpendicular mounting.
FUSE
Attach bracket here
for insert-mount
Attach bracket at
these locations for
parallel-mount.
Attach Mounting Brackets
(Nomad Only)(Fig.2)
Attach brackets to the side of the Nomad
chassis with the 3/8" mounting screws.
Choose the set of bracket holes appropriate
for your installation. Be sure bracket is flush
then install the Nomad inside the HVAC sys-
tem in the desired location and orientation.
UV-C Light Hazard.
UV-C light can cause temporary or permanent loss of
vision, and sunburn. Take precautions to protect eyes
and skin from direct exposure.
WARNING


