UV-C Light Hazard.
UV-C light can cause temporary or permanent loss of
vision, and sunburn. Take precautions to protect eyes
and skin from direct exposure.
WARNING
BIO-FIGHTER® ULTRA-FLEX INSTALLATION & OPERATION MANUAL
4
Fig. 4
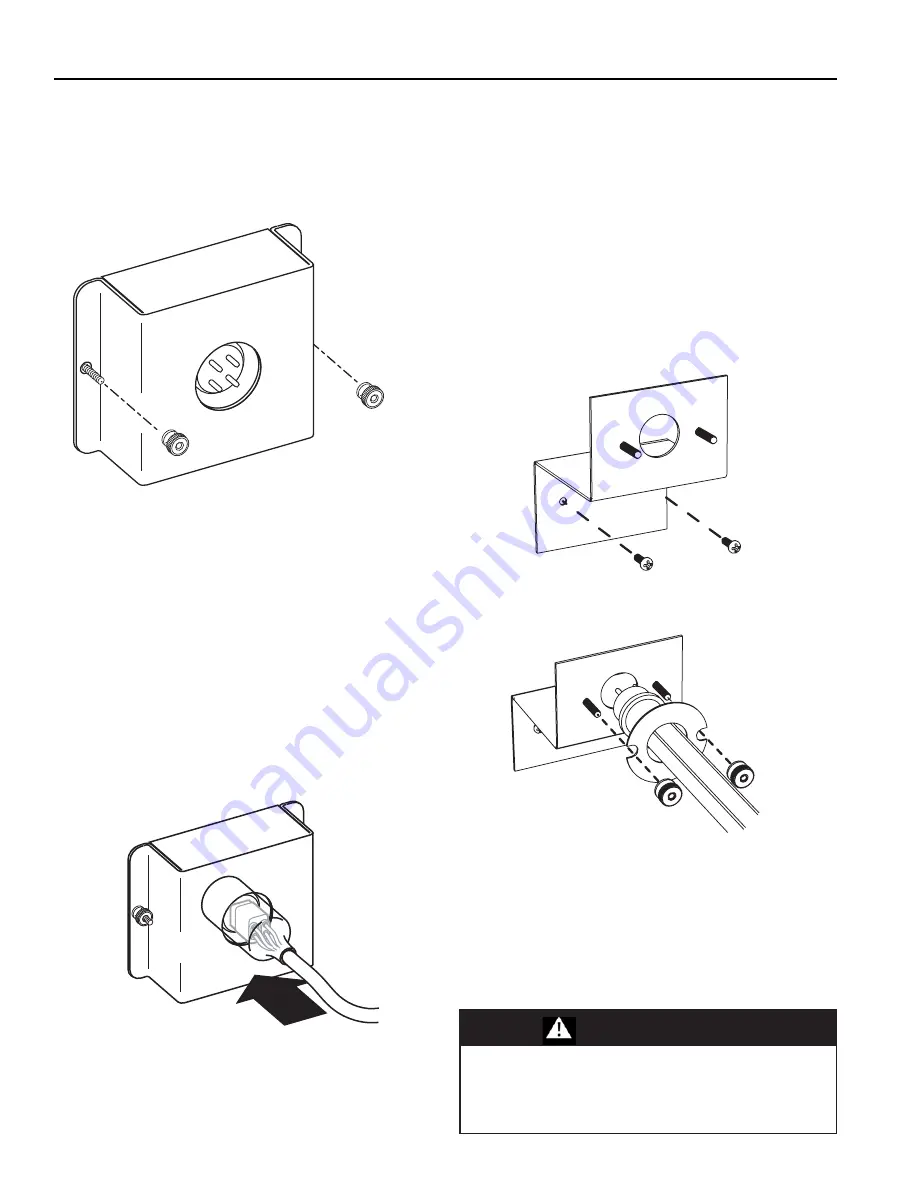
Reinstall lamp housing.
INSTALLING THE LAMP HOUSING(s)
(Fig.4 )
After lamp has been installed, reinstall the
remote lamp housing using the knurled nuts.
The remote lamp housing must be in place
prior to attaching the electrical harness.
Fig. 5
Attach lamp harness to lamp. The plastic boot slips over
the lamp and seals the connection from moisture.
Fig. 6
Install lamp bracket inside air handler
Fig. 7
Attach lamp to bracket.
CONNECTING THE HARNESS
(Fig.5)
Attach the connector to the lamp. Hold back the
protective boot to expose the harness connector.
The harness connector is asymmetrical and can
only be attached one way. If the harness does
not attach easily, rotate 90 degrees and try again.
After the harness connector is attached, slide the
protective boot over the lamp/connector. The pro-
tective boot fits snugly over the lamp and seals
the connection from moisture, dust, etc.
OPTIONAL INTERNAL LAMP MOUNTING
Use the optional lamp bracket(s) to install the
entire lamp assembly inside the AHU.
Install the lamp bracket(s) at the desired loca-
tion with two self-drilling screws. (Fig. 6)
Insert lamp base into bracket, slide lamp
retaining washer over lamp and fasten using
two knurled nuts. Use knurled nuts from
remote lamp housing.(Fig. 7)
Connect harness to lamp. Refer to "Connecting
The Harness" on this page for details.


