
DUST FREE
®
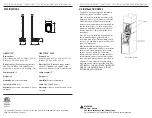
LIGHSTICK™/ LIGHTSTICK™ PLUS INSTALLATION & OPERATION MANUAL
DUST FREE
®
LIGHSTICK™/ LIGHTSTICK™ PLUS INSTALLATION & OPERATION MANUAL
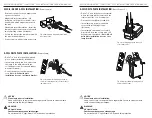
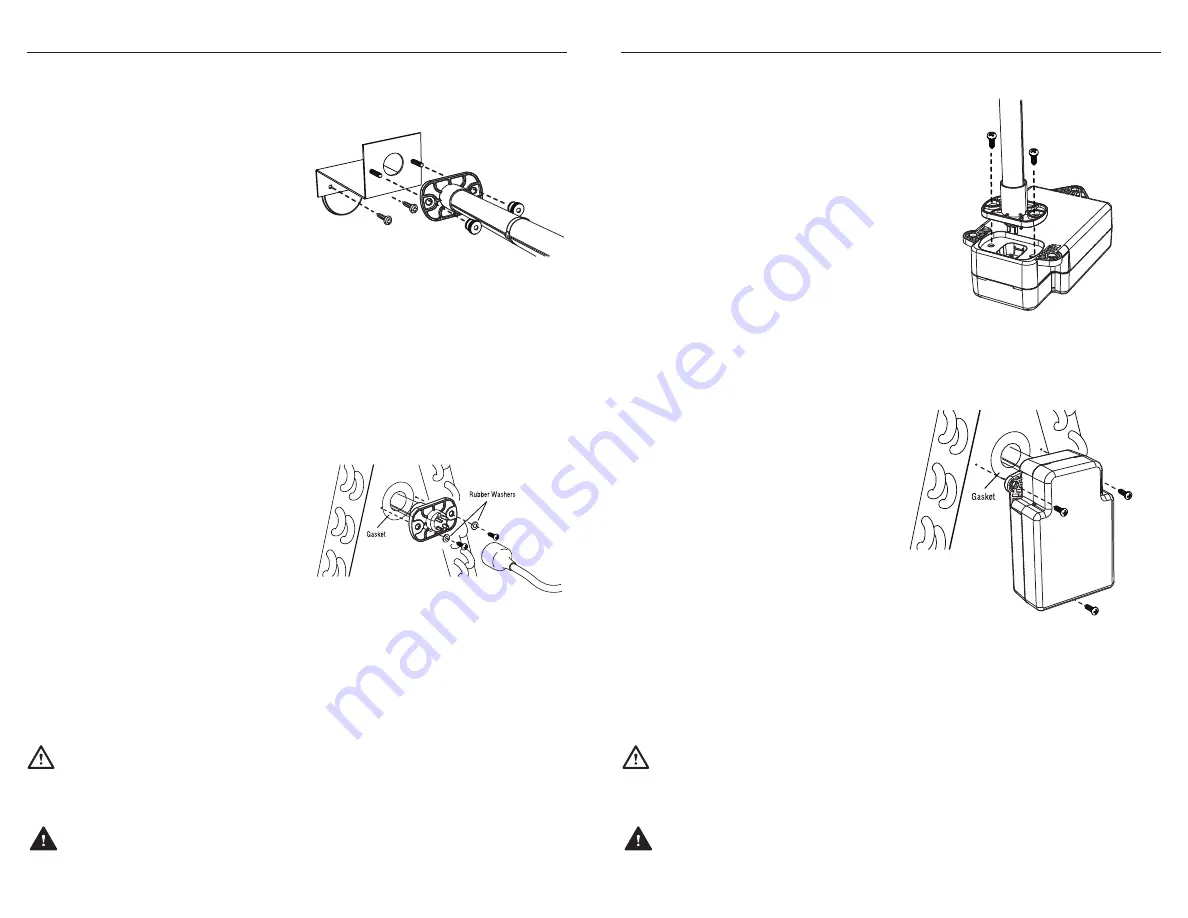
W-COIL / ABOVE A-COIL INSTALLATION
(Remote Lamp)
A-COIL DELTA PLATE INSTALLATION
(Remote Lamp)
A-COIL DELTA PLATE INSTALLATION
(Direct Connect™)
• Disconnect power to the air handler and
open access panels.
• Magnetic Bracket Installation - Slit
insulation on the back or side wall of air
handler and attach magnetic bracket to
the wall.
• Standard Bracket Installation - Install the
lamp bracket at the desired location with
two self-drilling screws (included).
• Secure the lamp to the lamp bracket with
the provided knurled nuts.
• Connect remote mount lamp power cord.
• Drill a 7/8” hole in the outer sheet metal
where the lamp will be centered on the
return side of the coil. See diagram.
• Place gasket (included) around hole.
• Insert lamp into power module and
secure with self-drilling screws.
(Included.)
• Insert lamp/power module assembly
directly into hole and secure with self-
drilling screws (Included.)
Note: A-Coil
delta plate installation does not use
lamp bracket.
• Drill a 7/8” hole into the delta plate and
place gasket (included) around hole.
• Insert lamp directly into hole and secure
the lamp to the delta plate with two
self-drilling screws. (Screws and rubber
washers Included.)
• Connect remote mount lamp power
cord.
Note: A-Coil delta plate
installation does not use lamp bracket.
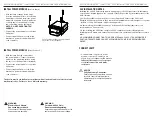
WARNING
UV Light Hazard.
Can cause serious eye and skin damage.
Do not look at UV-C light. Wear UV-C eye and skin protection
WARNING
UV Light Hazard.
Can cause serious eye and skin damage.
Do not look at UV-C light. Wear UV-C eye and skin protection
NOTICE
Clean lamp prior to installation.
Use a cotton cloth to remove dirt and fingerprints. Failure to clean the lamp
could shorten the lamp’s lifespan.
NOTICE
Clean lamp prior to installation.
Use a cotton cloth to remove dirt and fingerprints. Failure to clean the lamp
could shorten the lamp’s lifespan.
Fig. 2 Attach lamp to lamp bracked and install
in desired location.
Fig. 3. Insert lamp into delta plate hole and se-
cure with screws and washers. Connect remote
lamp power cord.
Fig. 4 Insert lamp into power module and
secure with screws.
Fig. 4A Insert assembly into delta plate hole
and secure with screws.


