background image

8

Parts & Operations Manual 

Victory Series

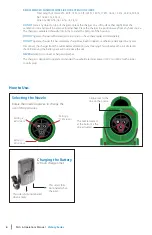
Filling the Tank

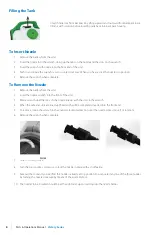
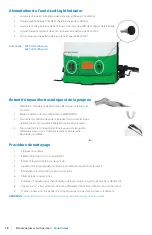
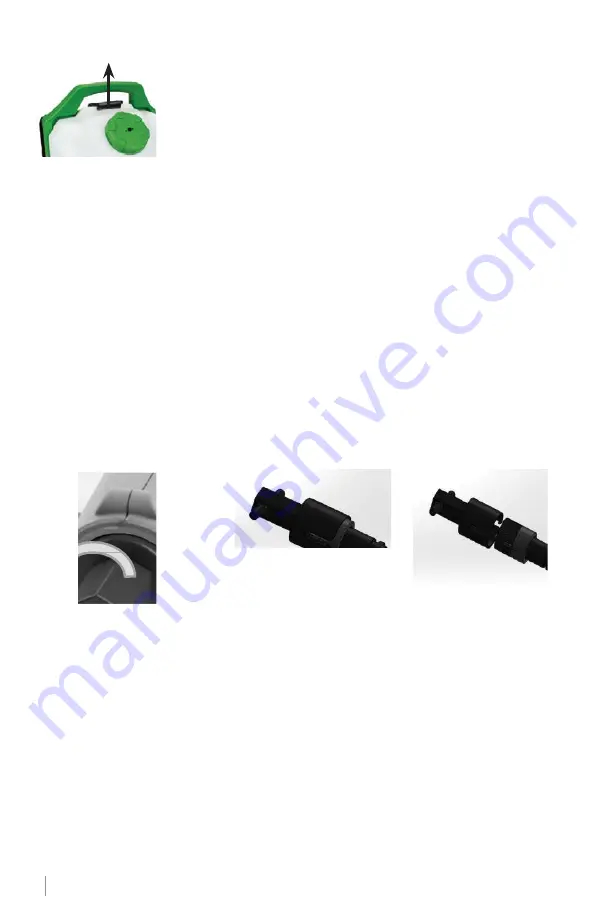
Unlatch tank lock from backpack by lifting upward and outward from backpack base. 
Fill tank with solution before inserting tank back into backpack housing.

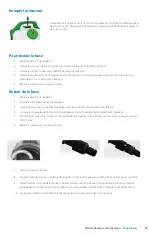
To Insert Nozzle

1. 

Remove the battery from the unit.

2. 

Insert the nozzle into the wrench, lining up the tabs on the nozzle and the slots on the wrench.

3. 

Insert the wrench with nozzle into the front end of the unit.

4. 

Push in and rotate the wrench ¼ turn counter clockwise. When you hear a click the nozzle is in position..

5. 

Remove the wrench when complete.

To Remove the Nozzle

1. 

Remove the battery from the unit.

2. 

Insert the nozzle wrench into the front of the unit.

3. 

Rotate wrench until the tabs on the nozzle line up with the slots in the wrench.

4. 

When the tabs and slots are lined up the wrench will be completely inserted into the front end.

5. 

To remove, rotate the wrench in the counter clockwise direction until the nozzle comes loose (1/4 rotation).

6. 

Remove the wrench when complete.

7. 

Slide tool over groove.

8. 

Turn the tool counter- clockwise to lock the nozzle in place with a click feeling.

9. 

Take out the tool and you will fi nd the nozzle is already at top position. You can select anyone of the three nozzles 
by turning the nozzle clockwise by means of the assembly tool.

10.  The nozzles to be installed should be at the rightmost upon inserting into the nozzle holder

?::7:A0=2=::A0

Summary of Contents for 72001

Page 1: ...BackpackElectrostaticSprayer Victory Pulvérisateuràréservoirdorsal Code 72001 Parts Operations Manual Manuel de pièces et d opération ...

Page 2: ......

Page 3: ...g metering tips ALWAYS observe safety and handling instructions of the chemical manufacturer ALWAYS direct discharge away from you or other persons or into approved containers ALWAYS dispense cleaners and chemicals in accordance with manufacturer s instructions Exercise CAUTION when maintaining your equipment ALWAYS reassemble equipment according to instruction procedures Be sure all components ar...

Page 4: ...ks burns or a fire To clean the sprayer use soap water and a damp cloth to wipe clean To clean internal components run water through the sprayer for 3 minutes CAUTION TO AVOID ELECTRICAL SHOCK DO NOT TOUCH OR INSERT ANYTHING IN THE NOZZLE OF THE SPRAYER Electrical Safety Instructions CAUTION To avoid electrical shock do not touch or insert any foreign objects into the nozzle A cordless sprayer wit...

Page 5: ...Important Safety Instructions for Battery Chargers SAVE THESE INSTRUCTIONS This manual contains important safety instructions for battery chargers Before using charger read all instructions and cautionary markings on charger battery pack and product using battery pack DANGER Electrocution hazard 120 volts are present at charging terminals Do not probe with conductive objects WARNING Shock hazard D...

Page 6: ...diately DO NOT operate charger if it has received a sharp blow been dropped or otherwise damaged in any way Disconnect the charger from the outlet before attempting any cleaning This will reduce the risk of electric shock Removing the battery pack will not reduce this risk NEVER attempt to connect 2 chargers together The charger is designed to operate on standard household electrical power 120 V o...

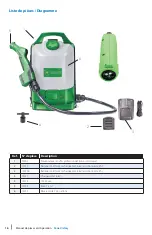
Page 7: ...iption 1 72001 Cordless Electrostatic Backpack Sprayer 2 72010 16 8 V Rechargeable Lithium Battery 8 hour runtime 2 72010A 16 8 V Rechargeable Lithium Battery 4 hour runtime 3 72011 16 8 V Charger 4 72014 Nozzle Wrench 5 72015 3 in 1 Nozzle 6 72013 2 25 Gallon Tank 6 1 5 2 4 3 ...

Page 8: ...he battery from the unit 2 Insert the nozzle wrench into the front of the unit 3 Rotate wrench until the tabs on the nozzle line up with the slots in the wrench 4 When the tabs and slots are lined up the wrench will be completely inserted into the front end 5 To remove rotate the wrench in the counter clockwise direction until the nozzle comes loose 1 4 rotation 6 Remove the wrench when complete 7...

Page 9: ...T 3 To remove the water line from electrostatic gun handle pull back on quick release coupler to remove 4 To remove electrical connection push metal spring loaded tab inward until electric line is released Cleaning Procedure 1 Turn backpack switch off 2 Remove battery from inside battery door 3 Remove tank from backpack base 4 Add clean water to tank by removing tank cap 5 Re install tank into bac...

Page 10: ... any residual chemical build up that may have occurred Warranty ONE YEAR LIMITED WARRANTY DUSTBANE VICTORY INNOVATIONS will repair or replace without charge any defects due to faulty materials or workmanship for one year from the date of purchase This warranty does not cover part failure due to normal wear or tool abuse For further detail of warranty coverage and warranty repair information call 1...

Page 11: ......

Page 12: ...sage TOUJOURS respecter les consignes de sécurité et de manipulation du fabricant du produit chimique TOUJOURS décharger loin de vous ou d autres personnes ou dans des récipients approuvés TOUJOURS distribuer des produits de nettoyage et des produits chimiques conformément aux instructions du fabricant Faites preuve de prudence lors de l entretien de votre équipement TOUJOURS réassembler l équipem...

Page 13: ...nt 3 minutes MISE EN GARDE POUR ÉVITER LES CHOCS ÉLECTRIQUES NE TOUCHEZ PAS OU N INSÉREZ AUCUN OBJET DANS LA BUSE DU PULVÉRISATEUR Consignes de sécurité électrique MISE EN GARDE pour éviter les chocs électriques ne touchez et n insérez pas d objet étranger dans la buse Un pulvérisateur sans fil avec batteries intégrées ou un pack batterie séparé doit être rechargé uniquement avec le chargeur spéci...

Page 14: ...térieurs ou les bâtiments métalliques en été Les batteries endommagées doivent être recyclées Le transport des batteries peut éventuellement provoquer un incendie si les bornes de la batterie entrent par inadvertance en contact avec des matériaux conducteurs tels que des clés des pièces de monnaie des outils à main etc Consignes de sécurité importantes pour les chargeurs de batterie CONSERVEZ CES ...

Page 15: ...xcessive Placez le chargeur dans une position éloignée de toute source de chaleur Le chargeur est ventilé par des fentes situées en haut et en bas du boîtier NE FAITES PAS fonctionner le chargeur avec un cordon ou une fiche endommagé faites les remplacer immédiatement N UTILISEZ PAS le chargeur s il a reçu un coup violent s il est tombé ou s il a été endommagé de quelque manière que ce soit Débran...

Page 16: ...1 72001 Pulvérisateur sans fils professionnel à réservoir dorsal 2 72010 Batterie de lithium rechargeable 16 8 V autonomie de 8h 2 72010A Batterie de lithium rechargeable 16 8 V autonomie de 4h 3 72011 Chargeur de 16 8 V 4 72014 Clé à buse 5 72015 Buse 3 en 1 6 72013 Réservoir de 2 25 gallons 6 1 5 2 4 3 ...

Page 17: ...atterie de l appareil 2 Insérez la clé à buse à l avant de l appareil 3 Tournez la clé jusqu à ce que les languettes de la buse s alignent avec les fentes de la clé 4 Lorsque les languettes et les fentes sont alignées la clé est complètement insérée dans le devant 5 Pour l enlever tournez la clé dans le sens contraire des aiguilles d une montre jusqu à ce que la buse se desserre 1 4 de tour 6 Reti...

Page 18: ...de la poignée du pistolet électrique statique tirez sur le coupleur à libération rapide pour le retirer 4 Pour supprimer la connexion électrique poussez la languette métallique à ressort vers l intérieur jusqu à ce que la ligne électrique soit libérée Procédure de nettoyage 1 Éteignez le sac à dos 2 Retirez la batterie de son compartiment 3 Retirez le réservoir de la base du sac à dos 4 Ajoutez de...

Page 19: ...vers l appareil pour éliminer toute accumulation de produit chimique résiduel Garantie GARANTIE LIMITÉE D UN AN DUSTBANE VICTORY INNOVATIONS réparera ou remplacera gratuitement tout défaut dû à un vice de matériau ou de fabrication pendant un an à compter de la date d achat Cette garantie ne couvre pas les pannes de pièces dues à l usure normale ou à l utilisation abusive d outils Pour plus de dét...

Page 20: ...one 1 800 387 8226 Email General Inquiries info dustbane ca Technical Inquiries techsupport dustbane ca Website www dustbane ca Support à la clientèle Dustbane Adresse postale 25 place Pickering Ottawa ON K1G 5P4 Canada Téléphone 1 800 387 8226 Courriel Demandes générales info dustbane ca Demandes techniques techsupport dustbane ca Site web www dustbane ca ...

Reviews: