background image

INSTALLATION 

MANUAL

855-680-9595

NEED HELP?

STEP

 6

STEP

 7

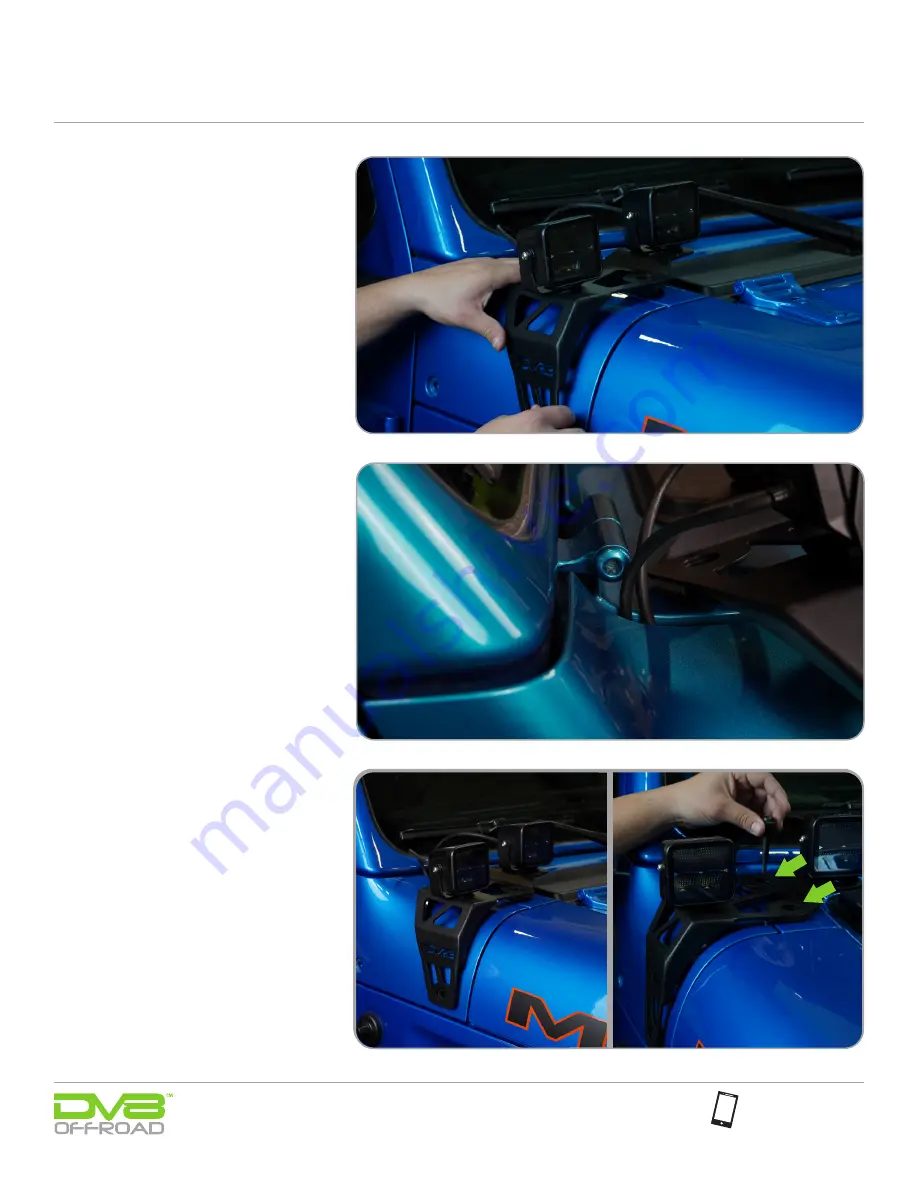
Once the wires are in place, reinstall 
the factory a-pillar panel ensuring the 
wires are side by side near the back of 
the panel. 

Place the bracket onto the panel 
aligning the two holes on the cowl 
and the front hole on the a-pillar 
panel. Loosely install the bolts on the 
top two holes on the cowl reusing 
factory hardware. 

Summary of Contents for LBJL-06

Page 1: ...ponsible for any bodily injury or harm to you or your vehicle as a result of an improper install Proper installation of this kit required knowledge of the factory recommended procedures for removal and installation of original equipment components We recommend that the factory shop manual and any special tools needed to service your vehicle be on hand during the installation Installation of this k...

Page 2: ...the brackets using the provided hardware with the lights Our brackets are designed to accept up to a M10 bolt to mount the light NOTE We are using two 3 DV8elite Pod Lights for our install STEP 2 Starting with the passenger side begin by removing the antenna using your 10mm wrench This will prevent any damage to your paint when removing the a pillar panel 2 M8x30mm Allen head Bolt 2 M8 Flat Washer...

Page 3: ... four bolts located on the a pillar and cowl once all bolts are out you may pull off the a pillar panel STEP 5 Hold the bracket over the cowl while you run the wiring to your preference this can be either into the hood or toward the cowl depending on how you decide to wire your lights ...

Page 4: ...nstall the factory a pillar panel ensuring the wires are side by side near the back of the panel Place the bracket onto the panel aligning the two holes on the cowl and the front hole on the a pillar panel Loosely install the bolts on the top two holes on the cowl reusing factory hardware ...

Page 5: ... Use the provided M8 hardware for the bottom hole on the bracket and reuse one of the factory bolts for the rear a pillar panel mount Continue by tightening all bolts in a star pattern make sure both wires do not get pinched in between the a pillar and cowl ...

Page 6: ...NSTALLATION MANUAL 855 680 9595 NEED HELP STEP 10 Repeat all steps on driver side STEP 11 Reinstall your antenna and check to ensure all hardware is secure STEP 12 Finish wiring lights to your preference ...

Reviews: