21
22
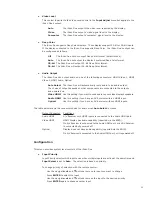
• Rename Inputs
The Rename Inputs feature lets you customize your setup. The names you enter will appear
in the Select Input menu.
Select the input you want to rename with the remote control ENTER button.
Use the navigation
t
,
p
,
q
,
u
buttons to move the highlighted character around on the
keyboard.
ENTER puts the selected character in the edit bar.
Cancel exits the window with no changes.
Finish
exits the window and applies the new name.
• Auto Wake Up
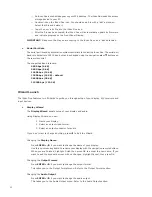
Auto Wake Up provides more control over the conditions in which the iScan Duo will auto-
matically power on. The Auto Wake Up window gives you 3 options for defining the condi-
tions in which the iScan Duo will power itself on:
Off The iScan Duo will power on using the remote. Use this option if you want the iScan
Duo to remain powered down even if input signals become active.
Mode 1 The iScan Duo will power on automatically only if it powered down automatically.
If an input becomes inactive, the iScan Duo will automatically power itself off. If the
input becomes active again, the iScan Duo will automatically power on. If the iScan Duo
is powered down with the remote, then Auto Wake Up is turned off.
Mode 2 The iScan Duo will always automatically power on whenever an input signal is
present on any input.
• Auto Standby
Auto Standby gives you control over the conditions in which the iScan will power itself down.
Off The iScan Duo never goes into standby mode. This is useful in cases where you may
not have an active video signal, but you may have an active audio signal passing through
the iScan Duo.
On The iScan Duo goes into standby mode after a brief interval when there is no active input.
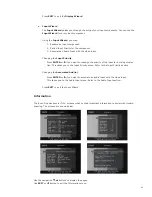
• Component Inputs
The Component Inputs menu gives you 3 options for controlling Automatic Gain Control on
Analog Component (YPbPr) Inputs:
Single Sync This is the default setting. Most component inputs will have sync only on the
Y signal.
Triple Sync A few devices will add sync to all three component input signals (Y, Pb, Pr).
If you know your device does this, choose this mode.
AGC Disable In some cases, Automatic Gain Control (AGC) will cause brightness
levels to be incorrect due to distortions in the analog input signals. Disabling AGC may
correct this problem.
In general, you should use Single Sync. If your picture does not look correct, experiment
with the other settings.
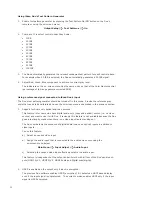
• Select RGBS
The menu allows you to assign one of the iScan Duo’s two component inputs to RGBS format,
which is available with the SCART connector. The SCART connector is used widely in countries
with PAL/SECAM video standards.
Select Component 1 or Component 2 to select the input
Select Enable to assign the selected input to RGBS format.
Note: When the RGBS mode is selected, the Y Pb Pr connectors are mapped to G B R. The Video
input connector next to the Y Pb Pr connector becomes the ‘S’ input. In other words, when RGBS
mode is selected, one of the Composite Video inputs becomes unavailable.
For example,
Component 1 input – RGBS mode disabled
Component 1 input – RGBS mode enabled
• LED Brightness
This menu controls the brightness of the power LED and Front Panel Display (FPD). There are
4 levels of control. ‘0’ turns off both LED and FPD. ‘3’ gives the maximum brightness off
both LED and FPD.
• Factory Defaults
Factory Defaults is a quick way to “undo” any settings that have been made, and restore the
iScan Duo’s original default settings.
Video Output
Restores video format setting to Auto. In Auto mode, the iScan Duo
will automatically communicate with your display and output your
display’s preferred format.
Picture Controls Restores default settings to Picture Controls menu items
Input Names Restores default names for video inputs.
All Defaults
Restores all defaults.
• Update Firmware
Update Firmware is used when you want to update the iScan Duo’s firmware.
Steps to update firmware:
— Download the new firmware (‘.zip’ file) from DVDO website.
— Unzip to file to extract the new firmware with a ‘.abt’ extension.
— Note its location on your PC hard-drive.
— Use mini-USB to USB cable supplied with the iScan Duo.
— Plug the smaller connector on the cable to the mini-USB port at the back of the
iScan Duo.
— Plug the larger connector to your PC.
— Select YES to confirm that you want to update firmware.
Y
G
Pb
B
Pr
R
Video 1
Sync

