12
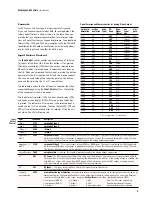
Input A
djust FPD shows Description
Bor
der level
BLEV
Th
e
Bor
der level
can be also be adjusted to pr
event burn-in with some displays. The border level setting is global i.e.
there is only one border level setting for the system. To adjust border level, push the
▼
or
▲
button. Th
e current level is
shown. The default value is ‘0’. Pushing the
▼
or
▲
button d
ecreases or increases the border level.
Overscan
SCAN
Th
e
Ov
erscan
fun
ction scales the input image proportionally in both vertical and horizontal dimensions by the user-speci-
fied overscan factor. The purpose of Overscan is to remove unwanted image portions around the perimeter of the image.
The default overscan value is 0, which means 100% of the input image is shown. The maximum overscan value is 20
which means the input image scaled up by 120%. To adjust the overscan level, first push the
▼
or
▲
button. Th
e current
level is shown. Pushing the
▼
or
▲
button th
en decreases or increases the amount of overscan. The Overscan value is
applied to all input aspect ratios and is independent of the Zoom value.
Line Offset
LINE
Th
e image can be adjusted vertically when an SDI input is selected using the
Line Off
set
fun
ction. This function can be
set independently for both NTSC and PAL/SECAM input formats.
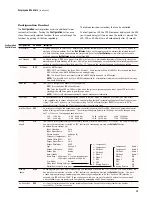
DVI Input
D
VII
Th
e
D
VI Input
con
trol function allows you to configure the DVI Input in ‘Auto’ mode or in ‘Passthru’-only mode. Pushing the
▲
or
▼
button sh
ows the current setting. Pushing the same button again switches to the other setting.
A
UTO:
Th
e DVI input will process all 480p, 720p and 1080i incoming signals with or without HDCP. If any other
signal is input into the DVI input, the system will switch into Passthru mode.
DPTH:
Th
e DVI input will only function as a pass-thru input. All input signals will be passed through to the DVI
output. In this mode the OSD from the system won't be displayed although you can navigate through the menu
using the front panel controls.
VCR Mode
VCR
VCR Mode
d
ecouples the output timing completely from the input timing to ensure a stable output from the iScan HD
+
f
or
VCR playback especially during trick-play modes (play forward, play reverse, still/pause). There are 3 modes:
ON:
Output timin
g is decoupled from the input timing regardless of Frame Rate settings.
OFF:
Output timin
g is dependent on Frame Rate settings.
A
UTO:
T
urns on VCR Mode if a VCR source is detected.
Film Mode
FILM
Film Mode
allows you to con
trol the film mode operation of the iScan HD
+
. M
ost of the time the automatic film mode detec-
tion is preferred. However there are some cases where the detection needs to be turned off, or biased towards film. There are
three modes - OFF, BIAS and AUTO.
OFF:
T
urns off film detection in the deinterlacer. All video sources are treated as original video
BIAS:
Th
e Film Bias mode may improve film mode detection in some cases. For example, it may improve the detection
of PAL/SECAM film sources.
A
UTO:
Sour
ce adaptive deinterlacing is on.
Auto Input
Priority
Selection
AIPS
Th
e
A
uto Input Priority Selection
fun
ction assigns different priorities to the video input’s automatic active video selec-
tion mode (AUTO in Input Select menu). First select the video input, then change the priority of that input.
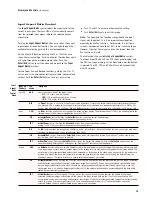
1- Press the
▼
button.
2- The first video input VID1 is shown.
3- Press the
Enter/Exit
button to vi
ew the current priority of the selected input.
4- Press the
▲
or
▼
button to chan
ge the priority of the selected input.
5- Press the
Enter/Exit
button again to complete th
e priority assignment.
6- Repeat Steps 1 through 5 to select the next video input and adjust the priority setting.
Audio Input
ASEL
Th
e
A
udio Input
fun
ction assigns a Digital Audio input to the currently selected Video input. To assign the audio input to
another video input, push the
▼
button. Th
e front panel display (FPD) will show the current setting.
Pushing the
▼
button again will assi
gn the next audio input. The five settings are:
A
UD 1
(Coax)
A
UD 2
(Coax)
A
UD 3
(Opti
cal)
A
UD 4
(Opti
cal)
OFF
(Wh
en this control is set to OFF, the Digital Audio outputs are disabled when the corresponding video input is selected.)
AV Lip Sync
A
VLS
iScan HD
+
autom
atically delays the input audio to match the video processing delay. You can choose to increase or
decrease the audio delay by changing this setting. Pushing the
▲
or
▼
button first displays th
e current additional bias
delay setting (default 0). Use the
▲
or
▼
button to in
crease or decrease the delay in milliseconds.
Note:
the total audio delay cannot be less than zero - i.e
., the iScan cannot have negative audio delay. If you choose to
decrease the automatic delay setting by a certain amount - this value could be changed by the iScan in situations where the
iScan's calculated delay plus the specified additional delay will result in a value less than zero.
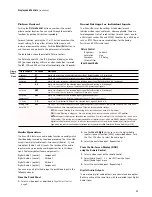
Input
Adjustment
Menu
Input Adjust Control
Pushin
g the
Input A
djust
button on
ce shows the current input
adjustment function. You can cycle through the available func-
tions by pushing this button repeatedly.
The currently available input adjust functions are
- Border level
- VCR mode
- AV Lip Sync
- Overscan
- Film mode
- Line Offset
- Auto Priority
- DVI input control
- Audio Input
Other functions will be added in future software releases.
The table below shows the available Input Adjustment controls.
The Input Adjust LED, the FPD (front panel display) and the OSD
(on-screen display) will turn on when the button is pressed. The
LED, FPD, OSD will turn off automatically after 30 seconds.
Display
s and Controls
(continued)


