


3-1
4
5
2
1
3
3
I
A
Installation
This chapter describes the installation procedure of the Pronto3 hard-
ware. The system must be installed properly before you can start work-
ing with it.
To install the hardware of the Pronto3 perform the following:
y
Unpack the Pronto3 and its accessories.
y
Place the Pronto3 on a firm, flat surface within reach of a power
outlet or mount it in a rack. For good air circulation and cooling
make sure the ventilation holes are not covered.
y
Connect at least the following computer peripherals:
– Mouse,
– keyboard and
– a monitor that is operable at a resolution of at least
1024 × 768 pixels (default manufacturing setting).
y
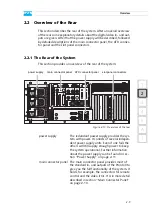
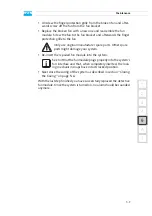
Connect any other peripheral computer and video equipment. For
an overview of the panels and connectors at the system’s rear see
section “Overview of the Rear” on page 2-9.
y
Connect the power cable(s) to the system.
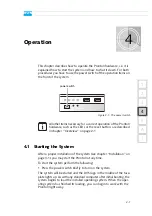
The Pronto3 hardware is now properly installed and you can switch on
the system as described in section “Starting the System” on page 4-1.
Please check your delivery and compare it with the delivery
note which has been included in the package on an extra sheet
of paper. In case of missing items, please contact your local
vendor or DVS immediately.
To make warranty claims you have to keep the original pack-
ing and use it in case of a return transportation.
The recommended resolution to run the Pronto3 soft-
ware is 1600 × 1200 pixels.
Summary of Contents for Pronto3
Page 1: ...Pronto3 Hardware Guide Version 1 0 Digital Disk Recorder Pronto3 Hardware Guide ...
Page 2: ......
Page 6: ......
Page 8: ......
Page 36: ...2 18 Pronto3 Hardware Guide ...
Page 38: ...3 2 Pronto3 Hardware Guide ...
Page 68: ...A 16 Pronto3 Hardware Guide ...
Page 72: ...I 4 Pronto3 Hardware Guide VTR 1 1 warranty 1 7 XLR connectors audio 2 13 ...


