Issue: 04.05.2011
DVZ-SKA-”BIOMASTER”-PLUS – Pump P2
Page 6 of 6
SKA-PLUS-ANNEX P2-Eng
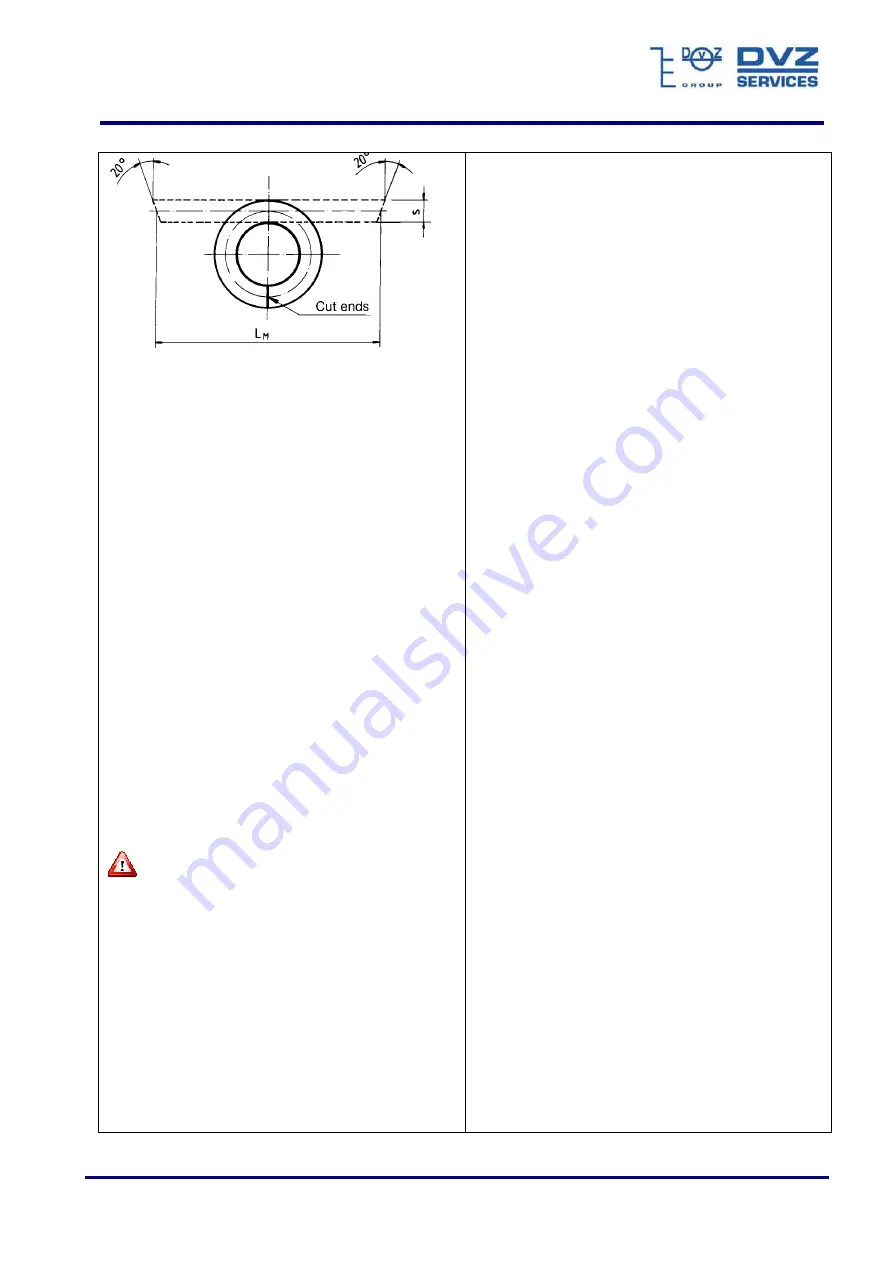
Figure 1: Cutting packing rings to size
Pre-pressed packing rings or rings cut to size
must
carefully be opened axially and radially just far enough
for them to be pushed over the shaft. Bending the rings
up may result in damage due to buckling.
When fitting in the packing area, the packing rings must
be carefully bent back into their ring shape. The cut joints
must be staggered by 90°. Each ring must be pushed into
the gland housing with the cut ends first, with the
assistance of the gland. Lantern rings or flushing rings are
to be fitted in the correct sequence.
ATTENTION:
Sharp tools must never be used for
installation, as there is a danger of damaging the shaft and
deforming the packing material.
–Commissioning the gland packing after re-packing
The gland packing should only be lightly tightened before
commissioning. During pump start-up, a leakage rate of 50
to 200 drops per minute is permitted.
Within 30 minutes of start-up, the leakage must be
gradually and evenly reduced to a minimum of 2 to 20
drops per minute by adjusting the gland (203) by means of
the hexagonal nuts (202).
ATTENTION
: During this process the temperature the
gland packing must not rise abnormally. Approx. 20 to
60°C above the temperature of the liquid pumped is
permissible. If the temperature rises suddenly, the gland
must be slackened immediately, and the start-up
procedure repeated.
The leakage can be drained via the tapped hole located in
the drip pan of the motor bracket.
Damage to people and the environment due to
leakage of hazardous materials must be prevented.
2. Mechanical seal
Non-balanced mechanical seals are used in all material
combinations and models. The mechanical seal is
maintenance-free.
In the event of severe leakage due to wear, the
mechanical seal must be replaced (please see
disassembly and assembly instructions).
ATTENTION:
As dry running of mechanical seals must be
avoided, the pump must only be started in filled condition
and with auxiliary devices connected, if provided.
Servicing (disassembly and assembly
instructions)
General
Trained service engineers will be available for installa-
tions and repairs on request.
When repairs are performed by the user’s own personnel
or by our service engineers, it is essential that the pump is
completely drained and cleaned.
This applies particularly to pumps that are returned for
repair to our factory or to one of our authorised service
centres.
In order to protect our staff and for the sake of environ-
mental protection, repairs on pumps filled with pumping
liquid will be refused. Otherwise, we will have to charge
the customer/user for the costs of ecological waste dis-
posal.
If repairs are required on pumps that have handled
hazardous materials and/or liquids that are harmful
to the environment, the customer/user must voluntarily
inform his own or our installation personnel of this on
site. This also applies if such a pump is returned to our
factory or to one of our authorised service centres. In
this case, evidence of the liquid pumped, for example in
the form of a DIN safety data sheet, must be submitted
to us when the request for a service engineer is made.
For all work executed on site, the user’s own personnel
and/or our service engineers must be alerted to dangers
that may arise in connection with repairs.
The most important disassembly and assembly operations
are described in these instructions. The assembly steps
described in the individual sections must be consistently
followed.
Disassembly of the progressive cavity pump
Before commencing disassembly, the following operations
must be performed:
- Disconnect the power supply cable to the motor.
It must not be possible to start the motor.
- Close all shut-off devices in the suction and discharge
lines.
- Drain the pumped liquid from the suction casing by
removing the screw plug (502).
Note
:Use a drip pan to collect the drained liquid.
- Disconnect the suction and discharge pipelines as well
as all auxiliary piping.
- Unscrew the bolts at the pump feet.
Removal of the stator
- Remove hexagon nuts (609) and washers (610) from the
connecting bolts (611).
- Pull off the discharge housing (504).
- Remove connecting bolts (611) and stays (612), if
provided.
- Pull the stator (402) off the rotor (401).
Note: If difficulty is experienced, rotate the stator (402)
with a chain wrench at the same time. In order to do this,
secure the hollow shaft (125).
- With plastic or metal stators, remove the stator gaskets
(403) and (404).
Summary of Contents for Biomaster PLUS Series
Page 15: ......
Page 16: ......
Page 17: ......
Page 19: ......
Page 21: ......
Page 22: ......
Page 23: ......
Page 24: ......
Page 25: ......
Page 26: ......
Page 27: ......
Page 28: ......
Page 29: ......
Page 30: ......
Page 31: ......
Page 32: ......
Page 33: ......
Page 34: ......
Page 35: ......
Page 36: ......
Page 37: ......
Page 38: ......
Page 39: ......
Page 40: ......
Page 41: ......
Page 42: ......
Page 43: ......
Page 44: ......
Page 45: ......
Page 46: ......
Page 47: ......
Page 48: ......
Page 49: ......
Page 83: ...Issue 16 08 2010 Instruction Manual DVZ SKA BIOMASTER PLUS Page 33 of 39...
Page 89: ...Issue 16 08 2010 Instruction Manual DVZ SKA BIOMASTER PLUS Page 39 of 39...


