17 of 29
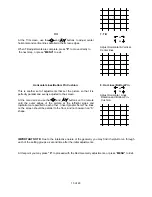
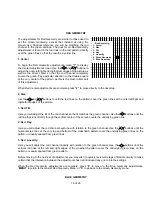
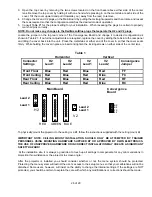
As with the Red Geometry, these adjustments will be to a master setting previously established. This time the
blue will be adjusted to the green master channel.
The adjustment procedure for blue is identical to that for red. Follow steps 1 to 5 above, except that this time you
will be adjusting the blue, rather than red channel.
Convergence Adjustments
Once the picture has been focused and adjusted to the screen size for all geometry parameters, the next step in
the set up process is convergence. During convergence the green channel used as a master reference, since it is
shooting straight at the screen, where the red and blue channels are offset from center and thus must hit the
screen at a slight angle. Convergence compensates for these angles, as well as the electronic circuit drift that
occurs in any projection television.
It is important that the convergence system be used as a “fine trim” adjustment, and not to compensate for
installation placement errors. That is why any adjustments relating to screen size, mounting angle and projector
to screen distance should be completed before convergence.
NOTE:
In order to make certain that convergence adjustments are made under conditions that are representative
of actual operating temperatures it is always best to let the set warm up for at least 30 minutes before critical
convergence settings are established.
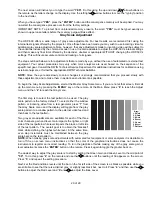
To reach the master convergence menu, first call up the main menu by pressing the “
MENU
” key on the remote.
From the Main Menu press “
8
” for the Adjust menu, and then “
4
” to reach the Convergence menu. At this point
you may first wish to adjust the signal level before proceeding with the actual convergence.
Signal Level Adjustment for Convergence
While the brightness and contrast for the HDP-500’s images
are set by a combination of the external controller/decoder
and the unit’s own internal controls, those adjustments are
designed to present the best possible picture for viewing.
During some set up procedures, however, it may be desirable
to change the signal level only for the purpose of the
adjustment. This adjustment DOES NOT affect the actual
signal level for picture displays, but it does permit you to
lower the level so at adjustments are more precise. When
signal levels are lower less beam current is used. This, in
turn, means that the video spot size is as small as possible
and is not prone to the softening caused by and over drive
signal.
Better focus, in turn, deliver the most accurate convergence adjustments. For that reason, we recommend that, if
possible, you lower the signal level to the greatest degree possible when converging the set.
To change the signal level for convergence adjustments, first reach the Convergence menu as outlined in the
steps shown above. At the Convergence menu, press “
7
” to display the Signal Level menu.
Use the left or right adjustment buttons on the remote (
/
), increase or decrease the signal level. When you
have reached the desired signal level press the “
MENU
” button to return to the Convergence menu.
NOTE
: Any change to the signal level in this menu will be effective only while the convergence adjustments are
being made. The signal level will return to normal levels when you return to the Adjust menu or cancel the
convergence adjustment.
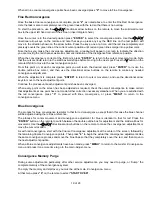
Coarse vs. Fine Convergence
The HDP-500 offers two levels of convergence, coarse and fine. The
coarse
convergence is also known as
“zone” convergence, while the
fine
convergence is sometimes referred to as “point” convergence. In the initial
installation of a projector is always best to step through both convergence processes. During the life of the
projector, when touch-up is required, use of the “fine” convergence will usually suffice to permit corrections to
convergence errors that are isolated to one area of the picture.
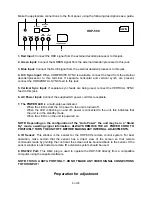
-
Convergence-
1. Coarse Red
2. Fine Red
3. Coarse Blue
4. Fine Blue
5. View
6. Start Over
7. Signal Level
Press ENTER to select cursor movement
or convergence adjustment

