24 of 29
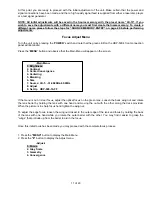
This will bring the highlight down to item 2,
“Menu Access”,
where
“Enabled”
is normally highlighted on the
right side of the menu. This indicates that full access to all menus is allowed.
To
“Protect”
the menus press the
button,
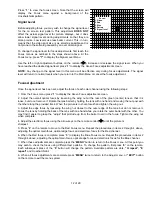
“Type the PASSWORD and then press ‘ENTER’ ”,
message will
appear at the top of the screen. A single cursor block will also appear at the right side of the
“Menu Access”
text
line.
You should now enter the password that will enable access to the menus. It may be up to nine alphanumeric
characters, including upper and lower case letters. Use the and buttons on the remote
to scroll through the letters, and the and buttons to move across the nine letter field once a character is
entered. When the password is entered, press the “
ENTER
” button on the remote. The system will ask you to
press “
ENTER
” a second time to confirm the password.
Once the password is entered the only menu functions available will be Brightness, Contrast and Center
Convergence from the Main Menu. Power On setting, Menu Access, menu Time-out, White Balance and Color
Temperature adjustments will also be permitted from the Set Up Menu.
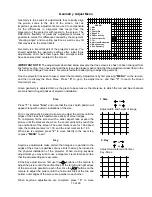
To return to full menu access, press “
MENU
”, and then “
9
” to reach the Set Up menu. Press “
2
” to access the
Menu Control System. Noting that
“Protected”
will be highlighted, press
to indicate that you wish to enable the
menu control system. Once you press , the message will appear at the top of the screen asking you to enter the
password established when the menus were restricted. Enter the password using the
and buttons on the
remote to scroll through the letters, and the
and buttons to move across the nine letter field once a character
is entered. When the password is entered, press the “
ENTER
” button on the remote. The system will ask you to
press “
ENTER
” a second time to confirm the password.
Once the menus system is unlocked, the word
“Enabled”
will be highlighted, and the restricted menu selections
will once again be available.
NOTE:
Remember that passwords for this system are case sensitive. Any password created using upper and
lower case letters must be repeated
EXACTLY
as it was originally entered in order to unlock the system.
NOTE:
To
overwrite
any previously saved password enter the following code
“A,A,A,A,A”
(Capital Letter
A
followed by a coma
,
etc…)
Menu Time-out
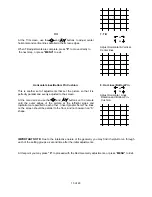
This selection allows the user to choose between a ten second time-out for the on screen menus and a thirty
second time-out. In general, the shorter time-out is preferable for normal use, while the longer time-out is typically
selected when making system adjustments and calibrations. To change the Menu Time-out, press “
MENU
” to
display the Main Menu and then press “
9
” to go to the Set Up menu.
Press “
3
” to select Menu Time-out, and press the or
button on the remote, as required, so that the desired
option is highlighted. If this is the only action required at this time, simply wait until the menus time-out, press
another number key to select a menu item on this screen, or press “
MENU
” to return to the Main Menu.
White Balance Control
This is an automated system that maintains constant gray scale tracking during the life of the CRTs by measuring
the beam current in the tubes.
NOTE:
When the auto white balance system is selected it is normal to see a red and blue line at the very top of
the picture. If the lines are objectionable you may wish to disable this function.
To activate the automatic white balance system, press “
MENU
” to display the Main Menu and then press “
9
” to go
to the Set Up menu.
Press “
4
” to select White Balance, and press the or button on the remote, as required, so that the desired
option is highlighted. If this is the only action required at this time, simply wait until the menus time-out, press
another number key to select a menu item on this screen, or press “
MENU
” to return to the Main Menu
Color Temperature Adjustment: Many users consider color temperature to be one of the most important aspects
of video display operation. To accommodate the wide variety of requirements for color temperature, the HDP-500
offers three factory preset color temperature settings, as well as a user adjustable setting.


