background image


Operating Instructions 


Read these instructions completely before operating this unit. 


Contents subject to change without notice or obligation. 


TranScanner

Rev. 5 

Printed in USA


Video Systems 

3

Summary of Contents for TranScanner 3

Page 1: ...Operating Instructions Read these instructions completely before operating this unit Contents subject to change without notice or obligation TranScanner 3 Rev 5 Printed in USA Video Systems 3...

Page 2: ...ion 9 The Front Panel Controls Information Menu 10 10 Using The Control Menus 11 Main Menu 11 Input Options 11 Format Options 11 Video Control Menu 12 Setup Option Menu 12 Menu Timeout 12 Menu Positio...

Page 3: ...ings must not be blocked or covered Never place the video equipment on a bed sofa rug or other similar surface that may block ventilation openings Never place this product near or over a radiator or h...

Page 4: ...To prevent fire or shock hazard do not expose this appliance to rain or moisture To prevent electric shock do not use this polarized plug with an extension cord receptacle or other outlet unless the...

Page 5: ...eparately in the system s memory These settings are recalled for each input when selected Video controls include contrast brightness color tint and sharpness Two programmable 12 Volt screen trigger ou...

Page 6: ...re HDCP compliant for High Definition 480p 580p 720p 1080i sources and computer graphics with VGA SVGA XGA and WXGA resolutions For computer graphics with VGA SVGA XGA or WXGA it is recommended to set...

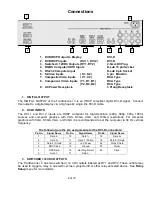
Page 7: ...S2 The S1 and S2 inputs are provided for NTSC 480i or PAL 580i video sources such as off air tuners satellite systems cable boxes SVHS VCR and DVD players S Video inputs instead of composite video inp...

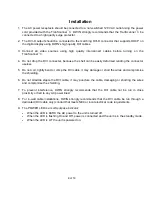
Page 8: ...useless 5 Do not coil tightly bend or crimp the DVI cable it may damage or short the wires and compromise the shielding 6 Do not straddle staple the DVI cable it may puncture the cable damaging or sh...

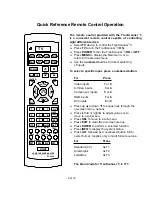
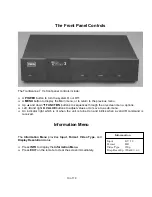
Page 9: ...TranScanner 3 ON or OFF Press MENU to display the Main menu or to return to the previous menu Use the numbered buttons for direct switching of inputs To select a specific input press a numbered button...

Page 10: ...u options Left and right VALUE buttons to adjust values or to move to a sub menu An indicator light which is lit when the unit is turned on and blinks when a valid IR command is received Information M...

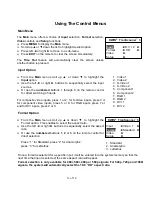
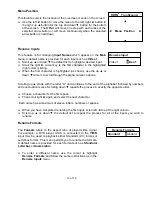
Page 11: ...press 3 or for component video inputs press 5 or 6 for RGB inputs press 7 or and for DVI inputs press 9 or 0 1 Video 1 2 Video 2 3 S Video 1 4 S Video 2 5 Component 1 6 Component 2 7 RGB 1 8 RGB 2 9...

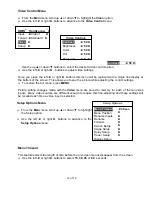
Page 12: ...ure while adjusting the control settings To restore the full menu press MENU Picture setting changes made with the Video menu are saved in memory for each of the ten video inputs Many video sources ar...

Page 13: ...arts with the letter A and continues to the end of the alphabet followed by numbers and punctuation marks Scrolling down repeats the process in exactly the opposite order Choose a character for the fi...

Page 14: ...ettings from the system s memory The predefined video sources include 480i 480p 580i 580p 1080i 540p 720p VGA 60Hz SVGA 60Hz XGA 60Hz and WXGA 60Hz In addition to predefined video sources the TranScan...

Page 15: ...menu To select the output to match your Display s resolution Use the left or right buttons to sequentially view the Display Resolution options After you have reached a setting that matches your displ...

Page 16: ...nce with the DVI specifications this adjustment will not require From the Display Setup Menu use the up or down button to select Position Use the arrow buttons to align the red border with the screen...

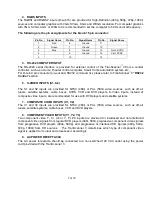
Page 17: ...command followed by POWER ON must be delayed 10 seconds Any command followed by INPUT SELECT must be delayed 1 second The following table lists the commands available POWER CONTROL PON Power on POFF...

Page 18: ...Power 3 Prong Receptacle Outputs DVI 1 x DVI D with HDCP 12V Triggers 2 x Mini Plug Output Resolutions HDTV 480p 720p 1080i 640x480 852x480 800x600 1024x768 1280x768 1024x1024 1366x768 Power Source 90...

Page 19: ...gn appearance or construction This warranty covers only the actual defects within the PRODUCT itself and DOES NOT cover the costs of installation or removal from a fixed installation normal set up or...

Reviews: