background image

DxO ONE - User Guide - Copyright © DxO Labs 1999-2015 - All rights reserved

59

Selfie Photo mode

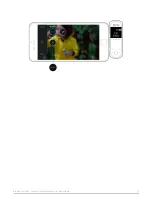
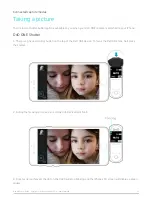
Take a photo using the ONE’s shutter trigger or the shutter button of the iPhone display.

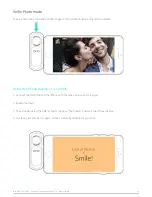
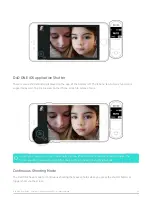
Using the iPhone display as a 'softbox'

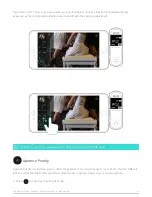
1. Connect the DxO ONE and the iPhone with the lens and screen facing you.
 
2. Enable the flash.
 
3. Take a photo using the ONE’s shutter trigger or the shutter button of the iPhone display.
 
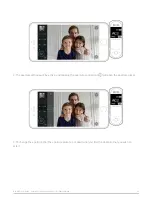
4. Get ready to smile as the app’s 'softbox' naturally illuminates your face. 

Summary of Contents for One

Page 1: ......

Page 2: ... Connected capture modes 34 Installing the DxO ONE App 34 DxO ONE App at a glance 38 Auto mode 39 Scene modes 40 Advanced modes 43 Video modes 51 Selfie modes 58 Selecting file format 61 Taking a picture 63 Composition grid and shooting parameters 68 Manual focus 69 Zooming when taking a photo 73 Activating timer mode 74 Activating flash 76 Shutter triggering with Apple Watch 78 Wireless Remote Co...

Page 3: ... Conserving battery power 113 Firmware updates 116 Processing your images with DxO Connect 118 Metadata and Watermark 119 Settings 121 Capture settings 121 Application Settings 124 Assistance 127 MicroSD card error messages 127 OLED status screen 129 Technical Specifications 133 Safety precautions 135 Certifications 136 DxO ONE Warranty Card 138 ...

Page 4: ...hare them with friends family and followers In this user documentation we ll introduce you to the DxO ONE camera the companion iOS app that controls the camera when connected to your iPhone or iPad and DxO Connect the complementary desktop software that enables you to make your best photos even better If there s a topic or question that isn t covered here please reach out to us Our DxO Customer Su...

Page 5: ...ll rights reserved 2 Introduction What s in the box Before use make sure the following items are included in the package of your DxO ONE If anything is missing please contact your retailer DxO ONE Camera 8GB MicroSD card USB Cable Pouch Wrist lanyard ...

Page 6: ...oSD card slot to ensure the camera will never impact your iPhone talk time or storage space Seamless integration with Apple iOS to provide access to the Photos app and 3rd party editing tools Instantly share DxO ONE images through your iPhone to Facebook Twitter Instagram and more DxO s proprietary SuperRAW format provides noise free images in extreme low light environments Tether the DxO ONE to y...

Page 7: ...ng the provided DxO ONE USB cord and wall charger plug The amount of charge available in the camera battery is displayed on the camera OLED screen Battery charged Battery uncharged Charging the battery using the DxO ONE wall charger plug 1 Open the rear door of the camera by pulling the latch door toward you 2 Insert the USB cord into the USB slot and attach the other end to the wall charger plug ...

Page 8: ...rging source before displaying the charge state of the device the charge state of the device Charging the battery using a computer 1 Open the rear door of the camera by lifting the tab and pulling the door toward you 2 Insert the USB cord into the USB slot and attach the other end to your computer 3 Make sure that the OLED display indicates that charging is in progress Charging in progress Battery...

Page 9: ...DxO ONE User Guide Copyright DxO Labs 1999 2015 All rights reserved 6 Charging in progress Battery charged ...

Page 10: ...oor Check and make sure that microSD card is inserted before using your DxO ONE as it will not Check and make sure that microSD card is inserted before using your DxO ONE as it will not operate without a microSD card operate without a microSD card 1 Open the door by lightly pulling on the latch door 2 Insert the microSD card into the microSD card slot with the connector pads facing forward toward ...

Page 11: ...r Guide Copyright DxO Labs 1999 2015 All rights reserved 8 The card will click firmly into place The card will click firmly into place 3 To remove the SD card simply press down on it and it will pop up for removal ...

Page 12: ...removing the card Do not force the Use caution to keep the card aligned while inserting or removing the card Do not force the microSD card into the slot If excessive force is required it is most likely not positioned correctly microSD card into the slot If excessive force is required it is most likely not positioned correctly ...

Page 13: ...ight DxO Labs 1999 2015 All rights reserved 10 Getting Started Turning the camera On and Off 1 To turn the camera On slide the lens cover down to reveal the lens 2 To turn the camera Off slide the lens cover back over the lens ...

Page 14: ...DxO ONE User Guide Copyright DxO Labs 1999 2015 All rights reserved 11 ...

Page 15: ...5 All rights reserved 12 Getting Started Opening and closing the Lightning connector Opening the connector 1 Slide the lens cover down to power on the DxO ONE 2 Slide the lens cover further down to cause the connector to pop out of the circular hub ...

Page 16: ...ting the camera to from the iPhone You should not have to force the connector down If it won t recess check again to make sure you ve You should not have to force the connector down If it won t recess check again to make sure you ve aligned the dots on the circular hub and try again aligned the dots on the circular hub and try again 2 Slide and hold the lens cover all the way down while gently pus...

Page 17: ...DxO ONE User Guide Copyright DxO Labs 1999 2015 All rights reserved 14 3 Slide the lens cover closed to power off the camera ...

Page 18: ...DxO ONE User Guide Copyright DxO Labs 1999 2015 All rights reserved 15 ...

Page 19: ... started Connecting and disconnecting the camera to from the iPhone Connecting the camera 1 Slide the lens cover further down to cause the connector to pop out of the circular hub 2 Insert the Lightning connector on the DxO ONE into the Lightning slot on the bottom of your iPhone ...

Page 20: ...xO ONE camera from your iPhone align the connector with the dots on the circular hub The black dot should align with the red dot You will hear a click when the dots align You will hear a click when the dots align 2 You can now detach the camera from your iPhone by pulling the two devices apart do not fold the phone onto ...

Page 21: ...de Copyright DxO Labs 1999 2015 All rights reserved 18 the camera to release 3 To close the connector slide and hold the lens cover all the way down while gently pushing the connector flat recessed in the circular hub ...

Page 22: ...t have to force the connector down If it won t recess check again to make sure you ve You should not have to force the connector down If it won t recess check again to make sure you ve aligned the dots on the circular hub and try again aligned the dots on the circular hub and try again ...

Page 23: ...s the shutter button on top of the ONE to take photos or record videos in stand alone mode The OLED display can be used with the framing assistant for photos as well as for videos Connected Mode When the DxO One is attached to your iPhone you will be able to access all the shooting modes of the camera and use the attached iPhone LCD screen as your viewfinder for previewing and reviewing images and...

Page 24: ...entation Connected Selfie Mode You ll also be able to use the DxO ONE in Selfie Mode when it is connected to your iPhone 1 Connect the DxO ONE to your iPhone with the lens of the camera facing toward you 2 The camera will now be in your left hand and the shutter button at the top 3 You may use either the physical shutter button or the soft shutter button on the display to trigger a selfie ...

Page 25: ...E as a stand alone camera to capture still images and video in Auto mode The DxO ONE will return to Auto photo capture mode when turned on Turning the camera ON To turn the camera On slide the lens cover down to reveal the lens Select mode 1 To change between still and video mode swipe left or right on the OLED screen on the rear of the DxO ONE device ...

Page 26: ...DxO ONE User Guide Copyright DxO Labs 1999 2015 All rights reserved 23 2 The OLED screen displays the selected shooting mode Still mode selected Video mode selected ...

Page 27: ...DxO ONE User Guide Copyright DxO Labs 1999 2015 All rights reserved 24 Still mode with saved shooting settings Video mode with saved shooting settings ...

Page 28: ...mpose your image when in standalone shooting mode whether shooting photos or video It uses the DxO ONE s OLED screen which displays a monochrome image of the scene 1 To activate the framing assistant sweep the OLED screen from the bottom to the top 2 The screen displays the following information In Photo mode 1 Focus indicator 2 Image of the scene being photographed ...

Page 29: ...O ONE while the framing assistant is activated it will still be activated when you turn your DxO ONE back on If you reconnect the DxO is activated it will still be activated when you turn your DxO ONE back on If you reconnect the DxO ONE to your iPhone the framing assistant automatically turns off ONE to your iPhone the framing assistant automatically turns off To use the framing assistant 1 Disco...

Page 30: ...ton is on the top side of the camera Take care not to accidentally put your finger in front of the lens when taking the photo 2 If you want to use the framing assistant sweep the screen from the bottom to the top 3 Half press the shutter button to obtain focus 4 The focus indicator dot displayed between the photo count and File Type indicators on the OLED screen stops blinking when focus is achiev...

Page 31: ...lone Mode are not automatically transferred to the iPhone when you connect Images taken in Stand Alone Mode are not automatically transferred to the iPhone when you connect the DxO ONE but can be reviewed with the ONE iOS app and can be manually saved to your iOS the DxO ONE but can be reviewed with the ONE iOS app and can be manually saved to your iOS Photos library Video taken in Stand Alone or ...

Page 32: ... mode 2 Hold the camera so that the lens faces toward your subject and the shutter button is at the top of the device Take care not to accidentally put your finger in front of the lens 3 If you want to use the framing assistant sweep the screen from the bottom to the top 4 Press and release the shutter button on the DxO ONE to start recording ...

Page 33: ...hing dot on the OLED screen indicates that you are recording a video If you are using the framing assistant the frame around the image will flash during recording the elapsed time of the video is displayed just below the frame 6 Press on the shutter button again to stop recording ...

Page 34: ... also activate the framing assistant which will let you use your OLED In standalone mode you can also activate the framing assistant which will let you use your OLED screen to compose your still and video images screen to compose your still and video images 6 To return to Auto mode for photo video sweep the back screen horizontally If you turn off your DxO ONE you will find your stored settings in...

Page 35: ... shot in standalone mode you can transfer both photo and video images from your camera directly to you iPhone Transferring images one by one 1 After reconnecting your camera to your iPhone press on the Gallery button to open the preview 2 Tap on the Save Image button in the upper right of the screen to copy your image into your iOS Photos library ...

Page 36: ...the preview 2 Press on the display button in Grid mode under the toolbar 3 Open the multi selection mode by checking the box in the Gallery Mode toolbar 4 Select On microSD card only in the Image Display menu 5 Select the images to be transferred by tapping on the corresponding thumbnails 6 Tap on the transfer icon in the left column 7 Your images are tranferred to your iPhone Camera Roll ...

Page 37: ...DxO ONE User Guide Copyright DxO Labs 1999 2015 All rights reserved 34 Connected capture modes Installing the DxO ONE App 1 Unlock your iPhone and plug the DxO ONE into it via the Lightning connector ...

Page 38: ...xO Labs 1999 2015 All rights reserved 35 2 You will be prompted to download the DxO ONE app from the App Store 3 Click App Store to open the DxO ONE page in the App Store 4 Install the app and launch it once the installation is done ...

Page 39: ... User Guide Copyright DxO Labs 1999 2015 All rights reserved 36 5 You will be prompted to allow DxO ONE to access your location while using the app 6 An automated instruction booklet will help get you started ...

Page 40: ...on update an information page shows a list of new features If they require a After an application update an information page shows a list of new features If they require a firmware update tap the Setup button to update the firmware firmware update tap the Setup button to update the firmware ...

Page 41: ...very powerful The app opens in Auto Mode and shoots in RAW JPEG by default The JPEGs are rendered from the The app opens in Auto Mode and shoots in RAW JPEG by default The JPEGs are rendered from the RAWs and are instantly available to share The RAWs can be further processed by DxO s desktop RAWs and are instantly available to share The RAWs can be further processed by DxO s desktop software to re...

Page 42: ...e shutter speed and ISO for the In AUTO mode the DxO ONE will choose the optimum aperture shutter speed and ISO for the scene While in AUTO mode you may choose to increase decrease the exposure by using the EV Bias scene While in AUTO mode you may choose to increase decrease the exposure by using the EV Bias control which is accessible in the sidebar to the left of the preview control which is acc...

Page 43: ...s the scene modes tap the capture mode selector displayed on the iPhone screen at the bottom right 2 Tapping this button will open the display of the different capture modes available to you 3 Tap the icon that best matches the scene that you want to capture to open that mode There are four scene modes to choose from ...

Page 44: ...DxO ONE User Guide Copyright DxO Labs 1999 2015 All rights reserved 41 Sport For use with fast moving subjects Portrait Use the portrait mode to isolate your subject s face by creating a lovely bokeh ...

Page 45: ...o capture photos of distant and wide scenes with maximum sharpness Night To capture great photos in low light conditions The DxO ONE app will automatically select the best settings to use for each scene The DxO ONE app will automatically select the best settings to use for each scene ...

Page 46: ... tap the capture mode selector displayed on the iPhone screen at the bottom right 2 Tapping this button will open the display of the different capture modes available to you 3 Tap the mode icon to select the advanced mode that you wish to use 4 When an advanced mode is selected the toolbar on the left expands to reveal the advanced controls ...

Page 47: ... 5 There are four scene modes to choose from Program Mode Program mode allows you to simultaneously adjust both shutter speed and aperture 1 Select to open Program mode 2 When using Program mode the exposure is always preserved The picker displays 9 steps which represent ...

Page 48: ...e aperture adjustment The settings will also be displayed on the OLED screen of the DxO ONE device The settings will also be displayed on the OLED screen of the DxO ONE device Aperture Priority Aperture Priority mode allows you to control the aperture that you wish to use for your photo The DxO ONE will pick the corresponding shutter speed to achieve the best exposure based on your chosen aperture...

Page 49: ...015 All rights reserved 46 2 The aperture settings will be active and tapping the aperture control icon will open the aperture picker 3 To change the aperture dial the aperture picker up or down until you find the aperture that you wish to select ...

Page 50: ... control the shutter speed that you wish to use for your photo The DxO ONE will pick the corresponding aperture to achieve the best exposure based on your chosen shutter speed 1 Select to open Speed Priority mode 2 The shutter settings will be active and tapping the shutter speed icon will open the shutter speed picker ...

Page 51: ...speed dial the picker up or down until you find the speed that you wish to select Manual Mode When in M Mode Shutter speed Aperture ISO Metering Mode Autofocus and White balance settings will be active and tapping each icon in turn will open the associated picker 1 Select to open Manual mode ...

Page 52: ...ights reserved 49 2 A menu will appear on the left hand side of the iPhone screen Tapping each icon in turn will open the associated picker 3 To change each setting dial the appropriate picker up or down until you find the setting that you wish to select ...

Page 53: ...DxO ONE User Guide Copyright DxO Labs 1999 2015 All rights reserved 50 ...

Page 54: ...he Video Mode 1 To select video mode switch the on screen shutter button from the photo icon to the video icon 2 The on screen shutter button will switch to video mode Recording a Video 1 To start recording video either tap the shutter button video icon on the iPhone display or depress the shutter button on the DxO ONE ...

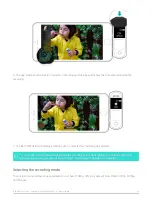
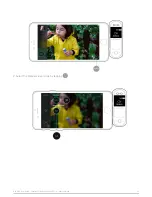
Page 55: ...ll photos during Auto video recording only 1080p 30fps To capture a still photo You may capture still photos during Auto video recording only 1080p 30fps To capture a still photo while recording video tap the soft shutter button located above the video record button while recording video tap the soft shutter button located above the video record button Selecting the recording mode There are three ...

Page 56: ... ONE User Guide Copyright DxO Labs 1999 2015 All rights reserved 53 Slow Motion Video 1 Tap on the bottom right of the iPhone display to open the video modes panel 2 Select the Slow Motion mode by tapping ...

Page 57: ...The app shutter button will turn red when recording and the app will display the time elapsed during the recording 4 The DxO ONE OLED screen will also display the Slow Motion icon Manual Video Mode 1 Tap on the bottom right of the iPhone display to open the video modes panel ...

Page 58: ...DxO ONE User Guide Copyright DxO Labs 1999 2015 All rights reserved 55 2 Select the Manual video mode by tapping ...

Page 59: ...meters Shutter speed from 1 30s to 1 20000s Aperture f 1 8 to f 11 ISO sensitivity 100 ISO to Hi2 and Auto mode Focusing mode AF or manual White balance Auto and presets Auto Video Mode To switch to Auto video mode 1 Tap on the bottom right of the iPhone display to open the video modes panel 2 Select the Auto video mode by tapping ...

Page 60: ...DxO ONE User Guide Copyright DxO Labs 1999 2015 All rights reserved 57 ...

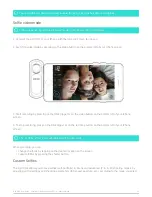
Page 61: ...uide Copyright DxO Labs 1999 2015 All rights reserved 58 Connected capture modes Selfie modes Activating Selfie Mode Connect the DxO ONE and the iPhone with the lens and screen facing you to activate the Selfie mode ...

Page 62: ...r the shutter button of the iPhone display Using the iPhone display as a softbox 1 Connect the DxO ONE and the iPhone with the lens and screen facing you 2 Enable the flash 3 Take a photo using the ONE s shutter trigger or the shutter button of the iPhone display 4 Get ready to smile as the app s softbox naturally illuminates your face ...

Page 63: ...art recording by pressing on the ONE trigger or on the video button on the bottom left of your iPhone screen 4 To stop recording press on the ONE trigger or on the red Stop button on the bottom left of your iPhone screen The softbox effect is not available in selfie video mode The softbox effect is not available in selfie video mode While recording you can Change the focus by tapping on the desire...

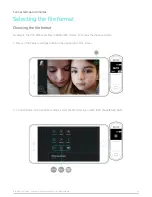
Page 64: ...lecting the file format Choosing the file format By default the DxO ONE saves files in RAW JPEG format To change the file save format 1 Press on the Capture settings button in the upper right of the screen 2 In the third line of the Capture settings select the file format you want JPEG SuperRAW RAW ...

Page 65: ...s the extension JPG SuperRAW SuperRAW is DxO s proprietary file format designed to capture beautiful photos in extremely low light Behind the scenes the camera captures four RAW images in quick succession and when your camera is connected to your Mac or PC it leverages both spatial and temporal noise reduction algorithms to merge them into one dynamic detailed photo SuperRAW format bears the exten...

Page 66: ...hen your DxO ONE camera is attached to your iPhone DxO ONE Shutter 1 There is a physical shutter button on the top of the DxO ONE device To focus the DxO ONE lens half press the shutter 2 During the focusing process a dot on the OLED screen will blink 3 Once focus is achieved the dot on the OLED will stop blinking and the iPhone LCD screen will display a green square ...

Page 67: ...64 The minimal focus distance is 20 cm The minimal focus distance is 20 cm 4 Press the shutter to take the photo 5 A progress bar displays briefly while the photo is being recorded 6 After the image has been taken it is displayed on the iPhone for two seconds for review ...

Page 68: ...s use the shutter button on the iPhone to reduce the risk of camera shake The In low light situations use the shutter button on the iPhone to reduce the risk of camera shake The two second timer is also very useful in reducing camera shake in low light situations two second timer is also very useful in reducing camera shake in low light situations Continuous Shooting Mode The DxO ONE has a mode fo...

Page 69: ...al gyroscope detects an instability and or an excessive range of motion The shutter speed is equal to or less than 1 40s If you tap on the motion blur icon a message will ask you to stabilize your camera or to increase the shutter speed The indicator disappears after the camera is stabilized Flickering alert Shooting under artificial light can sometimes produce a flickering phenomenon that appears...

Page 70: ...DxO ONE User Guide Copyright DxO Labs 1999 2015 All rights reserved 67 ...

Page 71: ...l lines so you can use the rule of thirds when The grid has two vertical lines and two horizontal lines so you can use the rule of thirds when composing your photos composing your photos 3 On the upper part of the screen capture settings include Metering mode Focus mode White balance mode iPhone battery charge level 4 On the lower part of the screen Exposure compensation indicator Shutter speed Ap...

Page 72: ... video M mode you can focus manually as follows 1 To access the advanced modes tap the capture mode selector displayed on the iPhone screen at the bottom right 2 Tap the mode icon to select the advanced mode that you wish to use P A S or M 3 When an advanced mode is selected the toolbar on the left expands to reveal the advanced controls ...

Page 73: ... 70 4 Sweep upwards to scroll through the controls and activate the manual focus by pressing on AF S and then on MR in the value selector 5 A focusing scale will appear on the left of the viewfinder screen graduated from the minimum focusing distance 20 cm to infinity ...

Page 74: ...real time the sharpness of that part of the image where you have placed it You can use your finger to move the loupe anywhere within the viewfinder You can use your finger to move the loupe anywhere within the viewfinder 8 To return to AF mode click on MF in the control bar on the left Focusing using hyperfocal distance You can select a maximum depth of field by tapping the on the focus to infinit...

Page 75: ...erture value The focus distance is automatically adjusted so that the image remains sharp throughout the hyperfocal distances to infinity Minimum Focus Distance When you are in manual focus mode you can return to the minimum focus distance of 20 cm at any time by tapping the icon at the bottom of the focus scale ...

Page 76: ...uide Copyright DxO Labs 1999 2015 All rights reserved 73 Connected capture modes Zooming when taking a photo Zoom is controlled by the iPhone either by a pinch action or by sliding the cursor displayed on the screen ...

Page 77: ...o take a photo either 2 or 10 seconds after pressing the shutter It is useful for reducing camera shake when using the camera in low light situations and for taking group selfies 1 Tap on the Capture settings icon 2 On the first line in the Capture settings click on either the 2 second or 10 second timer icon 3 A countdown begins and is displayed on the iPhone screen ...

Page 78: ...DxO ONE User Guide Copyright DxO Labs 1999 2015 All rights reserved 75 4 The shutter is released and the photo captured at the end of the countdown ...

Page 79: ...tings display select one of the flash modes by tapping on the relevant button Off The flash is deactvated Automatic The flash will fire automatically if lighting conditions require it On The flash will fire for each shot The icons associated with the Auto or flash On modes are displayed on the right in the viewfinder The icons associated with the Auto or flash On modes are displayed on the right i...

Page 80: ...tion for the DxO ONE when used with an iPad when used with an iPad Your iPhone provides the flash Be sure that you do not cover the flash with your fingers while holding Your iPhone provides the flash Be sure that you do not cover the flash with your fingers while holding the iPhone To ensure the light properly illuminates the subject do not rotate the DxO ONE relative the iPhone To ensure the lig...

Page 81: ...s Shutter triggering with Apple Watch 1 On your Apple Watch launch the ONE triggering application 2 Connect the ONE to your iPhone 3 Launch the DxO ONE application on your iPhone 4 As soon as the connection is established the triggering button on the Apple Watch will light up 5 Shoot your photo ...

Page 82: ...erved 79 6 As soon as you have taken a photo the triggering button will light up again indicating that it is ready to trigger the shutter again The Apple Watch companion can also trigger the video record The Apple Watch companion can also trigger the video record ...

Page 83: ...res and settings from your phone Controlling your camera remotely makes it easier to take certain types of photographs including group selfies and long exposures and you can even shoot from creative angles By connecting to a local Wi Fi network you can leave your iPhone free to connect to the Internet By connecting to a local Wi Fi network you can leave your iPhone free to connect to the Internet ...

Page 84: ...n existing Wi Fi network 1 Make sure your Iphone is connected to a local Wi Fi network 2 Connect the DxO ONE to your iPhone and turn it on to launch the iOS application 3 Touch the Shooting Settings icon 4 Scroll down to the Remote Control section 5 Touch the sidebar to the right of Connect through a Wi Fi Network ...

Page 85: ...tings iOS dialog box appears 1 7 A dialog box shows the status of the connection Do not detach your DxO ONE from your iPhone while the connection is being established This may Do not detach your DxO ONE from your iPhone while the connection is being established This may take a few moments take a few moments ...

Page 86: ...r iPhone 9 Disconnect your camera from your iPhone You can now use your DxO ONE while disconnected As soon as you disconnect the DxO ONE a network icon appears on the camera s OLED screen and a blue rectangle appears all around the DxO ONE application on your iPhone Note that the rectangle will blink and then turn orange if the quality of your Wi Fi connection begins to drop ...

Page 87: ...eactivate the DxO ONE tap the iPhone screen or press the DxO ONE shutter halfway ONE tap the iPhone screen or press the DxO ONE shutter halfway Controlling the camera over a local Wi Fi network depends on the network s coverage Controlling the camera over a local Wi Fi network depends on the network s coverage Activating Wi Fi has a significant impact on the DxO ONE s battery Activating Wi Fi has ...

Page 88: ...work non stop in close collaboration with Apple to adapt your DxO ONE app to these last minute changes and to in close collaboration with Apple to adapt your DxO ONE app to these last minute changes and to ensure you continue to have a great experience with your camera ensure you continue to have a great experience with your camera If you don t have access to a Wi Fi network you can use Wi Fi Dire...

Page 89: ...dialog box tells you to select the DxO ONE XXX XXX XXX XXX XX access point in your iPhone s Wi Fi Settings Go into your iPhone s Wi Fi settings and select the DxO ONE XXX XXX XXX XXX XX access point and return to the DxO ONE iOS application 8 After the connection is confirmed a new message indicates you can disconnect the DxO ONE from your iPhone ...

Page 90: ...d The range of the direct connection can reach up to around 150 feet However the connection can be The range of the direct connection can reach up to around 150 feet However the connection can be affected by the weather any obstacles in the way and other Wi Fi connected devices affected by the weather any obstacles in the way and other Wi Fi connected devices ...

Page 91: ...ed into a power source the DxO ONE waits to be reconnected indefinitely Reconnecting the DxO ONE after it goes into standby Bring the iPhone out of sleep mode 1 Open the application which is in Gallery mode 2 Touch the Capture button located on the bottom to reestablish the connection 3 The connection is reestablished after a few seconds 4 Reconnecting the DxO ONE to a Wi Fi network after the ONE ...

Page 92: ... reserved 89 Browsing and Sharing Single photo review 1 When in Still capture mode tap the gallery button at the top of the toolbar on your iPhone display to open the image view 2 View your photos in full screen mode by tapping on the photo to hide the toolbar ...

Page 93: ...DxO ONE User Guide Copyright DxO Labs 1999 2015 All rights reserved 90 3 Swipe the screen right and or left to scroll through and review the photos ...

Page 94: ... User Guide Copyright DxO Labs 1999 2015 All rights reserved 91 4 Tap the photo again to display the toolbar again 5 By swiping from the top to the bottom of the screen you can view a page of EXIF information ...

Page 95: ...can display the shooting location in the iOS Maps application by tapping on the thumbnail of the map map 6 When using the toolbar in Grid mode you will be able to Access information messages user guide About section Switch to image selection mode Return to capture mode 7 In Single image display mode the icons are divided to the left and to the right To the left the icons let you Access information...

Page 96: ...DxO ONE User Guide Copyright DxO Labs 1999 2015 All rights reserved 93 if attached as well as photos stored on your iPhone if attached as well as photos stored on your iPhone ...

Page 97: ...99 2015 All rights reserved 94 Browsing and Sharing Video review 1 Tap the gallery button at the top of the toolbar on your iPhone display to open the image view 2 Open the video and press the play button displayed on the center of the video ...

Page 98: ...Copyright DxO Labs 1999 2015 All rights reserved 95 3 If you play a slow motion video the video player will display the Slow Motion mode icon Tap the icon to switch between standard playback and slow motion playback modes ...

Page 99: ...de About section Switch to Grid mode Return to capture mode The icons in the right toolbar let you Share videos To transfer videos from the ONE to your iPhone or to indicate your favorite videos after transfer Delete videos Videos are recorded on the microSD card of the DxO ONE You need to temporarily transfer them Videos are recorded on the microSD card of the DxO ONE You need to temporarily tran...

Page 100: ...ing Sharing photos and videos 1 When in Still capture mode tap the gallery button to open the image view 2 Tap the Share icon on the upper right to open the native iOS Sharing panel 3 You can choose to share photos by message by email or by any other sharing service that Apple iOS supports ...

Page 101: ...DxO ONE User Guide Copyright DxO Labs 1999 2015 All rights reserved 98 4 A successfully shared message will display on the screen ...

Page 102: ...owsing and Sharing Deleting photos and videos 1 When in Still capture mode tap the gallery button at the top of the toolbar on your iPhone screen to open the image view 2 Tap on the trashcan icon on the lower right 3 You will be prompted to allow DxO ONE to delete the photo ...

Page 103: ...hosen to store photos Photos are deleted from the microSD card and the iPhone if you ve chosen to store photos there there If you have iCloud Photo Library enabled you will be warned that deleting the photo will delete it from If you have iCloud Photo Library enabled you will be warned that deleting the photo will delete it from all your devices all your devices ...

Page 104: ...ur photos 1 When in Still capture mode tap the gallery button on the top of the toolbar on your iPhone to open the image view 2 Tap the Share icon on the upper right to open the native iOS Sharing panel 3 At the bottom of the sharing panel you have the options to print from an AirPrint compatible printer ...

Page 105: ...DxO ONE User Guide Copyright DxO Labs 1999 2015 All rights reserved 102 ...

Page 106: ...os in your iOS Photos library tap the Heart icon on the lower right hand side of the photo Photos stored only on the DxO ONE microSD card cannot be selected as favorites Video clips also Photos stored only on the DxO ONE microSD card cannot be selected as favorites Video clips also cannot be selected as favorites cannot be selected as favorites ...

Page 107: ...ing and Sharing Gallery grid view Opening Gallery view 1 Tap the gallery button at the top of the toolbar on your iPhone display to open image view 2 Tap the gallery grid button at the bottom of the toolbar 3 Scroll through the gallery by swiping vertically on the iPhone screen ...

Page 108: ...When scrolling the location of the photos in the top row is displayed on the screen header When scrolling the location of the photos in the top row is displayed on the screen header 4 Tap the camera icon to return to capture mode or simply depress the shutter button halfway ...

Page 109: ...re those photos that you ve marked as favorite by using the heart symbol On iPhone displays all of the photo and video files in the DxO ONE album stored on your iPhone On microSD Card displays all of the photo and video files stored on the SD card in the camera Photos are displayed by date grouped by month in descending order with the most recent images Photos are displayed by date grouped by mont...

Page 110: ... and Sharing Multi selection mode 1 Tap the gallery button at the top of the toolbar on your iPhone display to open image view 2 Tap the gallery grid button at the bottom of the toolbar 3 Enter into multi selection mode by tapping the check mark in the toolbar when in gallery view ...

Page 111: ... User Guide Copyright DxO Labs 1999 2015 All rights reserved 108 4 To select photos or videos from gallery view tap the photo thumbnail 5 A check mark will appear on the top right corner of each selected photo ...

Page 112: ...All rights reserved 109 6 From the toolbar you will be able to Share Photos Transferring images from your camera to your iOS Photos library Delete Photos 7 To return to the gallery view tap the back button or simply depress the shutter button halfway ...

Page 113: ...DxO ONE User Guide Copyright DxO Labs 1999 2015 All rights reserved 110 ...

Page 114: ...1 Advanced features Formatting the microSD Card 1 In Capture mode tap on the Capture settings button on the top right 2 Go into the Storage section on the very bottom of the Capture settings screen 3 Tap on Format microSD card 4 In the dialog box that opens tap on Format ...

Page 115: ... choose to format the microSD card all the existing data on it will be erased If you choose to format the microSD card all the existing data on it will be erased Do not disconnect the camera during the formatting process Do not disconnect the camera during the formatting process ...

Page 116: ...displayed on your iPhone screen and on the camera screen 6 To reactivate the camera touch the screen of your iPhone or press down the ONE s shutter half way This will return the camera to Capture mode If after several minutes in standby mode you do not use the ONE it will turn itself off even if the If after several minutes in standby mode you do not use the ONE it will turn itself off even if the...

Page 117: ...ng its on off button 2 To wake up the ONE slide the lens cover open to power up the camera 3 If your iPhone has gone to sleep press the home button and unlock your iPhone or simply use the Touch ID of your iPhone if it has this feature To conserve the battery power of both your DxO ONE camera and your iPhone we recommend that To conserve the battery power of both your DxO ONE camera and your iPhon...

Page 118: ...vely taking photos or video you power down the DxO ONE when not actively taking photos or video 4 For brief periods in between actively taking photos your DxO ONE will automatically switch to Power Saving mode 5 To wake your DxO ONE from s mode simply tap the iPhone display or press the physical shutter half way ...

Page 119: ...best experience and best image quality from the DxO ONE It s important to keep your firmware updated with the latest version of the iOS app The availability of an update is signaled by a red dot 1 On the Application menu icon on top part of the left hand toolbar after quitting the capture screen by tapping on the Gallery preview on the upper left 2 In the Update firmware section after tapping on t...

Page 120: ...he app during the update If you disconnect Do not disconnect the camera from your iPhone or close the app during the update If you disconnect your iPhone or switch applications at the beginning of the firmware update the new firmware will not your iPhone or switch applications at the beginning of the firmware update the new firmware will not be installed If you disconnect the camera after reboot t...

Page 121: ... will automatically launch and allow you to apply image processing to your selected photos You may also use DxO Connect to import your DxO ONE photos directly to DxO FilmPack to apply You may also use DxO Connect to import your DxO ONE photos directly to DxO FilmPack to apply analog film looks to your digital images or to DxO OpticsPro which allows you to control every aspect analog film looks to ...

Page 122: ... Business name 6 Tap on Done to validate the entry 7 To enter an author name repeat the preceding steps The Copyright and Author information is saved in the image EXIF metadata and can be accessed by The Copyright and Author information is saved in the image EXIF metadata and can be accessed by any software capable of reading the metadata any software capable of reading the metadata Watermark To e...

Page 123: ...mbedded on the bottom right of the image If you The Watermark will appear as small white text embedded on the bottom right of the image If you want to share an image without a signature or watermark deactivate the Watermark feature want to share an image without a signature or watermark deactivate the Watermark feature ...

Page 124: ...tings menu 1 While in capture mode tap the capture settings button on the top right of the screen 2 To access the different sections use your finger to scroll through the settings page 3 A closed section arrow pointing downward will show only its title Tap it to open up the contents and tap it again to close the section ...

Page 125: ...alue Manual ISO settings override the chosen value Max exposure time Press to set a shutter speed that should not go above for example 1 50 second in automatic mode which is perfect for taking hand held photos Manual speed settings override the chosen value Manual speed settings override the chosen value Metadata Copyright Lets you enter the copyright information see Advanced features Metadata and...

Page 126: ...attery power Storage Store photos on microSD card and iPhone Saves a full resolution JPEG file on your iPhone for all photos taken when the DxO ONE is connected to your iPhone microSD card JPEG files are not saved on your iPhone Video files are always and only stored on the microSD card Photos taken in standalone mode are not added to your iPhone storage Photos taken in standalone mode are not add...

Page 127: ...ttings Application Settings Accessing the DxO ONE application settings menu 1 While in capture mode tap the gallery button on the top left A new screen opens 2 Tap the Menu grid button at the bottom of the toolbar 3 A new screen opens that displays the options detailed below ...

Page 128: ...NE and associated software New messages are indicated by a red dot along with a number indicating the number of unread messages If there are new messages or a new firmware update available the Menu button will also display a If there are new messages or a new firmware update available the Menu button will also display a red dot red dot Help and User Guide Tapping Getting Started Support will conne...

Page 129: ...User Guide Copyright DxO Labs 1999 2015 All rights reserved 126 the microprogram version and series numbers your camera must be connected to your iPhone legal mentions and the iOS application conditions of use ...

Page 130: ...card A microSD card must be inserted into the slot of the ONE in order for the camera to function If your microSD card is missing you will see the following warning on the OLED and the iPhone screen The message will appear whenever the shutter button is depressed MicroSD card is almost full When you have less than 100MB of space remaining on your microSD card we ll display the following warning on...

Page 131: ...DxO ONE User Guide Copyright DxO Labs 1999 2015 All rights reserved 128 MicroSD card is full When your microSD card is full the following warning will be displayed on the OLED and iPhone screens ...

Page 132: ...charge level the shooting mode and file type selected the image count remaining on the microSD card the file type being recorded as well as error messages if something goes wrong It also provides you with an easy way to switch between still photos and video mode when using the ONE in standalone mode Connected Still Shooting Modes Screen Components 1 Capture Mode 2 Image Count 3 File Type Auto Mode...

Page 133: ...uide Copyright DxO Labs 1999 2015 All rights reserved 130 Action Night Advanced Modes Program Mode Aperture Priority Speed Priority Manual Mode Autofocus Focus attained Connected Video Shooting Modes Auto Slow Motion ...

Page 134: ... Recording Standalone Shooting Modes Still Video Framing assistant photo Framing assistant video Photo mode with saved shooting settings Video mode with saved shooting settings Battery Status Charging Status Battery Charge Remaining 100 no charge Shutter Progress Focus achieved ...

Page 135: ...rights reserved 132 Shooting USB Connected Temperature Warnings Camera is hot Warning Camera is too hot Busy processing or storing images Warning Messages USB Error microSD Card Error microSD Card not inserted Firmware Updates Firmware Update in progress ...

Page 136: ...y Manual Video modes 1080p 30 fps 720p 120fps Manual 1080p 30 fps File formats JPG DNG DXO SuperRAW MOV H 264 Focus range 20cm infinity Autofocus Contrast detect using face detection Focus modes Single shot continuous tap to focus manual focus Metering modes Spot center weighted multi zone Zoom Digital 3x Micro USB port USB 2 power charging mass storage connection Lightning connector Retractable c...

Page 137: ...9 2015 All rights reserved 134 Dimensions 67 5 x 48 85 x 26 25 mm Compatible with iPhone 6S Plus iPhone 6S iPhone 6 Plus iPhone 6 iPhone 5s iPhone 5c iPhone 5 iPad Air 2 iPad mini 4 iPad mini 3 iPad Air iPad mini 2 iPad 4th gen iOS 8 or later ...

Page 138: ...electric shock USB cable and power adapter Use the USB cable and power adapter included with your DxO ONE camera Use of a non DxO power adapter may pose a risk of fire or serious harm to you or your DxO ONE camera Using a damaged cable or power adapter can cause fire electric shock injury or damage to DxO ONE camera Do not attempt to disassemble the USB cable or power adapter as it may cause perso...

Page 139: ...et on a circuit different from that to which the receiver is connected Consult the dealer or an experienced radio TV technician for help This device is designed and manufactured not to exceed the emission limits for exposure to radio frequency RF energy set by the Federal Communications Commission for an uncontrolled environment CE RF Exposure Compliance This device meets the EU requirements 1999 ...

Page 140: ...nt at the time of disposal will help conserve natural resources and ensure that it is recycled in a manner that protects human health and the environment For more information about where you can drop off your waste for recycling please contact your local authority or where you purchased your product Made for iPhone and Made for iPad mean that an electronic accessory has been designed to connect sp...

Page 141: ...ny attempted transfer is void If you are a consumer having its residence in EU you will also benefit from legal rights under EU law in relation to the sale of defective non conforming or mis described products for a minimum of two 2 years depending on your country of purchase national laws may give additional rights These legal rights are not affected by anything else in this Warranty Card DxO giv...

Page 142: ...sers of the DxO ONE do not follow the guidelines to use the DxO ONE as set in the DxO ONE documentation or general purchasing conditions DxO is not responsible for any loss or damage or defect to any approved iPhone or iPad model or any other device that DxO later approves in writing for use with DxO ONE DxO ONE may not function properly if the approved iPhone or iPad model or any other device tha...

Page 143: ...ether express or implied by statute common law trade usage custom or otherwise in respect of the quality or fitness for purpose description of the DxO ONE or otherwise Without limiting the foregoing DxO disclaims any implied warranty of merchantability and implied warranty of fitness for a particular purpose The United Nations Convention on Contracts for the International Sale of Goods CISG is exp...

Reviews: