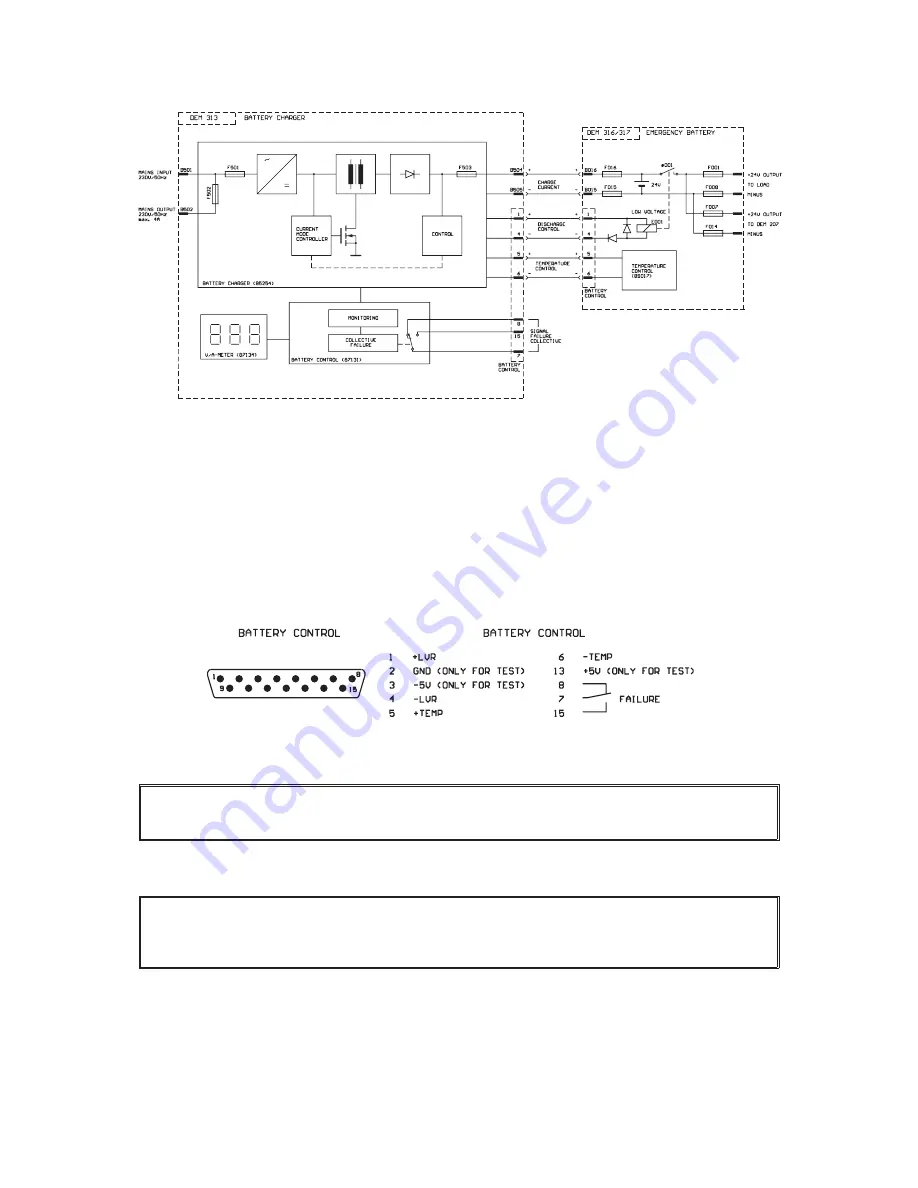
Fig. 1 Connection of the battery to the charging unit
3.1 Control connector BATTERY CONTROL
Various control input/outputs are available at the 15-pole D-sub pin connector BATTERY CONTROL (9):
(Also see Figure 2):
- Input temperature TEMP/-TEMP
- Output exhaustive discharge relay +LVR/-LVR
- Failure signal output FAILURE
Fig. 2
Connections of the BATTERY CONTROL pin connector
Note
The switch rating of the failure signal output amounts to max. 30V dc / 0.IA . The contacts 2, 3
and 13 are provided for test purposes only and must not be used.
4. Alteration of the mains voltage (to be performed by qualified personnel only)
Attention:
Before removing the top unit cover, the device must have been disconnected from the
mains for at least 2 minutes, since the capacitors in the device carry hazardous voltage
which needs to discharge first.
For 115V AC operation, the mains powerfuse (6) must be replaced by a fuse 2A slo-blo (T2A). A T2A
label must be stuck over the T1 A marking above the mains power fuse (6). A 115V label must be stuck
over the marking 230V above the mains connector (7). The necessary labels are to be found inside the
unit on the right adjacent to the PCB 85254.
For alteration to 115V AC operation, the wire jumpers S501, S502 and S504 on the PCB 85254 are to be
soldered in and the wire jumper S 503 must be removed, (see Figure 3).
18
Summary of Contents for Pro Matrix System DEM 313
Page 12: ...24 ...


