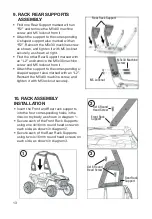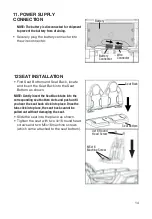
9
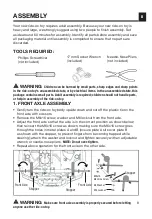
2. FRONT WHEEL ASSEMBLY
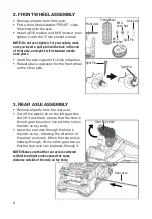
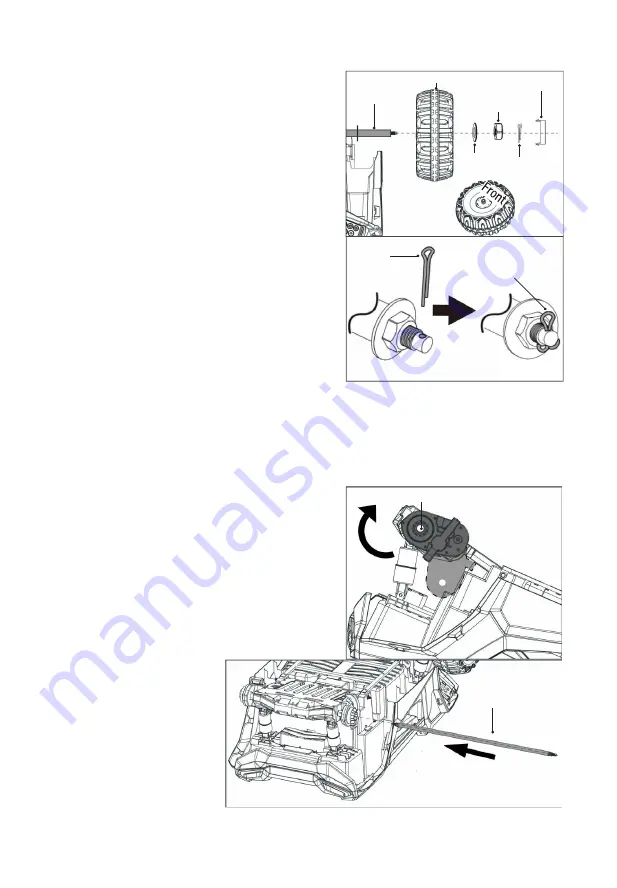
• Remove all parts from front axle.
• Find a front wheel labeled "FRONT", slide
the wheel onto the axle.
• Install a Ø12 washer and M10 locknut, then
tighten it with the 17 mm socket wrench.
NOTE:
Do not over-tighten. For your safety, make
sure you insert a split pin into the hole in the end
of front axle, and split it with standard needle-
nose pliers.
• Insert the axle cap until it clicks into place.
• Repeat above operation for the front wheel
on the other side.
Split Pin
Front Axle
Front Wheel
Split Pin
Axle Cap
Ø12
Washer
M10
Lock Nut
Split Pin
3. REAR AXLE ASSEMBLY
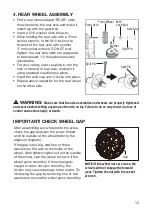
• Remove all parts from the rear axle.
• Cut off the plastic tie on the left gear box
and lift it as shown, ensure that the hole in
the left gear box sits in line with the hole in
the ride-on toy body.
• Insert the rear axle through the hole in
the ride-on toy, following the direction of
the arrow as shown. When the rear axle is
halfway through, lift the other gear box so
that the rear axle can protrude through it.
NOTE:
Make sure that the rear axle is centered
with left and right ends exposed the same
distance outside of the ride-on toy body.
Rear Axle
Gear Box's Hole


