background image


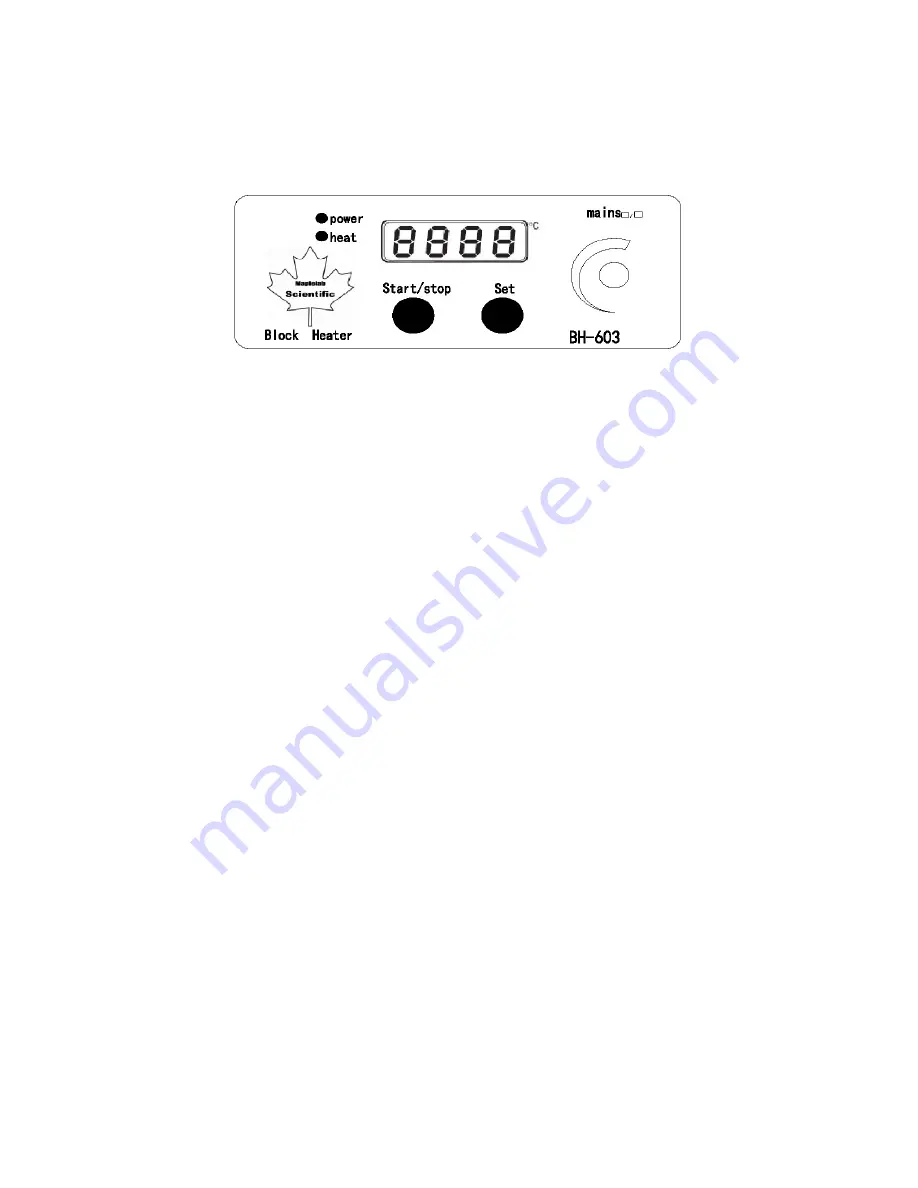
3.  When turning on the machine, the display will immediately show 

“_ _ _ _”, 

and then 

shows the actual temperature in Celsius.  The “power” light is off at this time.  And when the 
block temperature is over 50 ˚C, the “heat” light is on, otherwise, it is off, too. 


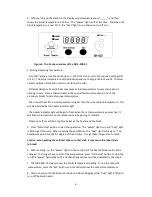
Figure 3: The front panel view of the DB-3-200-01 

4. Setting Operating Temperature: 

- Turn the Temperature Control Knob on in the front of the unit to the required setting (OFF 
or 1-9).  The actual temperature of the block depends on the type of block and fit.  Thermal 
contact between block and unit is crucial for best results. 

- Different designs of insert blocks may cause actual temperatures to vary and speed of  
heating to vary.  Place a thermometer in the special thermometer hole in one of the  
aluminum blocks to indicate proper temperature. 

- The unit will heat if the set temperature is higher than the current block temperature.  This 
will be indicated by the heater indicator light. 

- The heater indicator light will begin to flash when the set temperature is approached.  It 
will flash more slowly when the temperature is beginning to stabilize. 

- Please note there will be a lag time between the heater and the block.  

5.  Press “Start/stop” button to start the operation.  The “power” light is on and “heat” light 
is flashing at this point.  When reaching the equilibrium, the “heat” light is steady on.  The 
equilibrium point is set @ 0.1 degree of the accuracy.  It might take longer time to reach.  


Caution: when putting the cold test tubes or other vials, it may cause the tubes/vials  
to break! 

6.  When running, i.e. the “power” light on, the set point of the heated block could not be 
changed.  To change the set point of the temperature, press “Start/stop” button to stop the 
run (the “power” light will go off), and then change the set point as indicated in the step 4. 

7.  The DB-3-200-01 always shows the actual temperature reading.  To see the set point 
 temperature, press the “Set” button, and the LED will show the set point temperature. 

8.  After use, wait until the block cool down to below 50 degrees (the “heat” light is off) and 
turn off the block heater. 

Summary of Contents for DB-1-130-01

Page 1: ...1 BLOCK HEATER MODELS DB 3 200 01 DB 3 130 01 DB 2 130 01 DB 2 200 01 DB 2 200 02 DB 1 130 01 and DB 1 200 01 OPERATING MANUAL VERSION 3 11 Dynalab Corp Inc November 2017 v1 0 ...

Page 2: ...2 BEFORE USE Please read the following instructions Warning Check the line supply is sufficient to meet the power requirement of the unit ...

Page 3: ... IN TORT CONTRACT CIVIL LAW OR OTHER THEORIES OF LIABILITY INCLUDING STRICT LIABILITY EVEN IF ADVISED IN ADVANCE OF THE POSSIBILITY OF SUCH DAMAGES THE COMPANY S TOTAL LIABILITY INCLUDING BUT NOT LIMITED TO LIABILITY FOR INDEMNITY DEFENSE AND HOLD HARMLESS OBLIGATIONS IS LIMITED TO NO MORE THAN THE AMOUNT PAID TO THE COMPANY UNDER THE CUSTOMER S ORDER AND THE CUSTOMER AGREES TO INDEMNIFY THE COMPA...

Page 4: ...e set temperature is higher than the current block temperature This will be indicated by the heater indicator light 4 The heater indicator light will begin to flash when the set temperature is approached It will flash more slowly when the temperature is beginning to stabilize Please note there will be a lag time between the heater and the block Operation of Digital Unit For the digital DB 3 200 01...

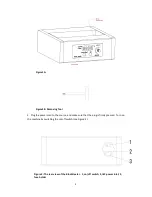
Page 5: ...2 Plug the power cord to the source and make sure that the plug is firmly pressed Turn on the machine by switching the on off switch see Figure 2 Figure 2 The rear view of the Block Heater 1 on off switch 2 IEC power inlet 3 fuse holder ...

Page 6: ...The heater indicator light will begin to flash when the set temperature is approached It will flash more slowly when the temperature is beginning to stabilize Please note there will be a lag time between the heater and the block 5 Press Start stop button to start the operation The power light is on and heat light is flashing at this point When reaching the equilibrium the heat light is steady on T...

Page 7: ...ation point release the set button and press mains to start the calibration In this time the power light will be on and the heat light will be flashing The display showed C _ _ X flashing 5 When reaching the equilibrium set temperature the display will stop flashing In this stage you can enter the actual block or vial temperature from reading the block or vial temperature from external temperature...

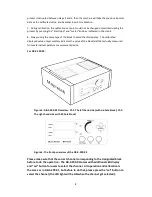
Page 8: ...e of the block vial that actually measured from external temperature measurement device For DB 2 200 02 Figure 4 DB 2 200 02 Overview Ch1 The left hand side with six hole block Ch2 The right hand side with 20 hole block Figure 5 The front panel view of the DB 2 200 02 Please make sure that the correct channel corresponding to the designated block before to do the operation The DB 2 200 02comes wit...

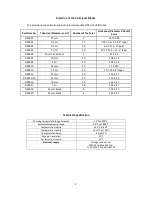
Page 9: ...9 2 ml 20 10 5 X 33 DB0010 13 mm 20 13 5 X47 DB0013 1 5 ml 20 10 7 X 14 9 taper DB0015 12 mm 20 12 5 X 47 DB 0015 33 12 mm 20 12 5 X 33 DB0016 16 mm 12 16 5 X 47 DB0017 2 ml 20 10 5 X 47 DB0018 19 mm Block 8 19 5 X 47 DB0019 33 mm Block 4 33 5 X 47 Technical Specification Working temperature range Ambient 5 C to 200 C Settable temperature range 0 0 C to 200 0 C Temperature stability 0 1 C at 40 C ...

Page 10: ...EN 61326 1 2006 and fulfill EMC testing requirement of Medical Device Directive 2004 108 EC listed in the report number CE2012 OTE8003E and EN 61010 1 plus EN 61010 2 010 2003 of the LVD di rective2006 95 EC in the listed report numberCE2012 AVE8006S mark affixed 2012 Signed Date ...

Page 11: ...cal earth continuity 5 Electrical Insulation 6 Electrical Flash Test Functional 1 Visual acceptance 2 Appropriate control function 3 Indicators Quality Control Inspector Dynalab Corp 175 Humboldt Street Suite 300 Rochester NY 14610 Tel 800 334 7585 Fax 585 334 0241 www dynalon com E dynaloninfo dyna labware com ...

Reviews: