A 3173A - HDMI to Component and Stereo Audio Converter
3
3.0 CONNECTION AND OPERATION
Before installation, please make sure all devices you wish to connect have been turned off.
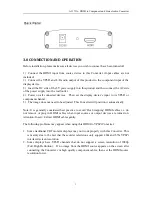
1) Connect the HDMI input from source device to this Converter. (Input cables are not
included)
2) Connect the YPbPr and L/R audio output of this product to the component input of the
display device.
3) Insert the DC side of the 5V power supply into this product and then connect the AC side
of the power supply into the wall outlet.
4) Power on all connected devices. Then set the display device’s input to its YPbPr or
component channel.
5) The image does not need to be adjusted. This Converter will position it automatically.
Note: It is generally considered best practice to avoid ‘Hot Swapping’ HDMI cables i.e. do
not remove or plug in HDMI cables when input sources or output devices are turned on.
Attention: Insert / Extract HDMI cables gently.
The following problems may appear when using this HDMI to YPbPr Converter:
1.
Some traditional CRT monitor displays may not work properly with this Converter. This
is mainly due to the fact that these older televisions only support 480i and 576i YPbPr
interlaced screen resolution.
2.
Some displays have YPbPr channels that do not support a screen resolution of 1080p
(Full High Definition). If no image from the HDMI source appears on the screen after
connecting the Converter via high quality component cables, then set the HDMI source
resolution lower.


