Leaders in Pipelin
e Survey Systems
C
C
C
-
-
-
S
S
S
C
C
C
A
A
A
N
N
N
2
2
2
0
0
0
1
1
1
0
0
0
SYSTEM MANUAL Version 6.03i
77
To update the Detector, select the appropriate COM port (see Appendix 1) and turn on the
Detector. As shown on the Upgrader program, select
MENU > SETUP > PROG
on the
Detector. Once selected using the the user will be prompted for a security code. This is
the code that is shown on the Upgrader screen (shown above as 12345678) and is simply
used to ensure that an upgrade is intended. Once entered press
CONTINUE
on Upgrader
and the data will be uploaded to the Detector. Once complete, the Detector will re-boot
and during this time is it important that you
do not turn off the Detector
as this could
result in corrupted data which will require a factory reset by Dynalog. Therefore, it is
recommended to ensure that the Detector’s batteries are charged before upgrading.
NOTE:
Upgrading can delete some or all of the surveys saved to the Detector’s internal
memory. Always download any data before upgrading.
15. DIAGNOSTICS
If it is suspected that there is a fault with the Detector, the
Diagnostics
program can be
used to interrogate and confirm the correct functioning of the various sub-systems within
the Detector. If an error is found, a report is produced which can be sent to Dynalog for
assessment and further advice.
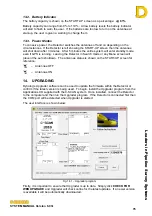
The Diagnostics program can be installed from the Applications CD supplied with the C-
SCAN system, located under
OTHER FILES / PROGRAMS
. Once installed, connect the
Detector to the computer and then start the Diagnostics Program. Ensure that the
Detector is connected to the computer before running Diagnostics so that the correct COM
port is made available (see Appendix 1).
Once the correct COM port
has been established, turn on
the Detector and wait for it to
complete its checks and
reach the START screen.
Do
not press any keys on the
Detector
. Now press
CONTINUE
on the
Diagnostics Program.
Fig 15.1 – Diagnostics program
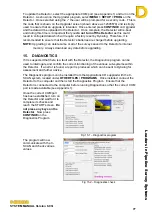
The program will now
communicate with the C-
SCAN and check various
values.
Fig 15.2 – Diagnostics check


