4
G
Copyright © 2014 - 2022 by Dynamic Projection Institute GmbH. All rights reserved. http://www.dynamicprojection.com
Weights and dimensions shown are approximate. Specifications and appearance are subject to change without notice.
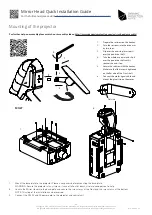
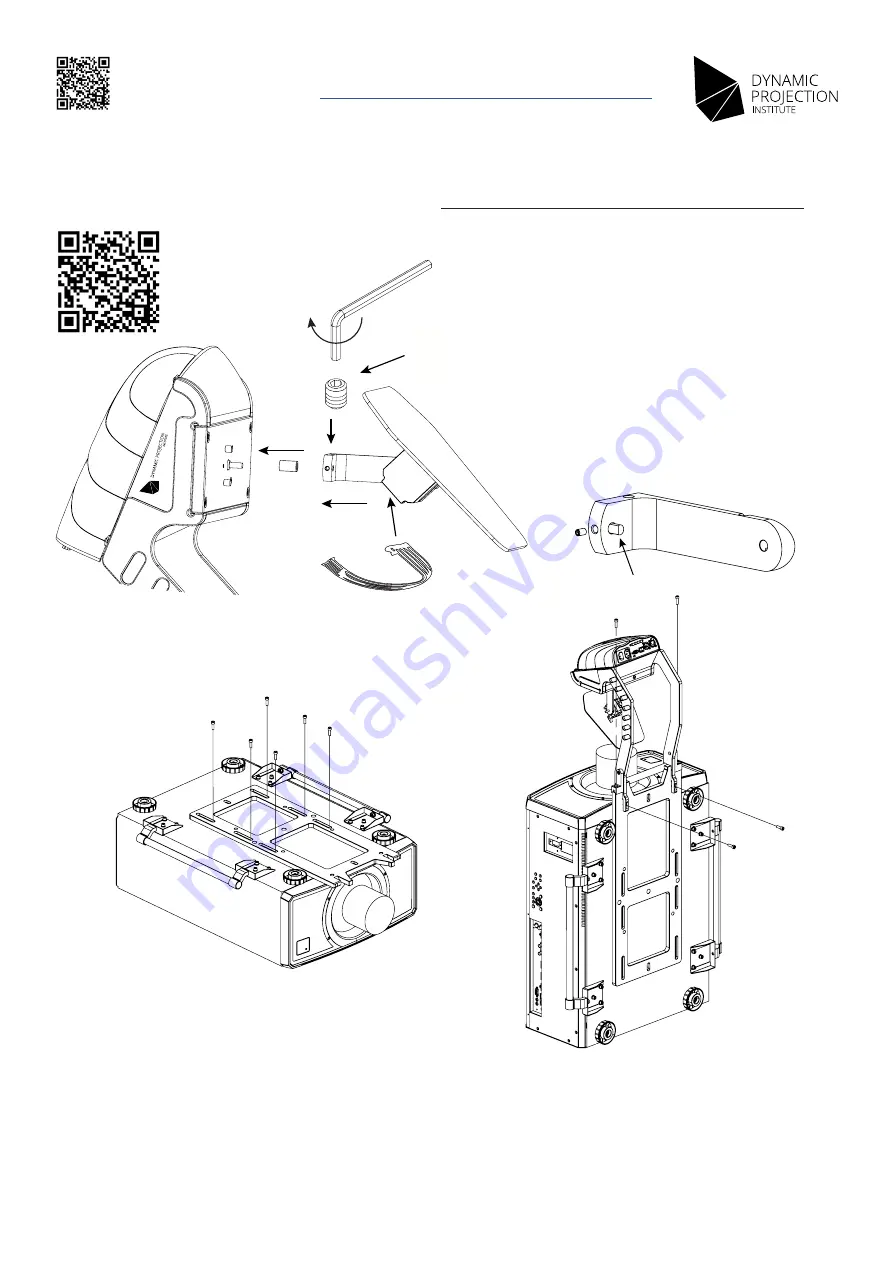
Mounting of the projector
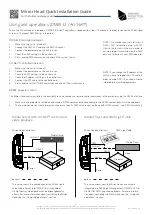
For further help on assembly please watch our assembly videos: http://www.dynamicprojection.com/mirror-head-assembly/
1
2
3
5
6
4
7.
Mount the base-plate to the projector. Please use spacers before mounting the base-plate.
WARNING: Secure the projector at any time so it cannot fall out or down. Use a second person to help.
8.
Lock-in the Mirror Head into the base-plate and secure the two screws at the front and the two screws at the bottom.
NOTE: This step of the installation can be reversed.
9.
Connect the RS232 and AC power-cord to the projector and control unit.
1.
Prepare the setscrew on the hex key.
2.
Turn the setscrew into the drive arm
by two turns.
3.
Slip over the end-stop (brass part)
over the pan drive shaft.
4.
Take the whole drive arm end slip it
over the pan drive shaft until it
reaches the end-stop.
5.
Secure the setscrew with the hex key.
Make sure that the screw is tightened
on the flat side of the D-cut shaft.
6.
Connect the motor signal cable and
mount the glue strip on the motor.
MH27
1
2
3
5
6
4
Flat side
7.
8.
QIG - Version 2.6
Mirror Head Quick Installation Guide
For the full manual please visit
http://dynamicprojection.com/mirror-head-assembly

