background image

17

üFit

 CUSTOMIZABLE CONTOUR SUPPORT BACK

1.


Customization


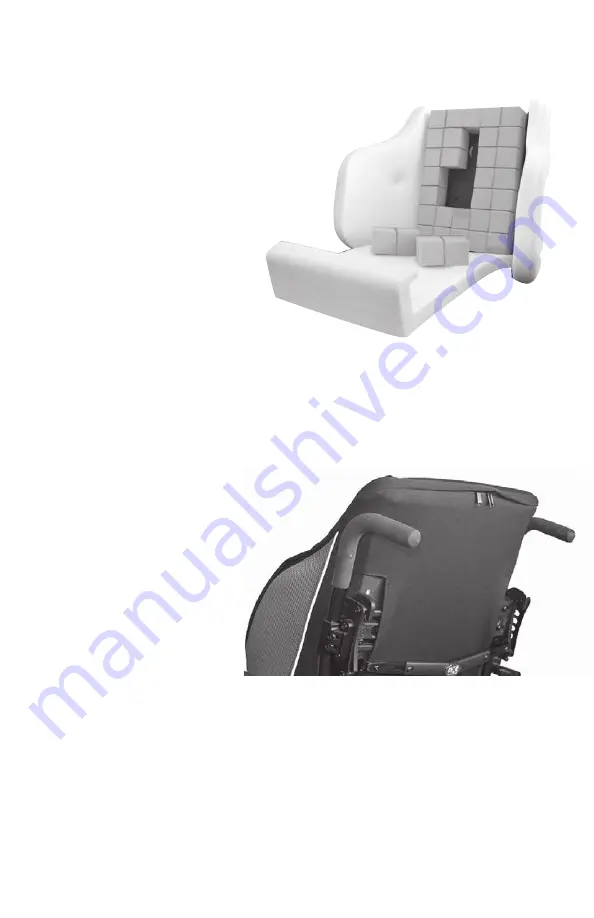
üCube

 sets can be removed 

completely, or cut for greater 

customization.  To remove/cut, 

first unzip both zipper pulls on 

the cover and fold the front of 

the cover down.  Remove the 

center foam overlay, to expose 

the üCube

.  To remove the 

üCube

, grasp the cube set by 

the darker coloured closed cell 

foam base and gently pull up – 

the cube will release from the 

back shell.
If cutting, cut the üCube

 once it has been removed, and re-install on back 

shell by aligning the studs (white pins on the underside of the üCube

) with 

the holes and pushing back into place until an audible click is heard.  Once 

all desired customization is complete, re-install the center foam overlay and 

zip-up the cover.

2.  Installing Head Support

To install a head support on the üFit

,  

you must remove the cover fabric that 

overlays the slots which the 

head support is installed 

in.  Coneveniently, there 

is a punched template to 

follow.  Simply connect 

the ends of the existing 

cuts with scissors or a 

knife to remove the 

rectangle of fabric. 
Next remove the back cover and then the üCube

 that are in the area 

around the mounting slots.  Install the mounting hardware and adjust the 

angle as desired by rotating the bracket slightly either clockwise or counter 

clockwise.  
Reassemble the üCube

 and cover ensuring the mounting hardware fits 

through the hole cut into the cover.

Summary of Contents for nxt Back

Page 1: ...INSTALLATION USERS MANUAL INSTALLATION MANUEL D UTILISATION...

Page 2: ...v hicules automobiles RESNA WC 4 2012 Section 20 Syst mes de si ges pour v hicules automobiles Il est recommand d utiliser un appui t te lorsque le dossier est utilis pour le trans port dans un v hicu...

Page 3: ...the Backrest 12 Retrait du dossier Removing the Backrest Cover for Washing 12 Retrait de la couverture du dossier pour le lavage Installing Pelvic Lumbar or Lateral Supports 13 Installation de suppor...

Page 4: ...LEFT CLAMP PART NO ITEM NO DESCRIPTION QTY CLAMP NIB 1002 1 G3 CLAMP INNER 1 NIB 1003 2 G3 CLAMP OUTER 1 NIB 0999 3 G3 MOUNTING BRACKET QR 1 NIB 1001 4 G3 CLAMP PLATE 1 NIB 0791 5 M6 FLAT WASHER 2 NI...

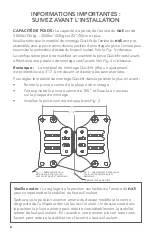
Page 5: ...of and behind the back canes To set the Quickfit mounting hardware in the forward most position Remove the cane clamp from the mounting plate Rotate the cane clamp 180 and re attach it to the mounting...

Page 6: ...tirer la pince canne de la plaque de montage Faites pivoter la pince canne de 180 et fixez la nouveau sur la plaque de montage Installez la pince comme indiqu dans Fig 2 6 3 7 8 BACK POST CENTRELINE F...

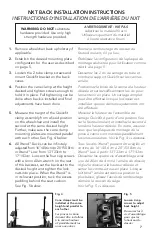
Page 7: ...ition fixe sur le fauteuil roulant et installez le second la m me hauteur d sir e En outre assurez vous que les plaques de montage de la pince canne sont mont es parall lement les unes aux autres Voir...

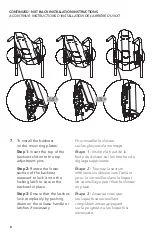
Page 8: ...secure the backrest in place Step 3 Ensure that the latches lock completely by pushing down on the release handle or latches if necessary Pour installer le dossier sur les plaques de montage tape 1 I...

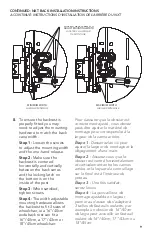
Page 9: ...n satisfied tighten screws Step 4 The width adjustable mounting hardware allows the backrest to fit 3 sizes of wheelchair ie a 16 40cm wide back rest can fit a 16 40cm a 17 43cm or 18 45cm wheelchair...

Page 10: ...the wheelchair While the client is seated and supported in the wheelchair loosen the depth screws on the mounting plate and set to the desired position Tighten all screws to lock the backrest in posit...

Page 11: ...T DRoIT vIS DE R gLAgE DE pRofoNDEuR INCLINAISoN SERRAgE Du TuBE LAT RAL A CONTINU INSTRUCTIONS D INSTALLATION DE L ARRI RE DU NXT 9 POUR VERROUILLER LE LOQUET D PLACEZ CETTE VIS DANS LE TROU ADJACENT...

Page 12: ...the backrest off the upper pins to remove completely Pour retirer le dossier du fauteuil roulant tape 1 Soulevez le levier de d gagement d une main pour lib rer les loquets poussez le bas de l arri re...

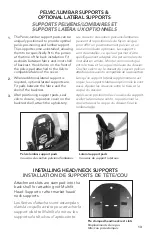
Page 13: ...nner shell of backrest Hook Velcro on the front of the pelvic pad attached to the Velcro compatible fabric of the cover Les coussins de soutien pelviens lombaires peuvent tre positionn s de fa on uniq...

Page 14: ...ed symmetrically on the back but may be asymmetrical if required Ajuster l arri re pour assortir la largeur de la chaise L arri re Armadillo est disponible dans des tailles pour adapter des largeurs d...

Page 15: ...aterals to be in nitely adjustable between their most inner and outer positions only limited by the postural requirements of the occupant of the wheelchair and any structural components of the wheelch...

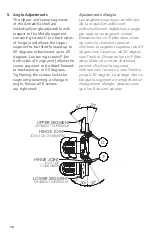
Page 16: ...egr s vers l avant ou de 20 degr s vers l arri re Desserrer les vis F des deux c t s du joint de charni re permet d incliner le segment inf rieur vers l avant ou vers l arri re jusqu 30 degr s Le serr...

Page 17: ...into place until an audible click is heard Once all desired customization is complete re install the center foam overlay and zip up the cover 2 Installing Head Support To install a head support on th...

Page 18: ...jusqu entendre un clic audible Une fois que toute la personnalisation souhait e est termin e r installez le rev tement de mousse central et zippez le couverture 2 Installation du support de t te Pour...

Page 19: ...d prior to processing a warranty claim Le support dorsal Seating Serie nxt a une garantie limit e de 24 mois compter de la date de livraison l acheteur d origine Si un d faut de mat riel ou de fabrica...

Page 20: ...Dynamic Health Care Solutions T 866 875 2877 F 866 875 2878 www DynamicHCS com By...

Reviews: