7
• E
Q U
I P P
E D W I
T H G E C K O ' S E X C L
U S I V
E •
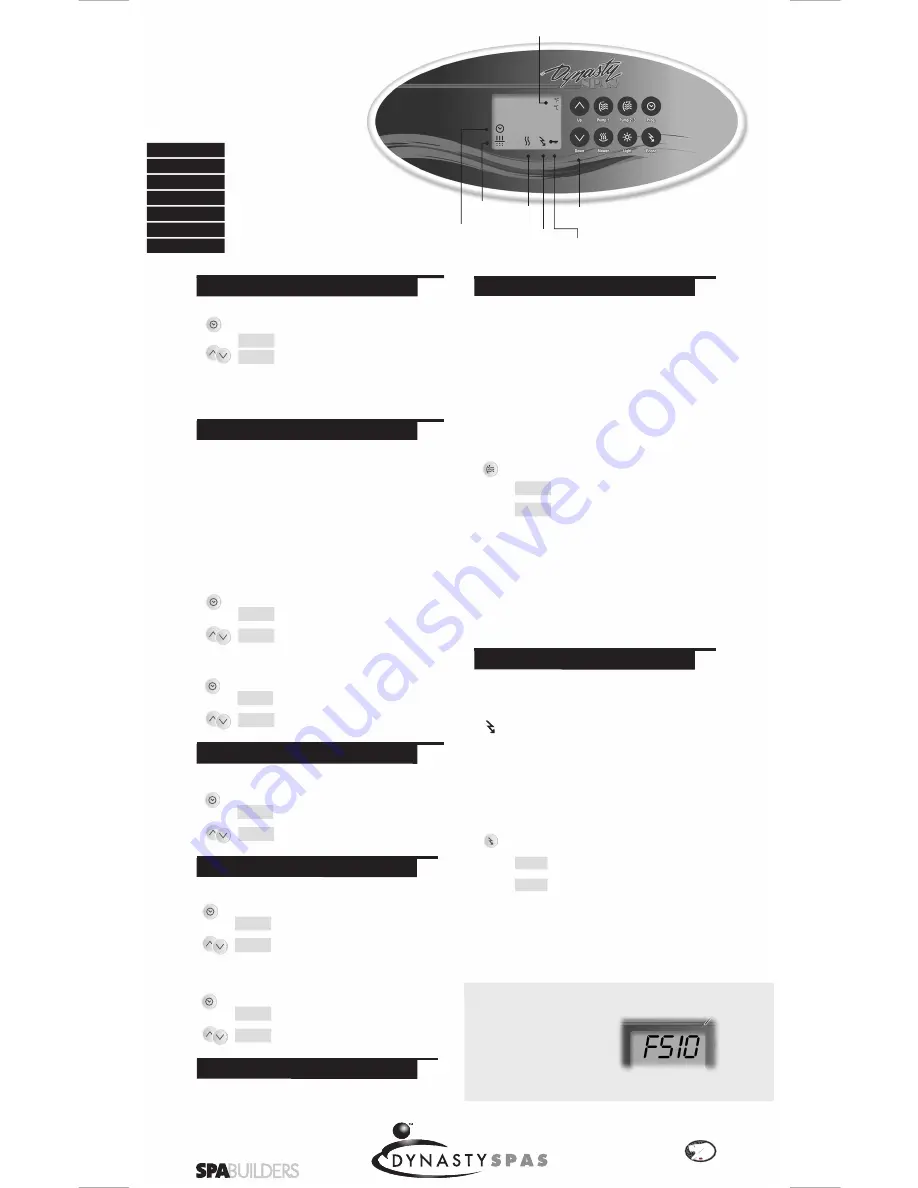
Smart
Winter
Mode
TM
9919-100494-B
Lock
icon
Temperature
unit
Programming Mode
icon
Filter Cycle
icon
Heater
icon
Economy Mode
icon
Up & Down
arrows
Step
Programming
Sequence
Step 1
Step 2
Step 3
Step 4
Time of day
Filter cycle start time
Filter cycle duration
Filter cycle frequency
Summary of control panel parameters
FSxx
Filter cycle start time
Fdxx
Filter cycle duration
FFxx
Filter cycle frequency
ESxx
Economy mode start time
Edxx
Economy mode duration
LocX
Control pad lockout
Step 5
Economy mode start time
Step 6
Economy mode duration
Step 7
Storing settings in memory & returning to Normal mode
Economy mode
Press
Econo
key to switch from Normal mode to Economy
mode. To save energy, the Economy mode Set Point is 20˚F
(11˚C) below the Normal mode Set Point.
The "Economy Mode" icon lights up when Economy
mode is on.
There are 3 available Economy operating modes:
noEc:
No Economy mode
Ec 1:
Economy mode always on
Ec 2:
Economy mode on during a programmed
number of hours (
see Steps 5 & 6*
)
Selecting the desired Economy mode:
1- Press and hold
Econo
key for
more than 2 seconds.
2- The display will show the current
mode (noEc, Ec 1 or Ec 2).
3- Keep key pressed down until the
desired mode is displayed.
After 5 seconds, the new setting will be programmed.
Ec 1
noEc
Step 1- Time of day
Setting the time:
1- Enter Programming mode by holding
Prog.
key pressed down for 2 seconds.
2- The display will show the current time.
3- Use
Up
and
Down
arrows to change
the hours.
4-
Prog.
key a second time to select the
minutes.
5- Use
Up
and
Down
arrows to change
setting.
11:43
pm
10:25
am
The system automatically performs two filter cycles per day, at
12-hour intervals. During the filter cycle, Pumps 1 & 2 and the
blower will run the first minute, then Pump 3 will run for one
minute. Pump 1 will then run at low speed for a programmed
number of hours. The "Filter Cycle" icon lights up when a filter
cycle is on.
To program a filter cycle, you must enter: 1) the time you want
the cycle to start and 2) the duration of the cycle. If no filtering is
required, the duration should be set to "0". For continuous
filtering, the filter cycle duration should be set to "12:00".
Setting filter cycle start time:
1- Press
Prog.
key a third time.
2- The display will show
FSxx
, with "xx"
representing the starting hour.
3- Use
Up
and
Down
arrows to change
setting.
Setting filter cycle duration:
1- Press
Prog.
key a fourth time.
2- The display will show
Fdxx
, with "xx"
representing the duration in hours.
3- Use
Up
and
Down
arrows to change
setting.
Steps 2 & 3- Filter cycle start time & duration
FS12
FS01
Fd12
Fd00
Setting filter cycle frequency:
1- Press
Prog.
key a fifth time.
2- The display will show
FFxx
, with "xx"
representing the frequency per day.
3- Use
Up
and
Down
arrows to change
setting.
Step 4- Filter cycle frequency
FF04
FF01
Step 7- Storing settings in memory
Press
Prog.
key an eighth time to store settings in the system's
non-volatile memory and to return to Normal mode.
Steps 5 & 6- Economy mode start time & duration*
Setting Economy mode start time:
1- Press
Prog.
key a sixth time.
2- The display will show
ESxx
, with "xx"
representing the starting hour.
3- Use
Up
and
Down
arrows to change
setting.
Setting Economy mode duration:
1- Press
Prog.
key a seventh time.
2- The display will show
Edxx
, with "xx"
representing the duration in hours.
3- Use
Up
and
Down
arrows to change
setting.
ES08
ES10
Ed04
Ed01
This function allows you to prevent unauthorized parameter
setting of the unit. This feature is especially helpful when young
children have access to the keypad.
There are two modes you can choose from:
Full
lock or
Partial
lock.
Full
lock means that all keypad functions are locked.
Partial
lock means that the basic functions of the spa will remain accessi-
ble (pumps, blower and light), but it will be impossible to change
the temperature Set Point, to override the Economy mode or
to enter the Programming mode.
When control pad is locked, the "Lock" icon will be displayed.
Locking your digital control pad:
1- Press and hold
Pump 1
key for
5 seconds.
2- The display will show
LocP
, with "P"
representing
Partial
lock.
3- Release the key and the keypad will be
in
Partial
lock mode. Keep key pressed
down for 5 more seconds if you want
to be in
Full
lock mode. The "LocF"
message will then be displayed.
When control pad is locked, all automatic functions of the system
run as usual. If a key is pressed down, a "LocP" or "LocF"
message will be displayed for 1 second. To unlock the keypad,
simply press and hold
Pump 1
key again for 5 seconds.
When control pad is unlocked, the "Ulock" icon will be displayed.
Digital control pad lockout
LocP
LocF


