MICroCurrenT InsTruCTIons
DYNATRON SOLARIS
®
PLUS SERIES | SERVICE MANUAL REV. 6 | AUGUST 29, 2017
52
Detailed Microcurrent Setup
Before setting up a Microcurrent treatment with electrodes, attach a lead wire with two electrodes to CH 1. For a probe
treatment, connect the optional MULTISTIM PROBE to the STIM OUTPUT jack on the right-side of the device. When a
MULTISTIM PROBE treatment is in progress, Channel 1 is not available for any other treatment.
1. Press the MICRO (Microcurrent) Key.
After pressing the MICRO key, the default settings for an electrodes pads treatment are automatically selected.
Microcurrent Quick Setup
1. Press the MICRO key. Channel 1 for electrodes is automatically selected.
2. PROBE TREATMENT. Insert the optional MultiStim probe into the STIM OUTPUT jack. Use the
DELIVERY toggle key to select PROBE. Selections are illuminated GREEN.
3. Choose POLARITY (Positive, or Negative. Bipolar selection available only for electrode treatments).
4. Choose POLARITY (Positive, Negative, or Bipolar). Note: Bipolar is not available in when inProbe mode.
5. CONDUCTANCE BAR: PAD: The CONDUCTANCE BAR may be turned ON or OFF by using the COND
toggle key. PROBE: Turning the Audible Tone OFF in Probe mode will turn off the Conductance Bar.
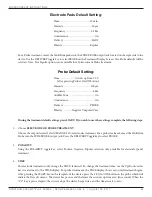
6. FREQUENCY. Using the MODE toggle key select FREQ. Use the right-side UP/DOWN arrow keys to
change FREQUENCY if desired.
7. INTENSITY. Using the INTENSITY arrow keys or the (+) & (-) switch in the probe handle, change the
INTENSITY, if desired.
8. TIME. For electrode treatments only, change the TIME by using the TIME ARROW keys.
9. VOLUME. The Audible Tone volume can be adjusted from 0 (off) to 10 for a Probe Treatment after selecting
VOLUME in the MODE window.
10. Press START.
11. STOP. Press and hold the FUNCTION and press the STOP key to stop only the focus treatment appearing
in the Treatment Screen. Pressing STOP alone, stops all treatments operating on the device. Using the
TIME arrow keys to bring treatment time to zero will also stop a treatment.

