background image

111

Step-by-Steps

DynaWrite Reference Guide 

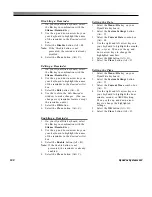
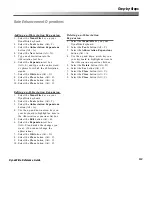
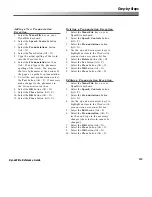
Adding a New Macro

1.

Select the 

Menu/File

key on your 

DynaWrite keyboard.

2.

Select the 

Tools

button (Alt + T).

3.

Select the 

Macros

button (Alt + M).

4.

Select the 

Add

button (Alt + A).

5.

Use the up and down arrow keys to 
scroll and highlight an available 
operation in the 

Macro building

list 

box.

6.

Select the 

Add

button (Alt + A).

7.

Use the tools in each popup window  
to insert specific files, text, or other 
operations.  The 

OK

button (Alt + O) 

in each window saves the information 
and returns you to the 

Edit Macro

menu.  

Cancel

(Alt + C) returns you 

to the 

Edit Macro

menu without 

saving new information.

8.

You may continue to use the same 
procedure to add more steps to the 
macro.  If you need to rearrange 
steps, select the 

Steps in this macro

(Alt + S) box, use the arrow keys to 
highlight steps, and then select the 

Move up

(Alt + U), 

Move down

(Alt + N), and 

Delete

(Alt + D) buttons

to move items in the list.

9.

Select the 

OK

button (Alt + O).

10. Enter a name for the macro into the 

text box.

11. Select the 

OK

button (Alt + O).

12. Select the 

Close

button (Alt + C).

13. Select the 

Close

button (Alt + C).

14. Select the 

Close

button (Alt + C).

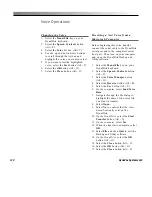
Macro Operations

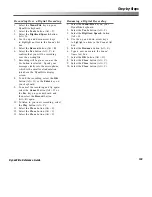
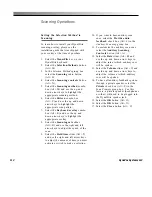
Deleting a Macro

1.

Select the 

Menu/File

key on your 

DynaWrite keyboard.

2.

Select the 

Tools

button (Alt + T).

3.

Select the 

Macros

button (Alt + M).

4.

Use the up and down arrow keys 
to highlight the name of a macro in 
the 

Macros

list box.

5.

Select the 

Delete

button (Alt + D).

6.

Select the 

Yes

button (Alt + Y).

7.

Select the 

Close

button (Alt + C).

8.

Select the 

Close

button (Alt + C).

9.

Select the 

Close

button (Alt + C).

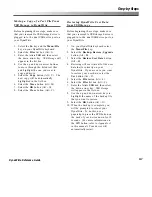
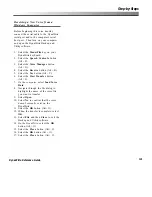
Editing a Macro

1.

Select the 

Menu/File

key on your 

DynaWrite keyboard.

2.

Select the 

Tools

button (Alt + T).

3.

Select the 

Macros

button (Alt + M).

4.

Use the up and down arrow keys 
to highlight the name of a macro in 
the 

Macros

list box.

5.

Select the 

Edit

button (Alt + E).

6.

Use the features of the 

Edit Macro

menu to make any necessary changes.

To add a step to the macro,

highlight 

an operation in the 

Macro building

list box and then select the 

Add

button (Alt + A).

To delete a step in the macro,

highlight

the  operation in the 

Steps in the new 

macro

list box and then select the 

Delete

button (Alt + D).

To rearrange steps in the macro,

highlight operations in the 

Steps in the

macro

list box and then select the 

Move Up 

(Alt + U) or 

Move Down

(Alt + D) buttons.

7.

Select the 

OK

button (Alt + O).

Summary of Contents for DYNAwrite

Page 1: ...Reference Guide ...

Page 2: ...splays menus etc Although every precaution has been taken in the preparation of this book the publisher assumes no responsibility for errors or omissions For information write to DynaVox Systems LLC 2100 Wharton Street Pittsburgh Pennsylvania 15203 USA The European Authorized Representative is Sunrise Medical Ltd High Street Wollaston West Midlands DY8 4PS England DynaWrite VeriVox DynaBeam Access...

Page 3: ...sage Window The DynaWrite Keyboard DynaWrite Menus The DynaWrite Main Menu Menu 1 Tools Menu 1 1 File Manager Menu 1 2 Reminders Menu 1 2 1 Edit Reminder Menu 1 3 Macros Menu 1 3 1 Edit Macro Menu 1 4 Abbreviation Expansions Menu 1 5 Dictionary Menu 1 5 1 Edit Word Menu 1 6 Phone Menu 1 6 1 Phone Book Menu 1 7 ECU Menu 1 8 Digitized Speech Menu 2 Speech Controls 1 4 12 12 13 16 16 17 20 28 29 31 3...

Page 4: ...reviation Expansions Menu 7 Text Editing Options Menu 8 User Preferences Menu 9 Help Settings Menu 10 Input Output Device Settings Menu 11 System Settings Step by Steps Basic Device Power Save Mode and Password Operations Be the Keyboard and Xfer Operations Date Time and Reminder Operations Digitized Speech Operations Environmental Control Operations File Operations Macro Operations Rate Enhanceme...

Page 5: ...ling the Power Macintosh or iMac Version Launching the Power Macintosh or iMac Version Backing Up User Data From Your DynaWrite Mac Restoring User Data to Your DynaWrite Mac Upgrading Your DynaWrite Software Mac Appendix A Resetting the DynaWrite Device Appendix B Battery Care Appendix C Product Support Appendix D DynaWrite Specifications Appendix E Proper Disposal of a DynaWrite Appendix F Radio ...

Page 6: ...iv DynaVox Systems LLC ...

Page 7: ... is subject to the following two conditions 1 this device may not cause harmful interference and 2 this device must accept any interference received including interference that may cause undesired operation To ensure safe operation of your device you should take care to note the following cautionary items Caution Your DynaWrite contains a Lithium Ion battery A safety hazard may develop when the ba...

Page 8: ...log on to www dynavoxsys com and select the Knowledge Base 24 7 Online Tech Support logo Our website also features detailed information about our customer support services If you are unable to find the answers you need on our website the Customer Support Center can be reached at 1 800 344 1778 Training and programming assistance as well as technical troubleshooting support are available Monday thr...

Page 9: ...ow display and also contains information about its basic operations The Menus section lists each menu in the order it appears in the software includes an illustration and provides a detailed explanation of its function A path for accessing each menu is also listed In the Step by Steps section DynaWrite operations are broken down into numbered sequences of steps These steps can be used to quickly c...

Page 10: ...Write has numerous options for customized synthetic speech You may select from three new VeriVox voices Michael Sarah and Jamie or choose from nine different DECtalk voices The speech rate and volume of each voice can be adjusted to meet your individual preferences For more information about customizing DynaWrite s synthetic speech features please see the entry for Menu 2 Speech Controls in the Me...

Page 11: ...ng customized macros please refer to the Macro Operations step by steps or the manual entry for Menu 1 3 Macros What System Features Can Be Used to Accelerate Communication DynaWrite s rate enhancement features can help you compose messages quickly and efficiently These features which include word prediction context prediction flexible abbreviation expansion and abbreviation expansion work to redu...

Page 12: ...ion feature can be further enhanced with context prediction a feature that anticipates word selections based on the grammatical structure of the sentence you are typing For context prediction to function efficiently all dictionary entries must be assigned the correct part of speech Flexible abbreviation expansion is a rate enhancement feature that is especially helpful for names and long phrases I...

Page 13: ... specific abbreviations for longer words and phrases thereby reducing the number of letters you must type for message composition Once you have defined a specific abbreviation in the DynaWrite software the DynaWrite will automatically expand the abbreviation into the full word or phrase whenever the abbreviation is typed and followed with a space For example you may define JLS as an abbreviation f...

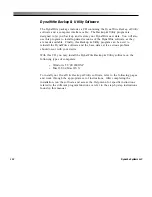
Page 14: ...The hockey game is about to start If you would like to read more about macros see the entry for Menu 1 3 Macros or the Macro Operations step by steps in this manual For a demonstration of the macros feature please refer to your DynaGuide training CD Can the System Be Integrated With Computers Your DynaWrite device was shipped with a CD that includes DynaWrite Backup and Utility software When this ...

Page 15: ...mputer Xfer is perfect for quick tasks like emails as notes and responses can be quickly composed in your DynaWrite Message Window and then easily sent to your email server For more information on using Be the Keyboard and Xfer check the Keyboard entry in the DynaWrite Basics section of this manual as well as the Be the Keyboard and Xfer Operations step by steps The DynaWrite can interface with co...

Page 16: ...s to meet your needs Instructions for working with text files can be found in the manual entry for Menu 1 1 File Manager as well as in the File Manager Operations step by steps in this manual Can the System Be Used to Offer Reminders Your DynaWrite device can be programmed to automatically remind you of important events in your daily schedule Reminders can be scheduled to be presented one time onl...

Page 17: ... selecting the Help key on your DynaWrite keyboard To learn more about using DynaWrite system help see the Keyboard entry in the DynaWrite Basics section of this manual A DynaGuide training CD was also included with your device This CD features step by step instructions for many DynaWrite procedures as well as feature demonstrations You can also find DynaWrite information on our company s website ...

Page 18: ... your device What s in the Box Carefully remove your DynaWrite and other items from the box Your DynaWrite device was shipped with the following items DynaWrite device DC power adapter charger 12 volt DC power cord shoulder strap handle strap DynaWrite Backup and Utility software CD computer interface cables USB and Serial DynaWrite Reference Guide manual product registration card ...

Page 19: ... in Figure 1 In the upper left corner of the DynaWrite is the circular Power button This button is used to turn the device on and off In the upper right corner there is a small light emitting diode LED which will light up only when the device s battery is being charged A small oval indentation can be found just above the DynaWrite display screen This indentation has a small opening for the device ...

Page 20: ...ynaWrite s infrared hardware When you teach your DynaWrite the infrared signals for controlling an appliance like a TV or VCR you ll aim the regular remote control for the appliance at this window When you use your DynaWrite as a remote control device the infrared signals will be transmitted through this window If you look at the front side of the device you will see five ports each labeled with a...

Page 21: ... used to connect your device to a computer via serial cable for backing up restoring or upgrading DynaWrite software This port can also be used to connect your DynaWrite to a printer The dual USB host port is on the far right of the front side This port should be used as the host connection to other equipment such as phones external keyboards and printers The dual USB host port can be seen in Figu...

Page 22: ...the towel with a mild window cleaner to remove fingerprints food particles and dust It is important however to be careful not to get any liquid near the keyboard Do not use tape or stickers on the display screen keyboard or case as they are difficult to remove and may damage the surface Avoid getting your DynaWrite unit wet Never submerge it in water e g dish water If your unit accidentally gets w...

Page 23: ...xes will fill with suggested words and phrases as the DynaWrite anticipates your intended text based on the characters you type You can use the Word1 Word2 Word3 Word4 and Word5 keys on your keyboard to select the individual boxes Time and date are also included in the display In addition small icons will appear at the bottom of the display to indicate specific states or settings This icon indicat...

Page 24: ... guide section for Menu 3 Keyboard Controls This icon is displayed whenever the DynaWrite has been set to require a longer hold time for key selections Refer to the Menu 3 Keyboard Controls section to learn more about hold time Customizing Message Window Font DynaWrite s unique software enables you to customize your Message Window font to suit your needs and preferences You may choose from three d...

Page 25: ... command to undo your last operation in the Message Window Selecting your keyboard s Ctrl and Z keys will undo the last keystroke you made Making the same selection again will redo the keystroke Here is a quick overview of these keyboard commands Action Required Keystrokes Copy Ctrl C Cut Ctrl X Paste Ctrl V Select a Character Shift or Select Lines Shift Home or End Undo Undo key or Ctrl Z Move to...

Page 26: ...Beam Access If you have not already selected a port for this connection a Select Port window will open when you select the BeKey ECU key You may also choose which type of connection you want to use for the Be the Keyboard mode in the Keyboard Controls menu Once this selection has been made and a connection is established between your DynaWrite device and your computer the DynaWrite keyboard will b...

Page 27: ...f the key face These small labels represent each key s assigned function when the number pad is active In Be the Keyboard mode the number pad keys can also be used as a mouse controlling the movement of a computer cursor For more information using the number pad for mouse control please refer to the instructional documentation for your computer When Be the Keyboard mode is active the customized co...

Page 28: ...ease refer to the entry for Menu 1 6 Phone and the documentation that came with your DynaVox Cabled Phone Module Chat The Chat key allows you to temporarily interrupt the composition of text in the Message Window If you are typing text into the message window and you wish to briefly speak a different message select the Chat key A new Message Window will appear over the one you have been working in...

Page 29: ...to Link Back Forward and Close see Figure 7 You may select one of these buttons by either tabbing to the button and then selecting the Enter key or by selecting the Alt key in combination with the button s accelerator The accelerator is indicated by the underlined letter in the button s name System help topics are listed in an outline form The Next Link Alt N button can be used to scroll through t...

Page 30: ...lease refer to the entry for Menu 1 3 Macros and the Macro Operations step by steps in this manual Menu File Selecting the Menu File key brings up the Main menu DynaWrite s top level software menu All other menus can be accessed from this point For more information about the DynaWrite Main menu please refer to the entry for the DynaWrite Main Menu in this reference guide When the Menu File key is ...

Page 31: ... one page of Message Window text Selecting the Pg Dn Print key in combination with the Function key Fn begins the process of printing a DynaWrite file or Message Window text If your printer settings have not already been defined a Printer Settings window will appear For more detailed information on printing from DynaWrite refer to the File Operations step by steps in this manual Search The DynaWri...

Page 32: ...ains a When Speak is selected group box The check boxes in this group box allow you to set the DynaWrite to speak only the last sentence or paragraph in the message window or to speak the entire contents of the message window Spell The Spell key allows you to easily locate and correct spelling errors in your Message Window text The spell checker will automatically return to the beginning of the te...

Page 33: ...speaks Word1 5 There are five word keys on your keyboard Word1 Word2 Word3 Word4 and Word5 These keys correspond to the word prediction boxes below the Message Window When DynaWrite s word prediction feature is activated DynaWrite will try to anticipate your words as you type For more information about word prediction refer to the entry for Menu 6 Rate Enhancement Controls These anticipated words ...

Page 34: ...ct an item hold down on your keyboard s Alt key and select the item s accelerator For example in the Main menu there is a Tools button The underlined letter T is the button s accelerator To select this button select the Alt and T keys at the same time This method is used throughout this manual Selections also can be made by using the Tab and Enter keys In a menu each time you select the Tab key a ...

Page 35: ... Speech Controls button which takes you to the Speech Controls menu The options in this menu can be used to customize the speaking voice of your DynaWrite device Keyboard Controls Alt K Selecting this button takes you to the Keyboard Controls menu In this menu you may select the specific attributes of your DynaWrite keyboard Backup Restore Update Alt B This button takes you to the Backup Restore U...

Page 36: ...r saving or printing a record of the current user preferences Help Settings Alt N The Help Settings button is the first button in the last row Selecting this button brings up the Help Settings menu which allows you to customize the appearance and presentation of the system messages and helpful hints System messages are presented to update you on device conditions like low battery states while help...

Page 37: ... options for sending receiving and printing DynaWrite files Reminders Alt R The next available button is the Reminders button Selecting this button accesses the Reminders menu which gives you options for programming your DynaWrite device to send you customized reminders whenever you need them Macros Alt M When you select the Macros button the Macros menu is opened The macros option allows you to p...

Page 38: ...g this button will open the Phone menu This menu provides tools for programming your DynaWrite to work with a cellular telephone ECU Alt E The ECU button is the first button in the bottom row of the Tools menu Choosing this button accesses the ECU menu which provides tools for teaching your DynaWrite device to function as part of an X 10 infrared system or as a remote control for commercial applia...

Page 39: ...nting files Steps for saving files to a USB storage device are also included Files Alt I The Files list box contains a list of saved directories and files When this list box is active use the up and down arrow keys on your DynaWrite keyboard to move through the list and highlight selections To open a highlighted directory select the Forward button You may simultaneously select several files in a r...

Page 40: ... through the available directories and files Highlighting the name of a directory and then selecting the Forward button will cause the DynaWrite to open the currently highlighted directory Load Alt L Selecting this button loads the currently highlighted file to the Message Window Loading a file to the Message Window will overwrite any text currently in the Message Window Save Alt S This button all...

Page 41: ...s list box The new directory folder will appear with an active text box for the new directory name Copy Alt Y Selecting the Copy button makes a duplicate of the currently highlighted file Transfer Alt T The Transfer button enables you to transfer specific DynaWrite text files to a computer through a serial cable connection Receive Alt V The Receive button enables you to receive DynaWrite text file...

Page 42: ...perations step by steps in this manual This section also includes specific instructions for enabling and disabling reminders Reminders Alt R The Reminders list box is a directory of all your stored reminders When this list box is active you can use the arrow keys on your keyboard to scroll through the list and highlight items Add Alt A Selecting the Add button takes you to the Edit Reminder menu w...

Page 43: ... you may give a new name to the currently highlighted reminder Disable Enable Alt B When a reminder is highlighted in the Reminders list box selecting the Enable button is like turning on an alarm clock Selecting this button will ensure that the selected reminder occurs as scheduled Once a reminder has been enabled selecting the Disable button is similar to turning the alarm clock off Selecting th...

Page 44: ...bling reminders OK Alt O Selecting the OK button accepts any new changes to the Edit Reminder menu and returns you to the Reminders menu Cancel Alt C Selecting the Cancel button closes the Edit Reminder menu without saving any changes and then returns you to the Reminders menu Name Alt N The Name text box can be used to record the name of the current reminder Time Alt T You can schedule a reminder...

Page 45: ...the appropriate macro and then select the OK button Alt O to return to the Edit Reminder menu The name of the selected reminder will appear next to the Invoke Macro button To close the Select Macro window without saving a selection choose the Cancel button Message Alt M The Message text box can be used to record a text message that will be presented with a DynaWrite reminder Messages can be presen...

Page 46: ...are the selections required to invoke the macro You can also reach the Macros menu by selecting the Macro key on your DynaWrite keyboard Tip For step by step instructions for adding a new macro to your DynaWrite software as well as steps for deleting editing and invoking a macro see the Macro Operations step by steps in this manual Macros Alt M The Macros list box is a directory of all your DynaWr...

Page 47: ...hat you really want to delete the macro Be careful as once you have deleted a macro you cannot get it back Rename Alt R When you choose the Rename button this selection will open a window where you may give a new name to the currently highlighted macro Invoke Alt I Selecting the Invoke button causes the DynaWrite device to carry out the programmed sequence of events in the currently selected macro...

Page 48: ...a list of macro operation components Nine operations can be included in a DynaWrite macro Call someone in phone book Clear the Message Window Dial a number Execute ECU command Insert file in Message Window Insert text in Message Window Pause for x seconds Play a sound and Speak text in Message Window When this list box is active use the up and down arrow keys on your DynaWrite keyboard to move thr...

Page 49: ...d steps can be deleted or rearranged using the other buttons in this menu Move Up Alt U The Move Up button can be selected to move the currently highlighted step in the Steps in this macro list box up one line in the list Delete Alt D The Delete button removes the currently highlighted step in the Steps in this macro list box A confirmation window is not shown when individual macro steps are delet...

Page 50: ...lso be found under Menu 6 1 Abbreviation Expansions Note Before you can use the abbreviation expansion feature you must activate it in the Rate Enhancement Controls menu To do that open the menu and then select the Abbreviation Expansion check box Alt E Tip For more information on creating editing and deleting abbreviation expansions refer to the Rate Enhancement Operations steps by steps in this ...

Page 51: ...ndow where you may make changes to the selected expansion The corresponding abbreviation will be shown but cannot be edited To accept the changed abbreviation expansion select the OK button Alt O To close the window without accepting the changes select the Close button Alt C Save Alt S Selecting the Save button in this menu saves your customized abbreviation expansions and the entire contents of t...

Page 52: ... typing To learn more about DynaWrite rate enhancement features be sure to read the entry for Menu 6 Rate Enhancement Controls in this manual Tip For more information on creating editing and deleting dictionary entries refer to the Vocabulary Operations step by steps in this manual Dictionary entries Alt T The Dictionary entries list box contains an alphabetized list of vocabulary terms A dictiona...

Page 53: ...nu saves the entire contents of the DynaWrite dictionary and your customized abbreviation expansions see Menu 1 4 Abbreviation Expansions for more information to the DynaWrite s flash memory Because this procedure prevents data loss in the event of a device failure it is recommended that you periodically back up your dictionary this way The back up process takes a few minutes however so it is not ...

Page 54: ...ionary menu Word Alt W If you are creating a new dictionary entry the Word text box will be empty until you type in your new word or phrase If you are editing a dictionary entry the selected entry will automatically appear in this box If you are making a change to the word or phrase itself type the change into this text box Part of speech Alt P You may use the Part of speech combo box to assign a ...

Page 55: ...ect plural spelling of that noun should appear in this text box Frequency Alt F The setting in the Frequency text box is an estimated reflection of how often a vocabulary item is used This is an important setting as it affects the order in which dictionary entries are selected by DynaWrite s rate enhancement features When a rate enhancement feature such as word prediction is searching the dictiona...

Page 56: ...e book features please refer to the documentation that accompanied your DynaVox Cabled Phone Module OK Alt O Selecting the OK button accepts any new changes to the Phone menu closes the menu and returns you to the Message Window Cancel Alt C Selecting the Cancel button closes the Phone menu and returns you to the Message Window without saving any new changes Call Alt L Call is the first button in ...

Page 57: ...NO 7 PRS 8 TUV 9 WXY 0 QZ and Unlike other DynaWrite menu features there is no need to hold down the Alt key when dialing a phone number in this menu When you make selections they are entered into the text box immediately above the number pad Type in the telephone number exactly as you would dial a phone Volume from Phone Alt U The Volume from Phone slider allows you to control the volume of incom...

Page 58: ...will be picked up and sent over the phone until the Speak button is selected and the Message Window contents are spoken While the Message Window text is being spoken the microphone is overridden Phone Book Alt B Selecting the Phone Book button opens the DynaWrite Phone Book menu This menu provides capabilities for adding storing deleting and editing telephone numbers in a phone book as well as too...

Page 59: ...t box When this list box is active you can use your up and down arrow keys to move through the items and highlight a selection Your DynaWrite device will arrive with one phone number preprogrammed into the phone book This number is for DynaVox Systems Customer Support Center which is available to answer any questions you may have about your device New Alt N You may create a new phone book entry by...

Page 60: ...ton allows you to change the telephone number of the currently highlighted phone book entry When the Edit button is selected a Phone Edit window will be brought up You may enter the changed phone number into the Number text box Alt N In this window you may change the phone number but not the name under which it is filed Choose the OK button Alt 0 to save the changes and return to the Phone Book me...

Page 61: ...d teaching them to your device refer to the Environmental Control Operations step by steps in this manual This section also contains step by steps for deleting renaming and invoking ECU commands Available commands Alt A The Available commands list box contains a directory of commands that your DynaWrite device has learned to perform Once the list box is selected you can use the arrow keys on your ...

Page 62: ...te to learn to control This procedure isn t necessary for X10 commands as they are pre programmed Delete Alt D The Delete button erases the currently highlighted command When this button is selected a confirmation window will appear asking you to confirm that you want to delete the item Be careful once a command is deleted you cannot get it back Rename Alt R The Rename button takes you to a window...

Page 63: ...own arrow keys on your keyboard to scroll through the list and highlight items New Alt N Selecting the New button brings up a Sound Name text box where you may enter the name of a new sound file Record Alt R Selecting the Record button begins the process of recording a new digital speech file and storing it in your device s database Delete Alt D The Delete button erases the currently highlighted d...

Page 64: ...tly highlighted speech file Transfer Alt T The Transfer button enables you to transfer selected speech files to a computer through a serial cable connection Receive Alt V The Transfer button enables you to transfer selected speech files from a computer to your DynaWrite device by using a serial cable connection Close Alt C Selecting the Close button will exit the Digitized Speech menu and return y...

Page 65: ...rom the list of voices available on your speech synthesizer Once the combo box is active you can use the up and down arrow keys on your keyboard to highlight a voice Speech rate Alt R The Speech rate slider can be adjusted to set the rate in words per minute that the DynaWrite speaks Once the slider is active use the right and left arrow buttons on your keyboard to adjust its position Moving the s...

Page 66: ... The When Speak is selected group box also includes a Clear after Speak check box Alt E When this check box is selected text in the Message Window will be automatically deleted after it is spoken by the DynaWrite Speak on entry Alt K Selecting the Speak on entry check box will cause the DynaWrite to speak each word individually as it is placed into the Message Window Each word is spoken as soon as...

Page 67: ... part of the Backup and Utility software on the CD that accompanied your device If you decide to use a new VeriVox voice it can easily be downloaded from your computer to your DynaWrite To learn about installing new voices please refer to the Voice Manager Operations step by steps in this manual Installed Voices Alt I The Installed Voices list box is a catalog of the synthetic voices that are curr...

Page 68: ...mation window will appear asking you to confirm that you really want to delete the marked file Be careful as once you have deleted a voice it cannot be retrieved unless you transfer it from your computer Close Alt C Selecting the Close button will exit the Voice Manager menu and return you to the Speech Controls menu ...

Page 69: ...e actual spelling and then the phonemic spelling of the exception you are defining This menu also allows you to test the new pronunciation exception Edit Alt E Choosing the Edit button opens the Edit Pronunciation menu where you can change the actual or phonemic spelling of the currently highlighted exception In this menu you can also test your changes Delete Alt D The Delete button erases the cur...

Page 70: ...u check the accuracy of your pronunciation exceptions When selected the Test button will cause the DynaWrite device to speak the currently highlighted exception Close Alt C This button closes the Pronunciations menu and returns you to the Speech Controls menu ...

Page 71: ... pronunciation exceptions refer to the Vocabulary Operations step by steps in this manual OK Alt O Selecting the OK button accepts any new changes to the Edit Pronunciation menu and returns you to the Pronunciations menu Cancel Alt C Selecting the Cancel button closes the Edit Pronunciation menu without saving any changes and then returns you to the Pronunciations menu Word Alt W When you are crea...

Page 72: ...ling jhwpaaluw Use the list of phonemes at the bottom of the menu to help you determine the correct phonemic spelling Test Alt T Selecting the Test button will cause your DynaWrite device to speak the current pronunciation exception so you can check its accuracy Phonemes This list contains phonemes that can be used in your pronunciation exception ...

Page 73: ...t saving any new changes to the Keyboard Controls menu Repeat Rate Alt R The Repeat Rate slider allows you to set the speed at which a keyboard selection will be repeated if the key is held down The position of the slider can be adjusted with the left and right arrow keys on your DynaWrite keyboard Moving the slider to the right toward Fast will speed up the repeat rate Moving the slider to the le...

Page 74: ...r toward Long A longer setting on this slider means that each key will need to be pressed for a longer period of time before a selection takes place A longer hold time can help prevent accidental selections The maximum hold time setting is two seconds Changes made to the Hold Time slider are effective immediately Sticky keys Alt N The sticky keys feature affects the Alt Control Fn and Shift keys o...

Page 75: ... Utility Software section in this manual Backup User Data Alt B Selecting this button begins the procedure for backing up your current DynaWrite data to a computer through a serial cable transfer Restore User Data Alt R Selecting this button begins the procedure for restoring DynaWrite data stored on a computer to your DynaWrite device This process uses a serial cable transfer Upgrade User Data Al...

Page 76: ...ton accepts any new changes to the Selection Methods menu closes the menu and returns you to the Main menu Cancel Alt C Selecting the Cancel button closes the Selection Methods menu and returns you to the Main menu without saving any new changes Selection method You may opt to access your DynaWrite directly through the device s keyboard or by scanning In the Selection Method menu the Keyboard Alt ...

Page 77: ...ontrols menu which includes tools for customizing the way your DynaWrite keyboard responds to individual keystrokes and selections Scanning controls Alt N The Scanning controls button accesses the Scanning Controls menu which lets you customize the way your DynaWrite device will scan menus text and your keyboard ...

Page 78: ...s menu without saving any new changes to the Keyboard Controls menu Repeat Rate Alt R The Repeat Rate slider allows you to set the speed at which a keyboard selection will be repeated if the key is held down The position of the slider can be adjusted with the left and right arrow keys on your DynaWrite keyboard Moving the slider to the right toward Fast will speed up the repeat rate Moving the sli...

Page 79: ... slider toward Long A longer setting on this slider means that each key will need to be pressed for a longer period of time before a selection takes place A longer hold time can help prevent accidental selections The maximum hold time setting is two seconds Changes made to the Hold Time slider are effective immediately Sticky keys Alt N The sticky keys feature affects the Alt Control Fn and Shift ...

Page 80: ...tton accepts any new changes to the Scanning Controls menu closes the menu and returns you to the Selection Methods menu Cancel Alt C Selecting the Cancel button closes the Scanning Controls menu and returns you to the Selection Methods menu without saving any new changes Scanning method Alt M The Scanning method combo box lets you specify the method you want to use to scan Once the combo box is a...

Page 81: ...keyboard configuration that you will be scanning Once the combo box is active you can use the up and down arrow keys on your keyboard to highlight the appropriate overlay Three DynaWrite keyboard overlays are available for scanning Qwerty Alphabetic and Optimized for scanning Continue After Selection Alt N When you are using scanning as your selection method selecting the Continue After Selection ...

Page 82: ...selection is made When this slider is active you can adjust it by using the left and right arrow buttons on your keyboard Moving the slider to the right toward Long will increase the necessary duration of the hold Moving the slider to the left toward Short will cause the scanning method to require a quicker hold Provide audio feedback Alt F Found in the Auditory Scanning group box this check box a...

Page 83: ...he Scanning Controls menu Cancel Alt C Selecting the Cancel button closes the Auditory Scanning Controls menu and returns you to the Selection Methods menu without saving any new changes Rate Alt R You can use the Rate slider to adjust the speed at which auditory prompts are spoken Using the arrow keys on your DynaWrite keyboard move the slider up to slow the speaking rate and down to speed it up ...

Page 84: ...ts Auditory scan prompts can be spoken publicly through your DynaWrite speakers or privately through an earphone You can select or deselect private auditory scan prompts through the Private check box Alt P in the Scan Prompts group box ...

Page 85: ...t Controls menu closes the menu and returns you to the Main menu Cancel Alt C Selecting the Cancel button closes the current menu and returns you to the Main menu without saving any new changes to the Rate Enhancement Controls menu Prediction settings The Prediction settings group box offers several options that can help you increase your rate of communication DynaWrite offers word prediction cont...

Page 86: ...s feature to be available The Abbreviation Expansion feature Alt E allows you to create abbreviations for longer words or phrases reducing the number of letters you must type Once an abbreviation has been recorded in the DynaWrite software typing that abbreviation into the Message Window and then selecting the space bar will cause the DynaWrite to automatically expand the abbreviation into the ful...

Page 87: ...buttons in the Presentation group box will illustrate which presentation method has been selected Show word labels Alt S Word prediction boxes can have labels to make then easier to identify When this check box is selected a label will appear below each word prediction box in the Message Window The label for each box will correspond to the label of the Word1 5 key that selects the box To remove th...

Page 88: ...u 1 4 Abbreviation Expansions Note Before you can use the abbreviation expansion feature you must activate it in the Rate Enhancement Controls menu To do this open the menu and then select the Abbreviation Expansion check box Alt E in the Prediction settings group box Tip For more information on creating editing and deleting abbreviation expansions refer to the Rate Enhancement Operations steps by...

Page 89: ...ndow where you may make changes to the selected expansion The corresponding abbreviation will be shown but cannot be edited To accept the changed abbreviation expansion select the OK button Alt O To close the window without accepting the changes select the Close button Alt C Save Alt S Selecting the Save button in this menu saves your customized abbreviation expansions and the entire contents of t...

Page 90: ... your Message Window text Once the combo box is active you can use the up and down arrow keys on your keyboard to highlight your choice of font The available fonts are Arial Times and Courier Font Size Alt S The Font Size combo box lets you specify the point size of your Message Window text Once the combo box is active you can use the up and down arrow keys on your keyboard to highlight the most a...

Page 91: ...ite Reference Guide Auto capitalization Alt A When the Auto capitalization check box is selected your DynaWrite device will automatically capitalize the first letter of every sentence you type into the Message Window ...

Page 92: ...ave a record only To learn how to save your actual settings see the Backup and Utility section in this manual Print Report Alt P Select the Print button to print out a record of your current user settings If you have not already chosen a printer port selecting this button will open a Printer Settings window where you will be asked to specify a printer type a printer port USB or serial and a baud r...

Page 93: ...this menu This feature allows you to customize the appearance of the text in your DynaWrite Help window Selecting Font will activate a combo box with three typeface options Arial Times and Courier When the combo box is active use the up and down arrow buttons on the DynaWrite keyboard to select and highlight an appropriate font Font Size Alt S Font size selection is included in the Help Features g...

Page 94: ... will appear on your DynaWrite screen whenever you attempt to make a selection that is unavailable These hints can be turned off as they appear by deselecting the accompanying Continue to show this message check box Alt S Once a helpful hint has been turned off it will not appear again From that time whenever you attempt the same unavailable operation a beep will sound When you wish to see all of ...

Page 95: ...rface on your DynaWrite device The two options include None no specified port and Serial Use the up and down arrow keys on your DynaWrite keyboard to highlight the appropriate option BeKey Xfer Port Alt B You can use this combo box to select a port for Be the Keyboard mode and for sending information to a computer via Xfer The options include None no specified port DynaBeam Access and USB When the...

Page 96: ...ancel button closes the System Menu Features menu and returns you to the Main menu without saving any new changes Current Date Alt D DynaWrite s date feature automatically keeps track of the current date and displays it below the Message Window The date can be reset with the Current Date combo box Once the combo box is active use your right and left arrow keys to highlight the day month or year Th...

Page 97: ...ailable memory group box displays the amount of RAM and Flash memory that is in use and the total amount of each that is available Screen Contrast Up Alt U Each time you select the Up button in the Screen Contrast group box the screen contrast will intensify Screen Contrast Down Alt W Each time you select the Down button in the Screen Contrast group box the screen contrast will fade Enable Alt E T...

Page 98: ...out saving a new password Tip The override password for DynaWrite is simon This password will work if that you forget your current password settings Reverse Image Alt R Selecting the Reverse Image check box will cause the DynaWrite display screen to present a high contrast white on dark image Begin Battery Calibration Alt B Select this button to start the procedure for calibrating your battery sli...

Page 99: ...t the Enable password check box Alt E 10 Select the OK button Alt O 11 Select the Close button Alt C Removing Password Protection 1 Select the Menu File key on your DynaWrite keyboard 2 Type your password into the Enter Password text box 3 Select the OK button Alt O 4 Select the System Settings button Alt Y 5 Deselect the Enable password check box Alt E 6 Select the OK button Alt O 7 Select the Cl...

Page 100: ...tton Alt Y 3 Select the Power down after combo box Alt P 4 Use the up and down arrow keys on your keyboard to highlight the appropriate setting You may set the DynaWrite to power down after it is inactive for one minute five minutes or 30 minutes You may also set it to never power down 5 Select the OK button Alt O 6 Select the Close button Alt C ...

Page 101: ...sure that Enable Be the Key is selected BeKey Xfer Setup for Windows 98 2000 and Me USB only Follow this set of instructions if you plan to use a USB cable to send information via the DynaWrite Be the Keyboard or Xfer features This set of instructions will provide accurate steps for setting up a Windows 98 2000 or Me computer Note It will not be necessary to complete this setup process more than o...

Page 102: ...ions will provide accurate steps for setting up a Windows XP computer Note It will not be necessary to complete this setup process more than one time Once your computer has learned to recognize the USB connection you can use the BeKey and Xfer features without any setup 1 Load the DynaWrite Backup and Utility CD onto your computer 2 Double click on DWBeKey exe to start the installation 3 Follow th...

Page 103: ...elect the OK Alt O button 3 Your DynaWrite keyboard will now be in Be the Keyboard mode Alternate functionalities for some keys will be listed on your DynaWrite display screen For more information refer to the BeKey entry in the DynaWrite Keyboard section of this manual 4 To exit Be the Keyboard mode select the Bekey ECU key again 10 Make sure the text box below the check box reads C DWBeKey You m...

Page 104: ...s into the computer s USB port 1 Turn on your computer and open the program into which you want to send text 2 On your DynaWrite keyboard select the Fn key in combination with the PgUp Xfer key 3 If you have not already chosen a port a Select Port window will appear Select the appropriate radio button and then select the OK Alt O button 4 If you want to transfer the current contents of the Message...

Page 105: ...ou want your device to power up from shutdown or low power mode to deliver a reminder select the Power Up Unit check box Alt U 10 To include a sound with the reminder select the Play Sound button Alt P Use the up and down arrows to highlight a sound name in the Available items list box and then Date Time and Reminder Operations select the OK button Alt O The selected sound file name will appear ne...

Page 106: ...ect the Fn key in combination with the Silence Remind key 2 Use the up and down arrow keys on your keyboard to highlight the name of the reminder in the Reminders list box 3 Select the Enable button Alt B Note If the Enable button is not presented the reminder is already enabled 4 Select the Close button Alt C Setting the Date 1 Select the Menu File key on your DynaWrite keyboard 2 Select the Syst...

Page 107: ... R again 11 To listen to your new recording select the Play button Alt P 12 Select the Close button Alt C 13 Select the Close button Alt C 14 Select the Close button Alt C Digitized Speech Operations Deleting a Digital Recording 1 Select the Menu File key on your DynaWrite keyboard 2 Select the Tools button Alt T 3 Select the Digitized Speech button Alt S 4 Use the up and down arrow keys to highli...

Page 108: ...5 Select the Close button Alt C 16 Select the Close button Alt C 17 Select the Close button Alt C Receiving a Digital Recording from a Macintosh Computer Before beginning this transfer connect the serial cable to the DynaWrite serial port and to the computer s serial host port Then turn on your computer and open the DynaWrite Backup and Utility software 1 On your DynaWrite keyboard select the Menu...

Page 109: ...g select the OK button Alt O or the Enter key on your keyboard 9 To cancel the recording and try again select the Cancel button Alt C or the Esc key on your keyboard and then select the Record button Alt R again 10 To listen to your new recording select the Play button Alt P 11 Select the Close button Alt C 12 Select the Close button Alt C 13 Select the Close button Alt C Renaming a Digital Record...

Page 110: ...t the OK button Alt O 14 Select the Close button Alt C 15 Select the Close button Alt C 16 Select the Close button Alt C Transferring a Digital Recording to a Macintosh Computer Before beginning this transfer connect the serial cable to the DynaWrite serial port and to the computer s serial host port Then turn on your computer and open the DynaWrite Backup and Utility software 1 On your DynaWrite ...

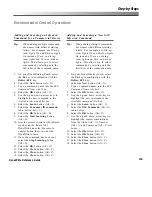
Page 111: ...rn 11 Once the command has been sent select the Stop Learning button Alt S 12 Select the OK button Alt O 13 Select the Close button Alt C 14 Select the Close button Alt C 15 Select the Close button Alt C Adding and Learning a New X 10 Infrared Command Tip When adding multiple commands use names with different starting letters For example use Dining room Lights On and Kitchen Lights On instead of T...

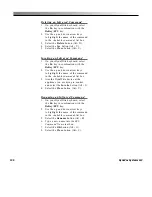
Page 112: ...with the BeKey ECU key 2 Use the up and down arrow keys to highlight the name of the command in the Available commands list box 3 Aim the DynaWrite device at the appliance you are trying to control and select the Invoke button Alt I 4 Select the Close button Alt C Renaming an Infrared Command 1 On your DynaWrite keyboard select the Fn key in combination with the BeKey ECU key 2 Use the up and down...

Page 113: ...ing a file will replace any text that is currently in the Message Window A warning will appear if you are about to overwrite text Printing from DynaWrite If you will be using a USB cable transfer connect the USB cable to the DynaWrite dual USB host port and to the printer s USB host port To use a serial cable for printing you will also need to use a Null Modem Adapter These adapters can be purchas...

Page 114: ... The name of the transferred file will appear in the Files list box 13 Select the Close button Alt C Receiving a DynaWrite File from a Macintosh Computer Before beginning this transfer connect the serial cable to the DynaWrite serial port and to the computer s serial host port Then turn on your computer and open the DynaWrite Backup and Utility software 1 On your DynaWrite keyboard select the Fn k...

Page 115: ...select the Start Transfer button Alt S 9 On the computer select Yes 10 When the transfer is complete select OK 11 Select File and then Quit to exit the Backup and Utility software 12 On the DynaWrite select the OK button Alt O 13 Select the Close button Alt C Saving a New DynaWrite File 1 Select the Fn key and the Menu File key on your DynaWrite keyboard 2 Select the Save As button Alt A Use the S...

Page 116: ...ist box Alt F highlight the file that is to be transferred 3 Select the Transfer button Alt T 4 Select the Yes button Alt Y 5 Select the Start Transfer button Alt S 6 On the computer select Receive file 7 Select OK 8 When the transfer is complete a file dialog will open The name of the file you transferred will appear in the File name text box Navigate through the dialog and find a place to store ...

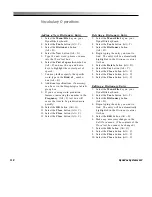
Page 117: ...tton Alt C 13 Select the Close button Alt C 14 Select the Close button Alt C Macro Operations Deleting a Macro 1 Select the Menu File key on your DynaWrite keyboard 2 Select the Tools button Alt T 3 Select the Macros button Alt M 4 Use the up and down arrow keys to highlight the name of a macro in the Macros list box 5 Select the Delete button Alt D 6 Select the Yes button Alt Y 7 Select the Close...

Page 118: ...e Close button Alt C 10 Select the Close button Alt C Invoking a Macro 1 Select the Macro key on your DynaWrite keyboard 2 Use the up and down arrow keys to highlight the name of a macro in the Macros available list box 3 Select the Enter key on your DynaWrite keyboard ...

Page 119: ...tton Alt T 3 Select the Abbreviation Expansions button Alt A 4 Use the up and down arrow keys on your keyboard to highlight an item in the Abbreviation expansions list box 5 Select the Edit button Alt E 6 Select the Expansion text box Alt E and make the changes you want You cannot change the abbreviation 7 Select the OK button Alt O 8 Select the Close button Alt C 9 Select the Close button Alt C 1...

Page 120: ... slider Alt R and use the right and left arrow keys to adjust the speed of the scan 9 Select the Hold time slider Alt T and use the right and left arrow keys to adjust the amount of time you must activate a switch to make a selection 10 If you want to hear auditory scan cues select the Provide audio feedback check box Alt F in the Auditory Scanning group box 11 To customize the auditory scan cues ...

Page 121: ...ighlighted in the list box 6 Select the Move button Alt M 7 Select the Files list box Alt I 8 Enter the letters USB and then select the down arrow key USB Storage will appear in the list box 9 Select the OK button Alt O 10 Select the Close button Alt C Backing Up DynaWrite User Data to USB Storage Before beginning these steps make sure that your removable USB storage device is plugged in to the du...

Page 122: ... Select the OK button Alt O 9 Select the Close button Alt C Moving a Copy of a Digitized Sound File From USB Storage to DynaWrite Before beginning these steps make sure that your removable USB storage device is plugged in to the dual USB device port on your DynaWrite 1 Select the Fn key and the Menu File key on your DynaWrite keyboard 2 Select the Files list box Alt I 3 Enter the letters USB and t...

Page 123: ...ng these steps make sure that your removable USB storage device is plugged in to the dual USB device port on your DynaWrite 1 On your DynaWrite keyboard select the Menu File key 2 Select the Backup Restore Upgrade button Alt B 3 Select the Restore User Data button Alt R 4 Restoring will overwrite all of the user data that is currently on your DynaWrite If you are sure you want to restore your user...

Page 124: ...utton Alt C 13 Select the Close button Alt C Deleting a Dictionary Entry 1 Select the Menu File key on your DynaWrite keyboard 2 Select the Tools button Alt T 3 Select the Dictionary button Alt D 4 Begin typing the entry you want to find The entry will be automatically highlighted in the Dictionary entries list box 5 Select the Delete button Alt D 6 Select the Yes button Alt Y 7 Select the Close b...

Page 125: ...unciation Exception 1 Select the Menu File key on your DynaWrite keyboard 2 Select the Speech Controls button Alt P 3 Select the Pronunciations button Alt N 4 Use the up and down arrow keys to highlight an item in the Words with pronunciation exceptions list box 5 Select the Delete button Alt D 6 Select the Yes button Alt Y 7 Select the Close button Alt C 8 Select the OK button Alt O 9 Select the ...

Page 126: ...er 8 Select Open 9 Select No to confirm that the voice doesn t currently exist on the DynaWrite 10 On the DynaWrite select the Start Transfer button Alt S 11 On the computer select Yes 12 When the transfer is complete select OK 13 Select File and then Quit to exit the Backup and Utility software 14 On the DynaWrite select the OK button Alt O 15 Select the Close button Alt C 16 Select the OK button...

Page 127: ... Alt G 4 Select the Receive button Alt R 5 Select the Yes button Alt Y 6 Select the Start Transfer button Alt S 7 On the computer select Load Voice Data 8 Navigate through the file dialog to highlight the name of the voice file you want to transfer 9 Select Open 10 Select No to confirm that the voice doesn t currently exist on the DynaWrite 11 Select the OK button Alt O 12 When the transfer is com...

Page 128: ...rogram can be used to reinstall the DynaWrite software and the base data set if a serious problem should occur with your device With this CD you may install the DynaWrite Backup Utility software on the following types of computers Windows 95 98 2000 XP Mac OS 9 x Mac OS X To install your DynaWrite Backup Utility software refer to the following pages and work through the appropriate set of instruct...

Page 129: ...y entries abbreviation expansions pronunciation exceptions macros phone book entries reminders and environmental control commands Note The backup process does not automatically back up your text files and digital recordings To ensure a complete backup of all your information you should individually transfer any text files or digital recordings to your computer It is especially important to transfe...

Page 130: ...o be properly recognized as a DynaWrite backup file 7 Select Save 8 Select Start Receiving Data 9 On the DynaWrite device select the Start Transfer button Alt S The DynaWrite data will be copied to the computer This process may take a few minutes 10 When the backup is complete select the Close button Alt C 11 Select the Close button Alt C 12 On the computer select OK The backup file will be added ...

Page 131: ...grade button Alt B 3 Select the Restore User Data software button Alt R 4 Select the Yes button Alt Y 5 On the computer select Restore DynaWrite data Any backup files in the Backups folder in the DynaWrite Backup Utility folder will be presented in a Select file dialog box If a backup file that you want to use is in a different folder or on another storage device locate the file so it is displayed...

Page 132: ...he Backup Utility software running on your computer follow these steps to upgrade the device 1 Select the Menu File key on your DynaWrite keyboard 2 Select the Help Settings button Alt N and note the current version number of your DynaWrite software 3 Select the Cancel Alt C button to return to the Main menu 4 Select the Backup Restore Upgrade button Alt B 5 Select the Upgrade DynaWrite software b...

Page 133: ...Write will be upgraded When the software upgrade is complete the DynaWrite will automatically restart 12 On the computer select OK 13 Select File and then Close to exit the program 14 To verify that the software has been upgraded check the software version number to see that it has changed Backup Utility Software ...

Page 134: ...e to a computer information currently stored in the device is copied to the computer and stored in a backup file This information includes all of your DynaWrite preferences dictionary entries abbreviation expansions pronunciation exceptions macros phone book entries reminders and environmental control commands Note The backup process does not automatically back up your text files and digital recor...

Page 135: ...ile key on your DynaWrite keyboard 2 Select the Backup Restore Upgrade button Alt B 3 Select the Backup User Data button Alt B 4 Select the Yes button Alt Y 5 On the computer select Backup DynaWrite data 6 Type a name for the backup file into the text box that appears 7 Select OK 8 Select Yes 9 On the DynaWrite device select the Start Transfer button Alt S The DynaWrite data will be copied to the ...

Page 136: ... highlight the port you will be using When you release the mouse button the port will be selected If at any time you need to change the port setting carry out the same process With the DynaWrite turned on and the Backup Utility software running on your computer follow these steps to restore user data to the device 1 Select the Menu File key on your DynaWrite keyboard 2 Select the Backup Restore Up...

Page 137: ...al cable to the DynaWrite serial port Attach the other end of the cable to a serial port on the computer The first time you run the Backup Utility software you will need to set the file transfer port To do this launch the software open the Options menu highlight Port and then highlight the port you will be using When you release the mouse button the port will be selected If at any time you need to...

Page 138: ...n this window 8 Select the name of the software upgrade file you want to use 9 Select Open 10 Select Yes 11 On the DynaWrite select the Start transfer button Alt S The software in the DynaWrite will be upgraded When the software upgrade is complete the device will automatically restart 12 On the computer select OK 13 Select Quit from the File menu to exit the program 14 Shut down the DynaWrite and...

Page 139: ...e device until you have tried accessing it several times Try to select the Menu File key to open the DynaWrite Main menu Also try to properly shut down the device by selecting the Power button Soft Resets If none of the above operations are successful you will need to perform a soft reset by using a small paper clip Straighten one end of the paper clip and follow the steps below 1 Turn the DynaWri...

Page 140: ...per clip and follow the steps below Warning When you perform a hard reset on your DynaWrite device all of your user data will be permanently erased You will have to restore your data from a backup file or restore the device s original base set data 1 Turn the DynaWrite upside down so that you are looking at the bottom of the device 2 Insert the straight end of the paper clip through the small open...

Page 141: ...DynaWrite the battery is being recharged It will take approximately three hours to fully charge the battery You cannot overcharge the battery so don t be concerned about leaving the unit plugged in overnight The amber LED will light up while the device is charging The light will go out when the battery is fully recharged Note Before storing a DynaWrite device for more than two weeks we recommend t...

Page 142: ...ow the steps below Caution To prevent the loss of data we strongly recommend that you back up all your DynaWrite text files and user data before replacing the battery Caution To prevent damage to your DynaWrite device do not use batteries that have been stored for more than one year 1 Turn off the DynaWrite device and disconnect any accessories 2 The battery door is located on the bottom of your D...

Page 143: ...y until the connector is securely seated 6 Place the battery in the battery well The flat side of the battery should be facing up 7 Reattach the battery door 8 Discard of the used battery in accordance to the local environmental laws in the area in which you live After installing a new battery be sure to fully charge your device before use Appendices ...

Page 144: ...e Customers must contact DynaVox Systems Sales department to receive a return authorization number before any product return or exchange Shipping costs associated with returns and exchanges are the customer s responsibility unless the return is due to a product defect Returned products must be in new condition and available for resale Please Note Customers returning DynaWrite devices within 30 day...

Page 145: ...able Lithium Ion 7 4 Volt Battery Life 7 hours with backlight on 9 hours with backlight off Interfaces USB Host USB Function Serial Port Switch 1 Jack Switch 2 Jack Speaker Headphone Jack Charger Jack Operating Temperature 32o to 113o F 0o to 45o C Storage Temperature 13o to 113o F 25o to 45o C DC Power Adapter Charger AC Input 100 240V 1 0A 50 60 Hz DC Output 12V 12V Accessories 2A US 4A outside ...

Page 146: ...tems LLC Appendix E Proper Disposal of a DynaWrite If you must dispose of your DynaWrite communication device please do so in accordance with the national environmental laws that apply to the country in which you live ...

Page 147: ... 2 Increase the separation between the equipment and receiver 3 Connect the equipment to an outlet on a circuit different from that to which the receiver is connected 4 Consult the dealer or an experienced radio TV technician for help The user may find the following booklet prepared by the Federal Communication Commission helpful How to Identify and Resolve Radio TV Interference Problems This book...

Page 148: ...vailable memory 91 B Backlight 22 Backing up DynaWrite information Macintosh 128 Windows 123 USB Storage 115 Backup and Utility software 117 Installing Macintosh 128 Installing Windows 123 Backup Restore Update menu 69 Basic Device Power Save Mode and Password Operations step by steps 93 Battery care 135 Charging the battery 135 Replacing the battery 136 Battery level 91 BeKey ECU key 20 Be the Ke...

Page 149: ...lay helpful hints 88 Display screen 13 Dual USB host port 15 DynaWrite System Help 23 DynaWrite version number 87 E ECU 55 Adding Learning an IR command for a commercial device 105 Adding Learning an X 10 IR command 105 Deleting an IR command 106 Invoking an IR command 106 Renaming an IR command 106 ECU key BeKey ECU 20 ECU menu 55 Edit Macro menu 42 Edit Pronunciations menu 65 Edit Reminder menu ...

Page 150: ...olDn 27 VolUp 27 Word1 5 27 L Labeling the word prediction boxes 81 Light emitting diode LED 13 Linnear scanning 75 Low power state 91 M Macro key 24 Macro Operations step by steps 111 Macros 40 Adding 111 Deleting 111 Editing 111 Invoking 112 Macros menu 40 Main menu 29 Making menu selections 28 Manipulating text 18 Copying text 19 Cutting text 19 Pasting text 19 Selecting text characters 19 Sele...

Page 151: ...xt 19 Cutting text 19 Moving to the top of the Message Window 19 Moving to the end of the Message Window 19 Pasting text 19 Selecting text characters 19 Selecting text lines 19 Undoing text 19 Microphone 13 Morph key 24 Moving to the top of the Message Window 19 Moving to the end of the Message Window 19 N NumLk key Home NumLk 24 P Password 91 Changing 93 Creating Activating 93 Removing 93 Pasting...

Page 152: ...me 75 Scanning method 74 Scanning pattern 75 Scanning rate 75 Setting the selection method to scanning 113 Scanning Controls menu 74 Scanning Operations step by steps 114 Screen contrast 91 Search key 25 Selecting a voice 59 Selecting menu items 28 Selecting text characters 19 Selecting text lines 19 Selection Methods menu 70 Serial port 15 Setting the Date 90 100 Setting the Time 90 100 Setting t...

Page 153: ... 108 Receiving from Windows 108 Saving 109 Transferring to Macintosh 109 Transferring to Windows 110 Time setting 90 100 Tools menu 31 Turning the device on off 93 Two switch scanning 75 U Undoing text 19 Undo key 27 Upgrading DynaWrite software Macintosh 131 Windows 126 USB device port 14 USB host port dual 15 USB Storage Operations 115 User preferences 86 Print report 86 Save report 87 User Pref...

Page 154: ...148 DynaVox Systems LLC X Xfer 25 Setting up for DynaBeam 97 Setting up for Macintosh 95 Setting up for Windows 98 2000 and Me 95 Setting up for Windows XP 96 Using Xfer 97 Xfer key PgUp Xfer 25 ...

Reviews: