


18
Understanding the basics
DX-24L200A12
Understanding the basics
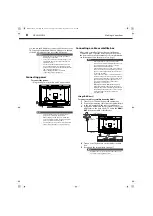
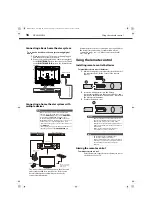
Turning your TV on or off
To turn your TV on or off:
1
Make sure that the power cord is connected to a
power outlet.
2
Press (Power) to turn on your TV. The power
indicator LED turns blue.
3
Press (Power) again to turn off your TV. Your TV
enters Standby mode.
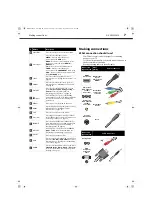
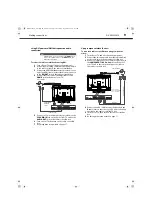
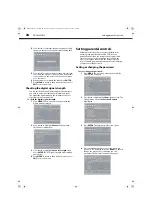
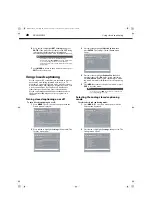
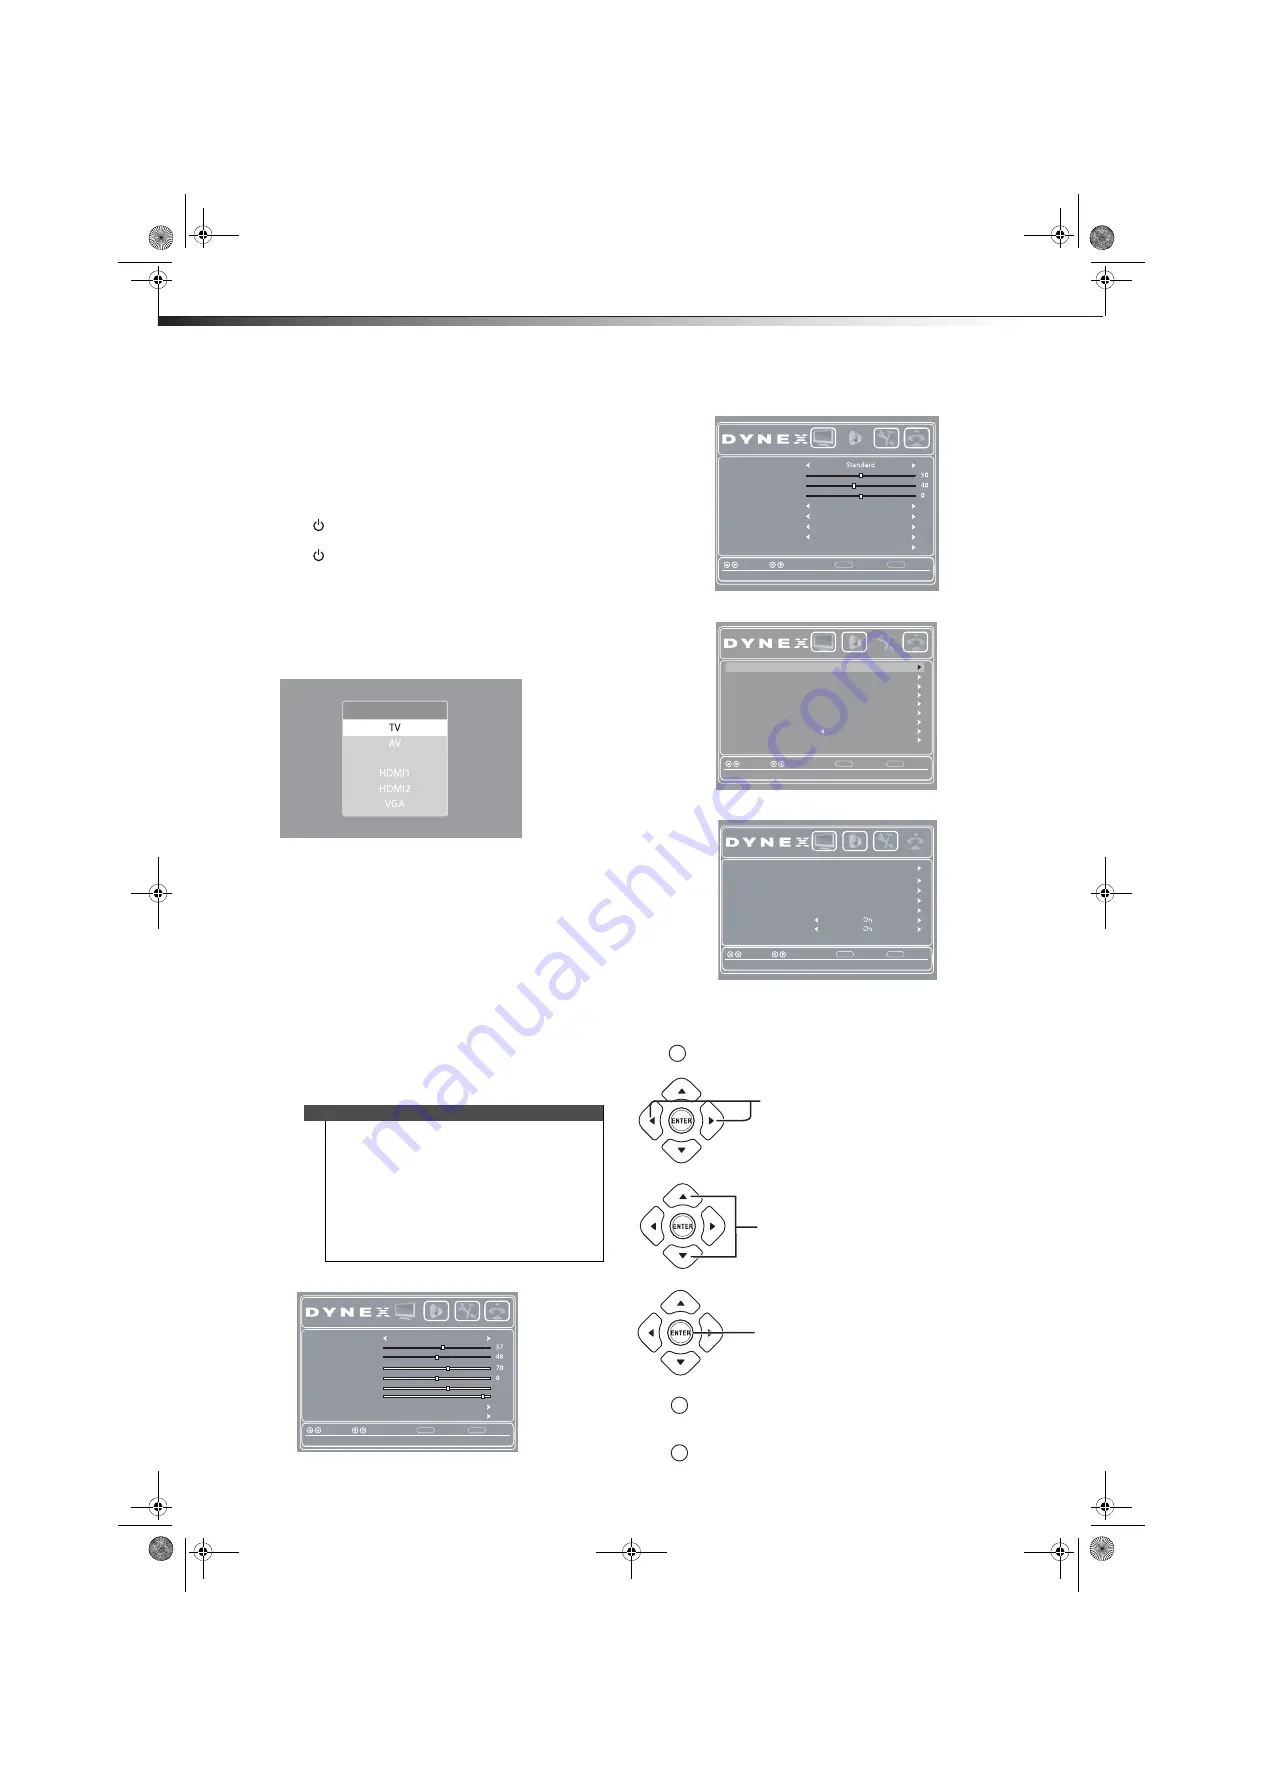
Selecting the video input source
To select the video input source:
1
Turn on your TV, then press
INPUT
. The
INPUT
SOURCE
list opens.
2
Press
or
to highlight the video input source,
then press
ENTER
. You can also press a direct input
button on the remote control to select the video
input source.
• Press
VIDEO
to select the device connected to
the
AV IN
jacks.
• Press
HDMI
to select a device connected to an
HDMI
jack.
• Press
TV
to select the TV input source.
• Press
COMP
to select the device connected to
the
COMPONENT
video jacks.
• Press
VGA
to select the device connected to the
PC IN VGA
jack.
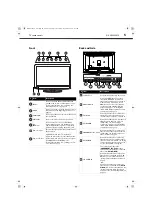
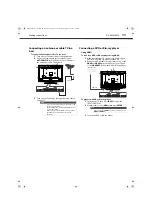
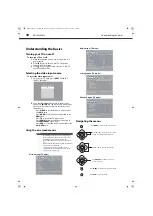
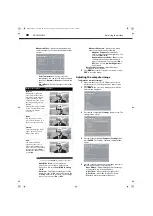
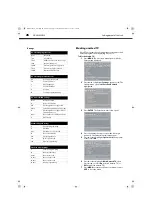
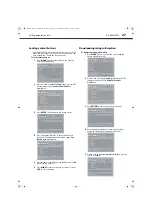
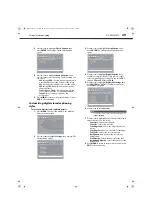
Using the on-screen menus
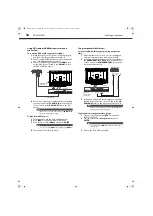
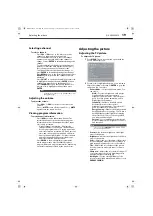
Picture menu (TV mode)
Audio menu (TV mode)
Settings menu (TV mode)
Channels menu (TV mode)
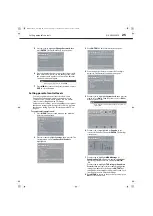
Navigating the menus
Notes
•
Depending on the signal source selected, you
may see different options on your screen. The
following menus are shown in TV mode.
•
Menu items that are not selectable are grayed
out.
•
Menus in this manual are described in TV mode,
unless otherwise indicated.
•
The screens shown in this manual are for
explanation purposes and may vary from the
actual screens on your TV.
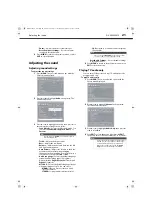
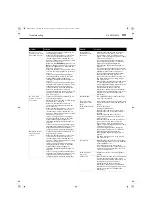
Component
INPUT SOURCE
Picture Mode
Standard
Contrast
Brightness
Color
Tint
Sharpness
BackLight
Advanced Video
Reset Picture Settings
Back
Select
Move
Adjust settings to affect picture quality
MENU
EXIT
Exit
Picture
Audio
Settings
Channels
29
55
Sound Mode
Treble
Bass
Balance
Auto Volume
MTS/SAP
Digital Audio/SPDIF
RAW
Off
Mono
English
Audio Language
Reset Audio Settings
Back
Select
Move
Adjust settings to affect sound quality
MENU
EXIT
Exit
Picture
Audio
Settings
Channels
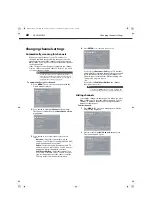
Time
Closed Caption
Menu Settings
Computer Settings
Input Labels
Back
Select
Move
Set various TV options
MENU
EXIT
Exit
System Info
Power on in Vivid Mode
Off
Reset to Default
Picture
Audio
Settings
Channels
Parental Controls
Auto Channel Scan
Add/Skip Channels
Favorites
Channel Label
Channel Strength
Audio Only
Back
Select
Move
Adjust the audio with the picture turned off
MENU
EXIT
Exit
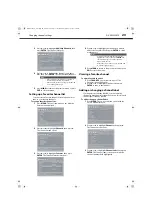
Auto Zoom
Picture
Audio
Settings
Channels
M
ME
EN
NU
U
M
ME
EN
NU
U
E
EX
XIITT
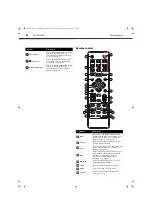
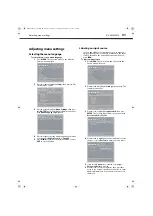
Press
MENU
to open the on-screen menu.
Press
or
to select menu options.
Press
ENTER
to confirm a selection or
enter a sub-menu.
Press
MENU
to return to the previous menu.
Press
EXIT
to close the menu.
Press
or
to move the cursor on the
screen or to adjust a selected item.
DX-24L200A12_11-0584_MAN_ENG_V1.book Page 18 Wednesday, September 14, 2011 12:59 PM


