Using the TV
15
Selecting mono, stereo, or SAP
Note:
This option only works for analog channels.
Your TV/DVD combo can receive stereo programs and secondary audio
programs (SAP) if the broadcaster sends a stereo signal. If you select
stereo or SAP and the program is broadcast in mono, your
TV/DVD combo plays the audio in mono.
To select mono, stereo, or SAP:
• Press
MTS/SAP
repeatedly to select
Mono
,
Stereo
, or
SAP
.
Setting the sleep timer
You can select the amount of time you want your TV/DVD combo to wait
before it automatically turns off.
To set the sleep timer:
• Press
SLEEP
repeatedly to select
Off
,
5 Min
,
10 Min
,
15 Min
,
30 Min
,
45 Min
,
60 Min
,
90 Min
,
120 Min
,
180 Min
, or
240 Min
.
Selecting the TV aspect ratio
To select the TV aspect ratio:
• Press
ZOOM
repeatedly to select
Full Screen
,
Normal
,
Wide
,
Zoom
, or
Cinema
.
Note:
The aspect ratios you can select may vary depending on the video
input mode.
Adding a channel to the favorite list
To add a channel to the favorite list:
1
Press
CH.LIST
. The channel list opens.
2
Press
CH+
or
CH–
to select the channel you want to add.
3
Press
FAVORITE
, then press
ENTER
to add the channel to the list.
4
To remove a channel from the favorite list, open the channel list,
select the channel you want to remove, press
FAVORITE
, then
press
ENTER
.
For information about tuning to a favorite channel, see “Changing TV
channels” on page 13.
Deleting channels from the channel list
After you scan for channels to set up the channel list, you can delete
channels from the list. When you press
CH+
or
CH–
, your
TV/DVD combo skips the channel you deleted. You can still tune to the
channel using the number buttons.
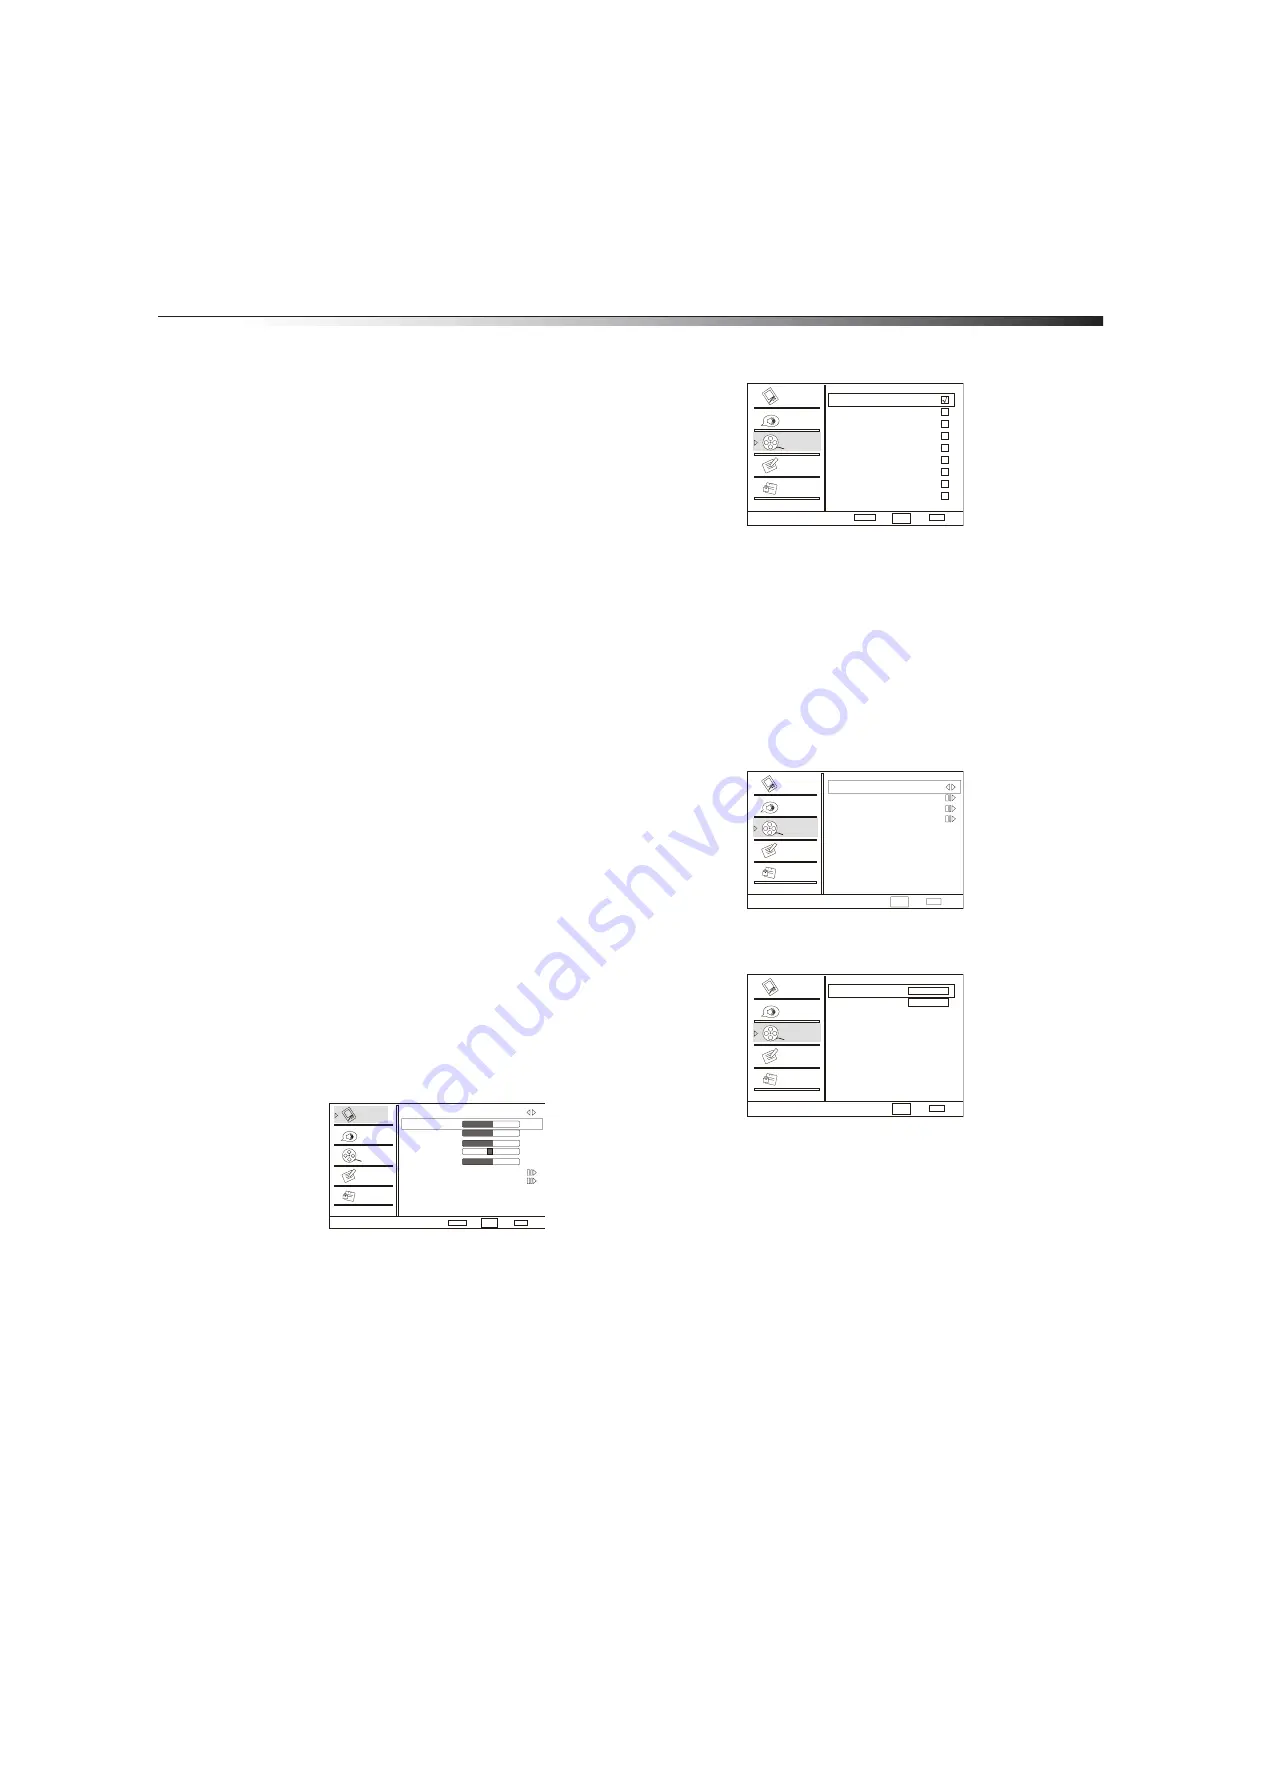
To delete channels from the channel list:
1
Press
MENU
, then press
CH+
or
CH–
repeatedly until the
Channel
menu appears.
2
Press
VOL+
or
ENTER
to open the
Channel
menu.
3
Press
CH+
or
CH–
repeatedly to select
Channel Skip
, then press
VOL+
or
ENTER
.
4
Press
CH+
or
CH–
to select the channel you want to delete, then
press
ENTER
. A check mark appears next to the channel.
Note:
When you press
CH+
or
CH–
, your TV/DVD combo will skip the
channel you deleted from the list. You can still tune to the channel
using the number buttons.
Note:
If you want to add a channel back to the list, repeat these steps.
When you press
ENTER
, the check mark disappears and the channel is
added back to the list.
Adding a label to a channel
You can add a label to a channel to make it easier to find.
To add a label to a channel:
1
Press
MENU
, then press
CH+
or
CH–
repeatedly until the
Channel
menu appears.
2
Press
VOL+
or
ENTER
to open the
Channel
menu.
3
Press
CH+
or
CH–
repeatedly to select
Channel Label
, then
press
VOL+
or
ENTER
.
4
Press
CH+
or
CH–
to select
Channel Index
, then press
INPUT
repeatedly to select a channel you want to label.
5
Press
CH+
or
CH–
to select
Channel Label
, then press
INPUT
repeatedly to select the letter, number, or symbol you want. You
can enter ten characters.
6
Press
VOL+
to go to the next character.
7
Repeat Step 5 and Step 6 to enter additional characters.
8
When you finish the label, press
ENTER
to confirm. If you need to
change a character you have already entered, press
VOL–
to go to
that character.
9
Repeat Step 4 through Step 8 to label additional channels.
10
Press
EXIT
to close the menu and return to normal viewing.
Video
Audio
Channel
Lock
Function
Video
Mode Custom
Brightness
Contrast
Color
Tint
Sharpness
Color Temperature
Advanced Video
50
50
50
0
50
Select
Back
Adjust
EXIT
ENTER
CH+/-
VOL+/-
Channel Skip
2 Analog
3 Analog
4 Analog
5 Analog
5-1 Digital
6 Analog
7 Analog
8 Analog
9 Analog
10 Analog
Select
Back
EXIT
CH+/-
VOL+/-
Set
ENTER
Video
Audio
Channel
Lock
Function
Channel
Video
Audio
Channel
Lock
Function
Select
Back
EXIT
CH+/-
VOL+/-
Tuner Antenna
Channel Scan
Channel Skip
Channel Label
Channel Label Set
Channel Index
Channel Label
Select
Back
EXIT
CH+/-
VOL+/-
Video
Audio
Channel
Lock
Function
1
Summary of Contents for DX-LTDVD19-09
Page 1: ...USER GUIDE 19 LCD TV DVD Combo DX LTDVD19 09 ...
Page 26: ...26 Legal notices ...
Page 27: ......


