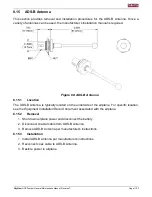
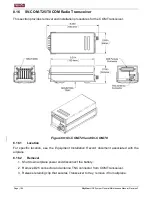
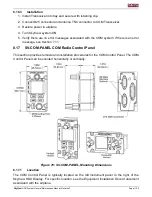
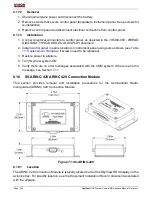

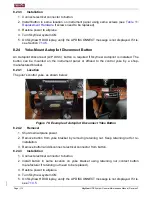


SkyView
HDX System
General Maintenance Manual, Revision F
Page | 117
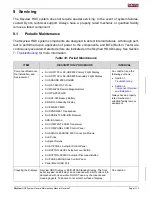
ITEM
DESCRIPTION / PROCEDURE
INTERVAL
•
OAT Probe: Visually inspect OAT probe for damage and wear.
The OAT wiring should be checked for integrity, damage,
chafing, or excessive wear. The installation should be
inspected for cracks in the fuselage, and loose, or damaged
fasteners.
•
AoA Probe: The the AoA probe should be visually inspected for
damage and wear. The AoA pneumatic tubing should be
checked for integrity, damage, chafing, or excessive wear. The
installation should be inspected for cracks in the fuselage, and
loose, or damaged fasteners.
•
Autopilot Components: Inspect all autopilot servos, servo
brackets and cables. Make sure there is no damage or wear.
Cables are within tension and cable clamp bolts are torqued
within tolerance.
9.2
Updating SkyView HDX System Software
1. Download latest Dynon Certified SkyView HDX system software from
http://www.dynoncertified.com/software-updates.php
2. Copy software files onto a 16GB or larger USB flash drive.
The files must be in the root
directory of the drive or it will not be recognizable by the SkyView HDX Display.
3. Insert the USB flash drive into one of SkyView HDX
Display’s USB ports. On the SkyView
HDX Display, go to SETUP MENU > SYSTEM SOFTWARE > UPGRADE SYSTEM
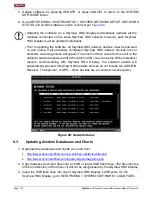
SOFTWARE…) > (highlight file and push right knob).
26)
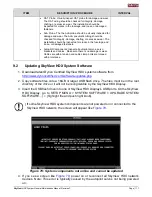
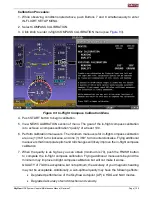
27) If some SkyView HDX system components are not powered on or connected to the
SkyView HDX network, the screen will appear like
Figure 79: System components not online and cannot be updated
, power on or reconnect all SkyView HDX network
devices. Note: This error is typically caused by the autopilot servos not being powered
on.


