39
Rev. 0.6
info@e-breathe.de • www.e-breathe.de
e-breathe e-Flow
4.4 Application & Use e-Flow
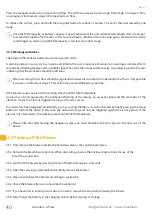
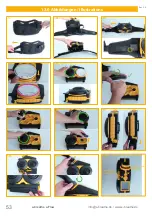
4.4.1 Putting on Blower
Please ensure in advance that the blower is securely and firmly connected to the belt/carrying system. Adjust the
belt to the approximate required size.
Put the blower belt on with the buckle in the front centered and the unit in the middle of the back.
Afterwards tighten the belt to prevent the fan from slipping.
4.4.2 Connection Breath Connection
Connect the breathing air hose to the blower as described in section 4.5.
Connect the other end of the breathing hose to the breathing connection according to the enclosed instructions for
use of the breathing connection.
4.4.3 Switching on Blower
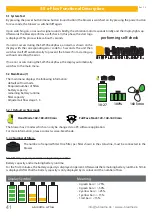
Press the power button/menu button (round button) of the blower. After switching on, the display with the start
logo lights up and the blower performs a self check (system test). See Figure 12
If the unit detects a fault at start-up, the blower will give an alarm with the associated error code. The error must first
be rectified before the blower can be put into operation.
If the unit does not find any errors during the self-check, the blower is ready for operation. However, before starting
any work, check that the filters used and the battery still have sufficient remaining capacity for the duration of your
work.
As soon as the blower supplies the breathing connection with fresh air, the connection is ready for application.
Observe the enclosed instructions for use of the breathing connection as you put it on.
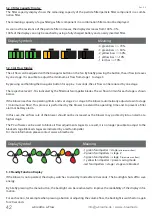
4.4.4 Adjustment Air Flow
If you use a hood / helmet / face shield as breathing connection, you may generate a negative pressure in the
breathing connection during inhalation when performing heavy work. This could cause unfiltered ambient air
to enter the head piece. For this reason, it is possible to increase the air flow during heavy work in order to com-
pensate these effects.
Please note when working with an increased air flow, the battery capacity exhausts more quickly and the filter
gets wasted faster.
Make sure that the breathing air hose runs along the back and is not twisted. Otherwise there is a risk of getting
stuck with the breathing hose. As a result, the blower or the breathing connection could be damaged.
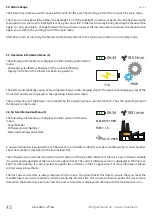
Procedure
•
Please make sure that the battery is fully charged (100%) and that new filters have been attached.
•
Screw the test tube onto the blower union nut.
•
Switch on the blower and wait for the self-check of the blower. If an abnormality occurs during this time, it must
be corrected before the blower can be operated. Hold the test tube vertically and straight up.
•
Turn the blower to stage 1 to perform the test. Wait 60 seconds and read from the test tube whether the mini-
mum air flow has been achieved. Important: If the recommended air flow rate has not been reached, the blower
must be checked by the e-breathe service.
•
In order to check the warning device, cover the test tube with the palm of your hand. Shortly afterwards you
will notice that the blower runs more intensively and/or the speed of the blower increases. An alarm is triggered
after approx. 10 seconds. Important: If the blower does not trigger an alarm and the speed does not increase,
the blower must be checked by the e-breathe service.
•
Switch off the blower again.

