48
Rev. 0.7
info@e-breathe.de • www.e-breathe.de
49
Rev. 0.7
e-breathe e-Flow
info@e-breathe.de • www.e-breathe.de
e-breathe e-Flow
5.4 Menu Change
The blower has submenus with various information for the user. The starting point of the menu is the main menu.
The menu can only be switched when the backlight is on. If the backlight is inactive, activate it by briefly pressing the
menu button. As soon as the backlight is active, you can switch to the next menu by briefly pressing the menu button
again. It is only possible to change forward. Once you have arrived at the last menu item and press the menu button
again, you return to the starting point of the main menu.
After 20 seconds of inactivity, the blower automatically returns to the main menu and turns on standby mode.
5.6 Mode menu (2)
Depending on the mode setting, the icons and the available flow rates per headboard change. Only the head part for
the correctly set mode may be used.
Depending on the set mode, there are different filter types that can be used. Depending on the filter type, an adjusted
volume flow can be set again. If the filter types are changed, the corresponding filter text and symbols change. Only
filters with the corresponding setting mode can be used.
For more information, please contact www.e-breathe.de.
The mode menu displays the following information:
- Set mode (half mask / full mask / hood)
- Available volume flows per mode
- Set filter type and number of filters
Function available from software version (V/N) 2.0.
Halfmask
Modus:
80 - 100 - 120 l/min
Combinationsfilter
Filtertyp:
Particle filter
06:34
100 l/min
Halfmask
Modus:
80 - 100 - 120 l/min
Combinationsfilter
Filtertyp:
Particle filter
Service:
Alarm on
Timer:
Alarm off
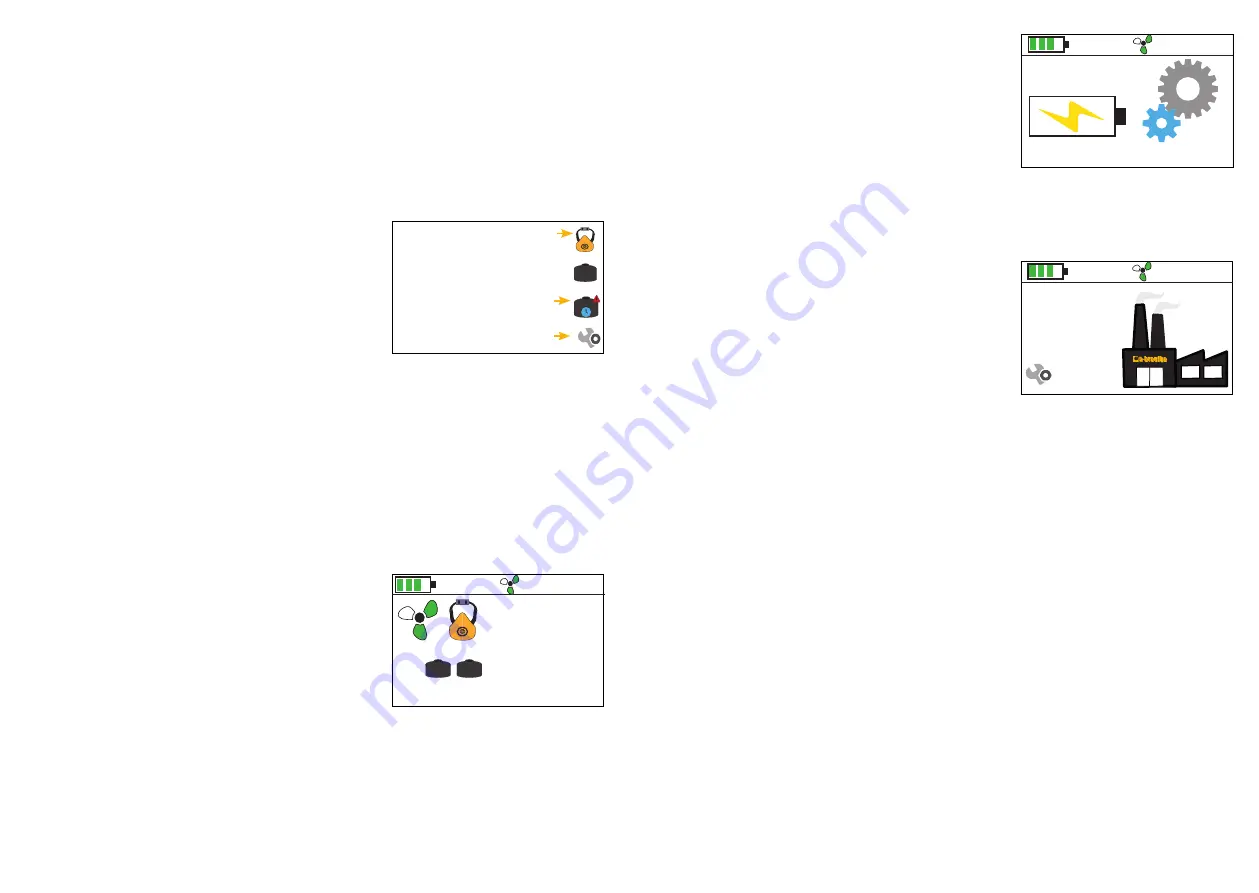
5.5 Settings Menu
The following information are displayed in the „Settings“ menu:
- Set mode (half mask / full mask / hood)
- Available volume flows per mode
- Set filter type
- Set timer
- Service Alarm
Function available from software version (V/N) 2.0.
In the Settings menu, you can adjust the blower settings.
You can open and close the menu by pressing the two buttons on the blower simultaneously for 2 seconds. Press the
round button briefly to change the line. By briefly pressing the triangular button, it is possible to make changes in the
respective line. Changes can only be made if a yellow arrow is displayed in the line. The settings can only be changed
before the activity and not during the activity.
Important: Only the Headboard and the filter may be used for the correctly set mode.
Otherwise, there may be no or little protection for the user.
For more information or queries, please contact www.e-breathe.de.
5.7 Operation Information Menu (2)
The battery automatically counts every complete charge in the charging station. The respective charging cycles of the
connected battery are displayed in the operating information menu.
The running hours of the blower are recorded by the operating hours counter function. Thus, the operating time of
the blower can be traced.
06:34
The following information are displayed in the operating information
menu:
- Charging Cycles (Battery Charges) of the connected Battery
- Display of the hours the blower has been in operation
192 h
11 x
180 l/min
5.8 System Information Menu (3)
The following information are displayed in the system information
menu:
- Serial Number
- Software Version Number
- Next outstanding service date
06:34
05.11.2019
180 l/min
S/N: 05111992
V/N: 1.13
A new serial number is assigned to each blower. You can therefore identify your personal blower by its serial number.
The serial number is displayed in the line marked S/N.
The software version number shows the current version of the installed software. If there is a new software available,
it is automatically updated at the next service appointment. The current software version is displayed in the line mar-
ked V/N. Alternatively, it is also possible to update the software via the PC application. For more information, please
contact www.e-breathe.de.
The next due service date is always displayed in the menu. You should meet this date to ensure that you meet the
manufacturer‘s warranty conditions and to extend the blower‘s life. The service technician enters the next service
date when the blower has been serviced. The next service date is displayed in the line with the maintenance icon.


