15
7.4
1-point temperature calibration on the
circuit board
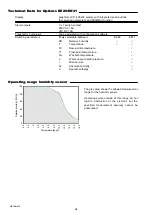
When the working range is limited to a certain more narrow range,
a calibration at one temperature point is absolutely
sufficient.
•
In accordance with the working range, either the high or low
calibration point should be selected. (CP
≥
or < 45 degC)
•
This calibration causes an extra inaccuracy for the rest of the
working range.
•
The one point temperature calibration may be performed direct-
ly on the circuit board, or for convenience, using the
configuration software supplied. (for more details, see "Software"
manual, 1-point temperature calibration)
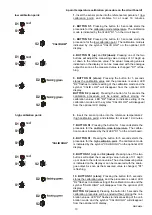
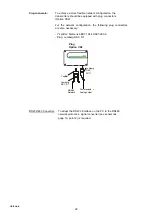
1-point temperature calibration procedure on the circuit board!
1.
Insert the sensor probe into the reference temperature
(calibration point) and stabilise for at least 30 minutes.
2. BUTTON S1
: Pressing the button for 5 seconds starts the
procedure for the calibration mode temperature. The calibration
mode is indicated by the lit LED "D1" on the circuit board
3. BUTTON S1
: Pressing the button for 5 seconds starts the
procedure. The calibration mode is indicated by the symbol
"CALIB HIGH" on the optional LCD display (CP
≥
45 degC).
or
BUTTON S2
: Pressing the button for 5 seconds starts the pro-
cedure. The calibration mode is indicated by the symbol "CALIB
LOW" on the optional LCD display (CP
≥
45 degC).
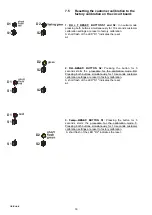
4. BUTTON S1 (up)
and
S2 (down)
: Pressing one of the two
buttons will adjust the measuring value in steps of 0.1degC up
or down to the reference value. The actual measuring value is
indicated on the display or can be measured with the analogue out-
put.
5. BUTTON S1 (store)
: Pressing the button for 5 seconds
stores the calibration value and the procedure is ended. LED
"D2" flashes to indicate exiting of the calibration mode and the
symbol "CALIB LOW" or "CALIB HIGH" will disappear from the
optional LCD display.
BUTTON S2 (cancel)
: Pressing the button for 5 seconds the
calibration procedure will be ended without storing the
calibration values. LED "D2" flashes to indicate exiting of the
calibration mode and the symbol "CALIB LOW" or "CALIB
HIGH" will disappear from the optional LCD display.
i
S1
S2
S2
S1
S1
S1
S2
D1
red
D1
red
D2
D2
“CALIB HIGH”
“CALIB LOW”
Hardware


