User Manual HTS801
Humidity and Temperature Sensor for High Humidity and Chemically Polluted Conditions | 27
Installation instructions
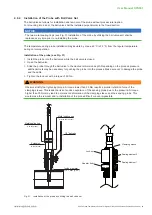
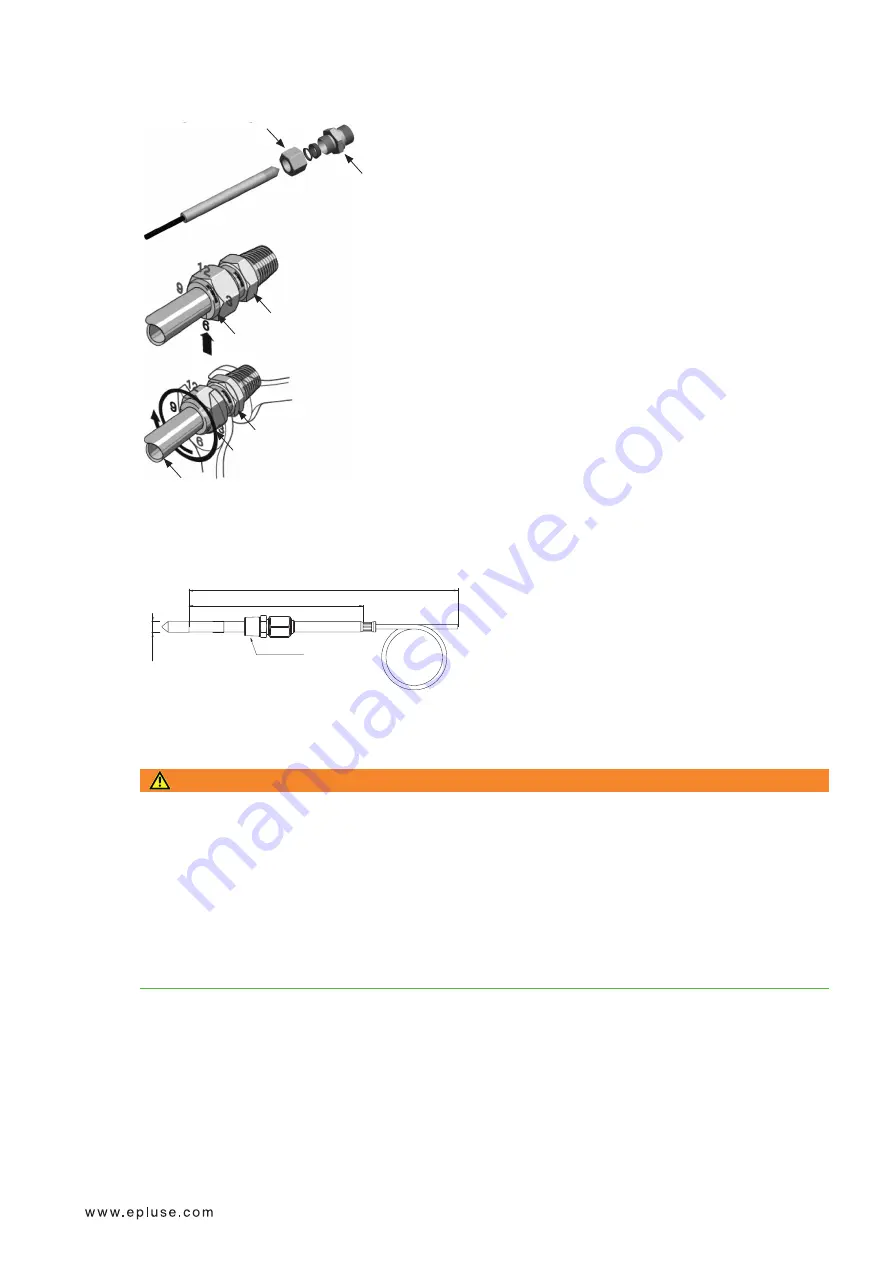
A
A
B
C
B
B
A
▪.
Tighten the nut (A) finger-tight.
▪.
Mark the nut (A) at 6 o‘clock position.
▪.
Hold the screw connection body (B) tight and tighten the nut (A)
with 1 ¼ turns till 9 o’clock position.
Assembly with high pressure applications and applications with
a high security factor:
▪.
Tighten the nut (A) until the probe (C) can no longer be turned by
hand and moved axially in the feedthrough.
▪.
Mark the nut (A) at 6 o’clock position.
▪.
Hold the screw connection body (B) tight and tighten the nut (A)
with 1 ¼ turns to 9 o’clock position.
Re-mounting:
▪.
Slide the measurement probe with clamping ring into the fitting as
far as it goes.
▪.
Tighten the nut finger-tight, then tighten by approx. a ¼ turn using
a spanner.
4.5
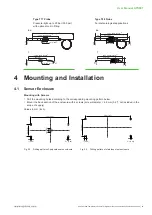
Remote Sensing Probe Type T9
1/2".ISO.or
1/2".NPT.
code “cable length”
code “probe length”
∅
12
(0.5")
For.pressure-tight.installation.up.to.300.bar.(4 350.psi).the.remote.sensing.probe.type.T9.comes.with.a.pressure-
tight feedthrough within the scope of supply.
WARNING
General safety instructions for pressure-tight installation
The installation, commissioning and operation of the HTS801-T9 may be performed by qualified staff
only. Special attention shall be paid to the correct installation of the probe into the process. In case of
inappropriate installation there is the risk for the probe to be suddenly expulsed due to the pressure in the
process.
Bending over the sensing probe should be avoided under any circumstances!
Make sure that the surface of the probe is not damaged during installation. A damaged probe surface may
lead to damaged seals and consequently to leakage and pressure loss.
The probe is rated with leakage rate B according to EN12266-1.


