7
E-flite Shoestring 15e ARF Assembly Manual
hinging the Ailerons
Required parts
Left wing panel with aileron
Right wing panel with aileron
Required Tools and Adhesives
T-pin
Thin CA
Pin vise
Drill bit: 1/16-inch (1.5mm)
1. Remove the aileron and hinges from the wing
panel. Use a pin vise and 1/16-inch (1.5mm) drill
bit to drill a hole in the center of each hinge slot.
Drill holes in both the aileron and wing. This creates
a tunnel for the CA to wick into, making a better
bond between the hinge and surrounding wood.
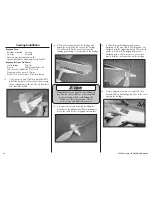
2. Place a T-pin in the center of each of the three
hinges. This will center the hinges when installed in
the aileron.
3. Place the hinges in the aileron as shown.
4. Slide the aileron back into position.
When gluing the hinges, do not use CA
accelerator. The CA must be allowed to
soak into the hinge to provide the best bond
between the hinge and surrounding wood.
5. Remove the T-pins, then press the aileron tightly
against the wing. Center the aileron in the opening
and check that it can move freely without binding
at the root or tip. Wick thin CA into the top and
bottom of all three hinges.
6. Once the CA has fully cured. Gently pull on the
aileron to make sure the hinges are secure. If any
hinges are loose, reapply CA to the hinge. Flex the
aileron through its range of motion a number of
times to break in the aileron hinges.
7. Repeat Steps 1 through 7 to hinge the
remaining aileron.


