Installation:
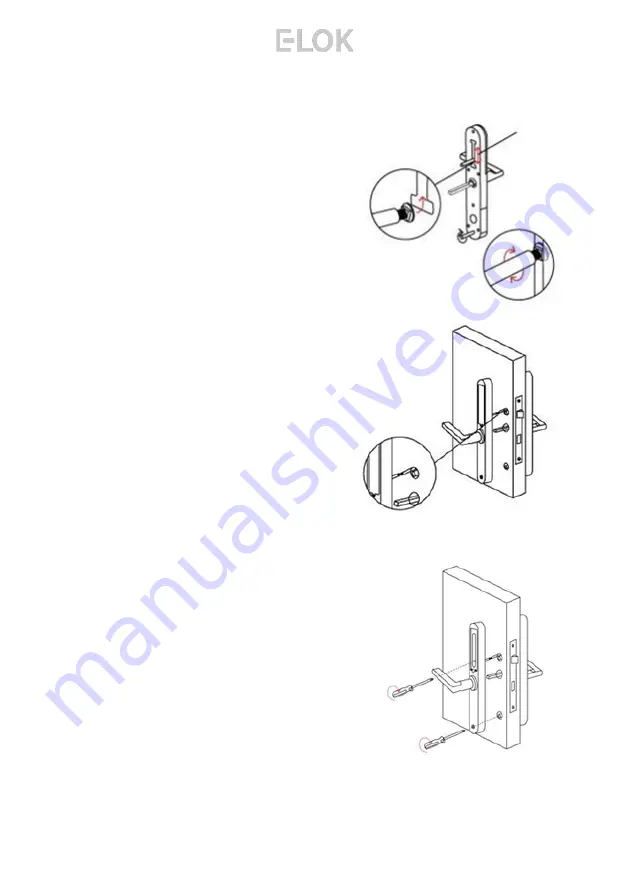
Step 5.
Now install the adjustable height screw
casing on the outdoor handle and bottom
screw casing. Now attach the included
rubber gaskets to both the front and back
handle.
Step 6.
Now you are ready to connect the front and
back panel. Remove the battery case from
the back panel. Connect the cable, ensure
there is space in the door for it. You may
have to create a cavity in a wooden door for
this.
Step 7.
Screw the back panel to front. Depending
on your door width, use the appropriate
included fixings screws for the top and
bottom fixing points.
Install Batteries and screw the battery
case back into place.
E-LOK 9-Series Smart Lock should be
ready to go!
11
9 - S e r i e s
Summary of Contents for 9-Series
Page 1: ...905 915 User Manual...
Page 38: ...Notes 9 S e r i e s...
Page 39: ...Notes 9 S e r i e s...
Page 40: ...9 S e r i e s User Manual E LOK com Version 2112 E9UM...


