


Proteus 2000 Operation Manual
23
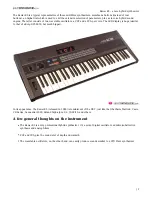
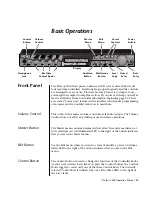
Basic Operations
Front Panel Controller Modes
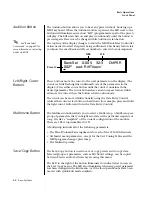
Home/Enter Button
The Home/Enter button is dual purpose. In general, this button acts as the
“Home” button. For example, when in an Edit menu, this button snaps the
cursor to the page name field of the current screen. When viewing the
Preset Select screen (we also call it the main screen), this button snaps the
cursor to the preset number field. In these instances, the LED is not used.
Some screens and parameter fields use this button as the “Enter” button. In
these cases, the LED blinks when the cursor is moved to one of these fields
indicating that the module is waiting for your response to initiate the
operation.
Data Entry Control
The Data Entry Control is a stepped, variable control switch used to change
parameter values. The wheel increments or decrements the current value
one unit with each click. This control incorporates acceleration, which
advances the value faster if the Data Entry Control is turned quickly.
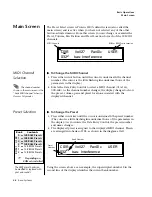
Controller Knobs
Each of the four Real-time Controller knobs has a corresponding LED to its
upper right side. The function of the Real-time Controllers depends on
which row is currently selected and the programming of the preset.
Front Panel
Controller
Modes
The Real-time Controller Knobs serve three purposes:
1.
Real-time control of synthesizer parameters
2.
“Quick Editing” the initial settings of the real-time controllers
3.
“Deep Editing” the parameters
This section describes each of the three uses.
Real-time Control
The Real-time controller knobs provide direct control of the Proteus 2000’s
synthesizer parameters. They are always active when on the Preset Select
(main) screen. They can optionally be used to transmit MIDI controller
messages to other MIDI devices.
The Control button (left of the knobs) changes the function of the real-time
controller knobs. Each time the button is pressed, the Control Mode toggles
to select one of the three Control Row groups. The currently selected
Control Row is indicated by the illuminated LED to the right of the button.
The control knob functions are determined by the selected Control Row.
The three Control Rows generate MIDI data that can control the preset on
the current MIDI channel (the channel showing on the Preset and main
screen. The labels (Tone, Presence, Shape, Image, etc.) printed on these rows
show how the factory ROM presets may be programmed to respond.
(The
controls might not conform to the front panel labels depending on the preset.)
You
can change the way a preset responds to MIDI A-L messages from the Edit
menu (PatchCords).