


Proteus 2000 Operation Manual
25
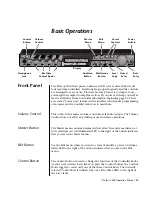
Basic Operations
Front Panel Controller Modes
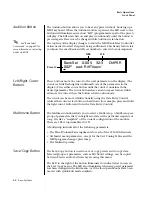
Deep Edit Mode
When in the Master, or Edit menus, you can use the Controller Knobs to
edit parameters. Using the Controller Knobs is a faster method for entering
data, but the Data Entry Control offers finer precision.
þ
To Enable Deep Edit Mode:
1.
Press the Master button and use the Data Entry Control to advance to
the “Knobs Deep Edit” screen as shown in the following illustration.
2.
Press either Cursor key to move the cursor to the bottom line in the
display.
3.
Use the Data Entry Control to change the value to “enabled.”
4.
Press the Master menu button to exit the Master menu.
When you enter any of the Edit menus:
1.
The four Controller Knobs are used for editing.
2.
All the Controller LEDs are off.
3.
All the Control Row LEDS are off.
When you turn a knob, the field value jumps to the current knob value.
You can still use the Data Entry Control for editing by moving the cursor to
the desired field.
To move through menus horizontally, use the Data Entry Control (the
page’s title field is the default cursor position). To move through menus
vertically (preset layers), press the left cursor to get to the layer field, then
change layers with the Data Entry Control.
•
Use the Data Entry Control to move through menus (horizontally) or
layers (vertically).
•
Use the Controller Knobs to change parameter values within each page.
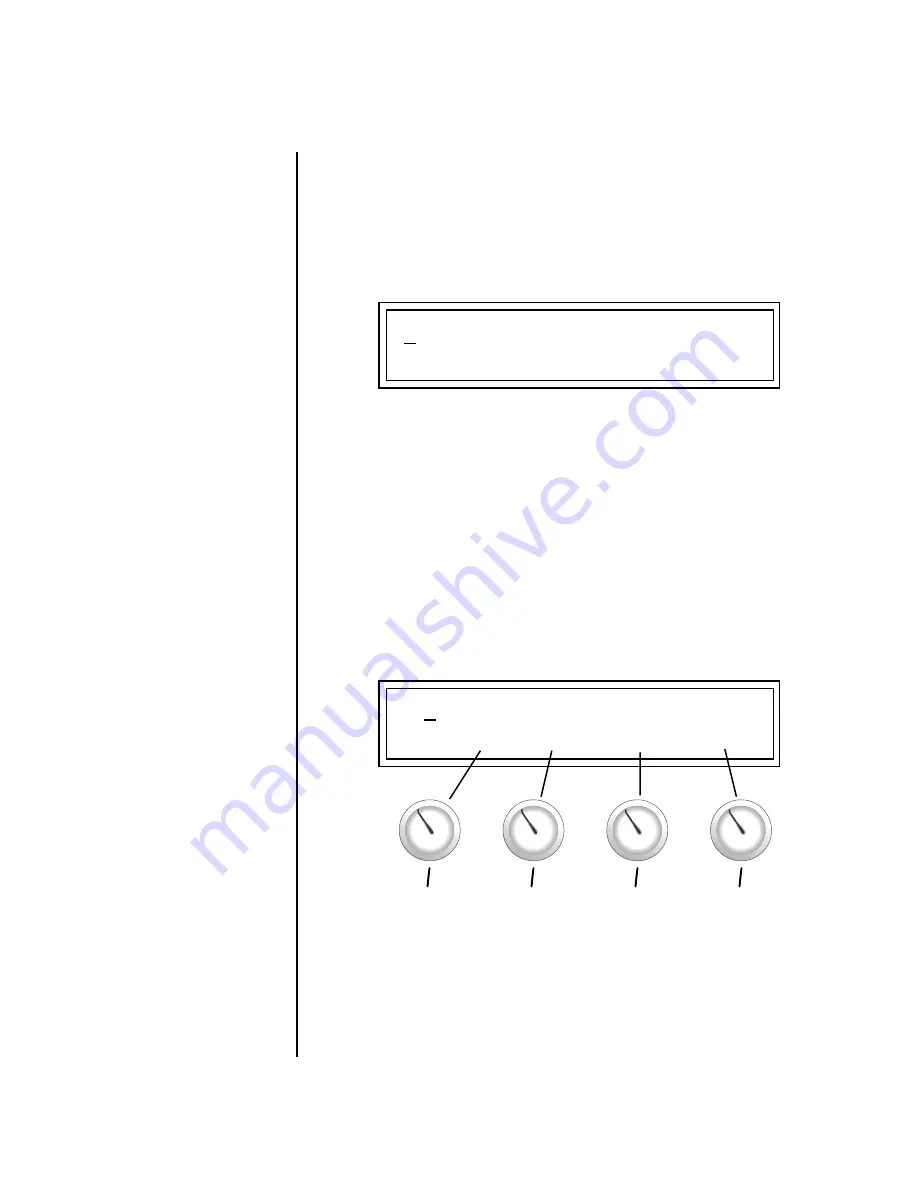
KNOBS DEEP EDIT
disabled
L1
KEY: LO FADE HIGH FADE
C-2 000 G8 000
A/E/I
B/F/J
C/G/K
D/H/L