background image

2Five Owner’s Guide

INDEX   5

INDEX

TITLE

PAGE NO.

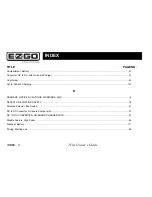
Electrolyte Level and Water .................................................................................................................................................... 102

Error and Warning Codes.......................................................................................................................................................... 92

Feature, High Pedal Disable  .................................................................................................................................................... 68

FEATURES ............................................................................................................................................................................... 37

FOUR-PASSENGER SPECIFICATIONS, 2Five ...................................................................................................................... 27

Front Seats................................................................................................................................................................................ 47

Front Turn Signals..................................................................................................................................................................... 47

GENERAL ................................................................................................................................................................................... 3

General Information................................................................................................................................................................... 37

GENERAL OPERATION ............................................................................................................................................................. 8

Glove Box, Locking  .................................................................................................................................................................. 45

Grab Handle - Front Passenger ................................................................................................................................................ 47

Grab Handle - Rear Passenger................................................................................................................................................. 49

Summary of Contents for 2010 2Five FOUR-PASSENGER

Page 1: ...OWNER S G UIDE...

Page 2: ...ntact your service representative on servicing the vehicle in accordance with the Periodic Service Schedule Service Parts Manuals as well as Repair and Service Manuals are available from a local Distr...

Page 3: ...FOREWORD 2Five OWNER S GUIDE ELECTRIC POWERED LOW SPEED VEHICLE 2Five TWO PASSENGER 2Five FOUR PASSENGER STARTING MODEL YEAR 2010...

Page 4: ...FOR ERRORS IN THIS MANUAL and E Z GO SPECIFICALLY DISCLAIMS LIABILITY FOR INCIDENTAL AND CONSEQUENTIAL DAMAGES resulting from the use of the information and materials in this Manual TO CONTACT US NOR...

Page 5: ...ent Manufacturer OEM approved parts may void the warranty Overfilling batteries may void the warranty BATTERY PROLONGED STORAGE All batteries will self discharge over time The rate of self discharge v...

Page 6: ...iv 2Five Owner s Guide FOREWORD Read all of this manual to become thoroughly familiar with this vehicle Pay particular attention to all Notices Cautions Warnings and Dangers Notes...

Page 7: ...e v TABLE OF CONTENTS TITLE PAGE NO SAFETY INFORMATION SECTION 1 GENERAL SPECIFICATIONS SECTION 23 INTRODUCTION SECTION 35 OPERATING PROCEDURES SECTION 53 MAINTENANCE PROCEDURES SECTION 71 REGISTRATIO...

Page 8: ...vi 2Five Owner s Guide TABLE OF CONTENTS Read all of this manual to become thoroughly familiar with this vehicle Pay particular attention to all Notices Cautions Warnings and Dangers Notes...

Page 9: ...OF CONTENTS FOR SAFETY INFORMATION SECTION TITLE PAGE NO GENERAL 3 NOTICES CAUTIONS WARNINGS AND DANGERS 4 GENERAL OPERATION 8 MAINTENANCE 13 VENTILATION 14 SEAT BELTS 15 Seat Belt Operation 17 REPORT...

Page 10: ...2 2Five Owner s Guide SAFETY INFORMATION Read all of this manual to become thoroughly familiar with this vehicle Pay particular attention to all Notices Cautions Warnings and Dangers Notes...

Page 11: ...bels located on the vehicle Always replace any damaged or missing labels On steep hills it is possible for vehicles to coast at greater speeds To prevent loss of vehicle control and possible serious i...

Page 12: ...NGS and DANGERS be aware that servicing a vehicle requires mechanical skill and a regard for conditions that could be hazardous Improper service or repair may damage the vehicle or render it unsafe Ad...

Page 13: ...EMENTS THIS IS A LEGAL REQUIREMENT AND IS IMPORTANT TO THE SAFE USE AND OPERATION OF THE PRODUCT All customers should adhere to this SAFETY RESTRICTION in connection with the use of all E Z GO product...

Page 14: ...GO 2Five dealer or write to the address on the back cover of this publication Attention Customer Quality Department E Z GO reserves the right to make design changes without obligation to make these c...

Page 15: ...ance beyond the factory specification Such modifications can result in serious personal injury or death Do not make any such modifications or changes E Z GO prohibits and disclaims responsibility for...

Page 16: ...n vehicle is to be left unattended turn key to OFF position AND REMOVE KEY Drive vehicle only as fast as terrain and safety considerations allow Consider the terrain and traffic conditions Consider en...

Page 17: ...worn at all times while operating the vehicle Keep feet legs hands and arms inside vehicle at all times Avoid extremely rough terrain Check area behind the vehicle before operating in reverse Make sur...

Page 18: ...fail A vehicle requiring repair is no longer functioning as designed and therefore could be potentially hazardous Therefore use extreme care when working on any vehicle When diagnosing removing or re...

Page 19: ...Be sure no loose clothing or hair can contact moving parts Use care not to touch hot objects Wear eye protection when working on or around the vehicle In particular use care when working around batter...

Page 20: ...ve all warnings and operation instruction labels affixed to the vehicle use extreme caution in areas where pedestrians are present maintain adequate distance between vehicles follow all safety rules e...

Page 21: ...are only performed by trained and qualified personnel follow the manufacturer s maintenance procedures insulate any tools used within the battery area in order to prevent sparks or battery explosion...

Page 22: ...ea charge in an area free of flammable liquids and items charge a vehicle in an area that is free from flame or spark pay particular attention to natural gas or propane water heaters and furnaces use...

Page 23: ...stened Be certain the seat belts are latched securely and are free from twists Position the shoulder belt across the top of the shoulder Do not place the shoulder belt under an arm Loose fitting safet...

Page 24: ...cle has not been tested for use with automotive style child safety seats or booster seats Do not use automotive style child safety seats or booster seats with this vehicle Inspect the safety belt webb...

Page 25: ...located near the center of the seat A click will be heard when the tab is securely latched Position the lap belt as low as possible on the hips not the waist Properly adjust and ensure a snug fit by p...

Page 26: ...Z GO Division of Textron Inc If NHTSA receives similar complaints it may open an investigation and if it finds that a safety defect exists in a group of vehicles it may order a recall and remedy campa...

Page 27: ...ve Owner s Guide 19 SAFETY INFORMATION Read all of this manual to become thoroughly familiar with this vehicle Pay particular attention to all Notices Cautions Warnings and Dangers LABELS AND PICTOGRA...

Page 28: ...SAFETY INFORMATION Read all of this manual to become thoroughly familiar with this vehicle Pay particular attention to all Notices Cautions Warnings and Dangers 20 2Five Owner s Guide...

Page 29: ...2Five Owner s Guide 21 SAFETY INFORMATION Read all of this manual to become thoroughly familiar with this vehicle Pay particular attention to all Notices Cautions Warnings and Dangers...

Page 30: ...22 2Five Owner s Guide SAFETY INFORMATION Read all of this manual to become thoroughly familiar with this vehicle Pay particular attention to all Notices Cautions Warnings and Dangers Notes...

Page 31: ...2Five Owner s Guide 23 GENERAL SPECIFICATIONS TABLE OF CONTENTS FOR GENERAL SPECIFICATIONS SECTION TITLE PAGE NO 2Five TWO PASSENGER SPECIFICATIONS 25 2Five FOUR PASSENGER SPECIFICATIONS 27...

Page 32: ...24 2Five Owner s Guide GENERAL SPECIFICATIONS Read all of this manual to become thoroughly familiar with this vehicle Pay particular attention to all Notices Cautions Warnings and Dangers Notes...

Page 33: ...ion splined to the motor shaft BRAKES 4 Wheel hydraulic disc PARKING BRAKE Automatic parking brake function FRONT SUSPENSION Coil springs over hydraulic shock absorbers REAR SUSPENSION Leaf springs wi...

Page 34: ...2 volt receptacle for accessories TIRES 205 50 10 TIRE PRESSURE 30 psi 207 kPa GROUND CLEARANCE 4 7 inches 11 9 cm at differential WEIGHT 822 lbs 373 kg without batteries OPERATING CONTROLS INSTRUMENT...

Page 35: ...el hydraulic disc PARKING BRAKE Automatic parking brake function FRONT SUSPENSION Coil springs over hydraulic shock absorbers REAR SUSPENSION Leaf springs with hydraulic shock absorbers STEERING Singl...

Page 36: ...2 volt receptacle for accessories TIRES 205 50 10 TIRE PRESSURE 30 psi 207 kPa GROUND CLEARANCE 4 5 inches 11 4 cm at differential WEIGHT 872 lbs 397 kg without batteries OPERATING CONTROLS INSTRUMENT...

Page 37: ...s Guide 29 GENERAL SPECIFICATIONS Read all of this manual to become thoroughly familiar with this vehicle Pay particular attention to all Notices Cautions Warnings and Dangers Fig 1 2Five Two Passenge...

Page 38: ...FICATIONS Read all of this manual to become thoroughly familiar with this vehicle Pay particular attention to all Notices Cautions Warnings and Dangers 30 2Five Owner s Guide Fig 2 2Five Four Passenge...

Page 39: ...de 31 GENERAL SPECIFICATIONS Read all of this manual to become thoroughly familiar with this vehicle Pay particular attention to all Notices Cautions Warnings and Dangers Fig 3 2Five Two and Four Pass...

Page 40: ...TIONS Read all of this manual to become thoroughly familiar with this vehicle Pay particular attention to all Notices Cautions Warnings and Dangers 32 2Five Owner s Guide Fig 4 2Five Two and Four Pass...

Page 41: ...of this manual to become thoroughly familiar with this vehicle Pay particular attention to all Notices Cautions Warnings and Dangers Fig 5 Vehicle Incline Specifications and Turning Diameter 1 9 7 f...

Page 42: ...34 2Five Owner s Guide GENERAL SPECIFICATIONS Read all of this manual to become thoroughly familiar with this vehicle Pay particular attention to all Notices Cautions Warnings and Dangers Notes...

Page 43: ...ing Brake 38 Key Switch Direction Selector 41 High Low Speed Switch 41 Accelerator Pedal 41 Brake Pedal 41 Horn 41 Headlight Switch 43 State of Charge Meter 43 Speedometer 43 Odometer 43 12V Accessory...

Page 44: ...equipped 47 Headlamps 47 Front Turn Signals 47 Rear Seat 49 Seat Belts Rear 49 Rear Restraints 49 Grab Handles Rear Passenger 49 Brake Light Turn Signal 49 Brake Light Overhead 49 Rear Storage Compar...

Page 45: ...nal with the key switch in the OFF position ALL accessories that do NOT use the accessory wiring harness MUST be connected to draw from the entire 48 Volt battery pack A DC to DC converter is required...

Page 46: ...ake This vehicle is equipped with an automatic parking brake when the vehicle is stopped the parking brake is automatically set The parking brake is released when the key switch direction selector is...

Page 47: ...2Five Owner s Guide 39 INTRODUCTION Read all of this manual to become thoroughly familiar with this vehicle Pay particular attention to all Notices Cautions Warnings and Dangers Notes...

Page 48: ...INTRODUCTION Read all of this manual to become thoroughly familiar with this vehicle Pay particular attention to all Notices Cautions Warnings and Dangers 40 2Five Owner s Guide...

Page 49: ...y should be turned to the OFF position and removed 2 High Low Speed Switch Located above the four cup console this switch allows operator to select between High Rabbit and Low Tur tle speeds for on ro...

Page 50: ...INTRODUCTION Read all of this manual to become thoroughly familiar with this vehicle Pay particular attention to all Notices Cautions Warnings and Dangers 42 2Five Owner s Guide...

Page 51: ...ting a full charge on the battery pack and E indicating the battery pack needs to be charged 8 Speedometer The digital speedometer is located on the dash in front of the steering wheel and indicates v...

Page 52: ...INTRODUCTION Read all of this manual to become thoroughly familiar with this vehicle Pay particular attention to all Notices Cautions Warnings and Dangers 44 2Five Owner s Guide 13 11 14 15 12 16 17...

Page 53: ...n either direction 13 Rear View Mirror The rear view mirror is a two position mirror manually adjusted for day and nighttime conditions 14 Side View Mirrors A driver side mirror is standard passenger...

Page 54: ...INTRODUCTION Read all of this manual to become thoroughly familiar with this vehicle Pay particular attention to all Notices Cautions Warnings and Dangers 46 2Five Owner s Guide...

Page 55: ...Restraint Front The front hip restraints are designed to help keep the occupants properly positioned in the event of sudden vehicle position changes 20 Grab Handles Front Passenger The vehicle is equ...

Page 56: ...TRODUCTION Read all of this manual to become thoroughly familiar with this vehicle Pay particular attention to all Notices Cautions Warnings and Dangers 48 2Five Owner s Guide 25 32 27 29 27 30 26 28...

Page 57: ...of sudden vehicle position change 28 Grab Handles Rear Passenger The vehicle is equipped with grab handles 29 Brake Light Turn Signal The combination brake light turn signal assemblies are located on...

Page 58: ...INTRODUCTION Read all of this manual to become thoroughly familiar with this vehicle Pay particular attention to all Notices Cautions Warnings and Dangers 50 2Five Owner s Guide 33 35 37 34 36 38...

Page 59: ...charged 35 On board Charger with DC to DC Converter On board charger is used to charge battery while vehicle is parked and the DC to DC converter is used to power accessories 36 Fuse Block The Fuse B...

Page 60: ...fter moving a stalled vehicle If the switch is left in the TOW position for an extended period of time it will drain the batteries The Run Tow switch is located under the seat on the passenger side of...

Page 61: ...R VIN 57 VEHICLE DATA PLATE 58 BEFORE INITIAL USE 59 ON BOARD CHARGER 61 Understanding the Charger 62 Maintenance Instructions 64 OPERATING THE VEHICLE 65 Regenerative Braking 67 Pedal Up Braking 67 P...

Page 62: ...54 2Five Owner s Guide Read all of this manual to become thoroughly familiar with this vehicle Pay particular attention to all Notices Cautions Warnings and Dangers Notes OPERATING PROCEDURES...

Page 63: ...vehicle One is placed on the steering column Ref Fig 1 the second is located on the frame member under the front splash shield on the driv er side Ref Fig 2 and the third is located on the passenger...

Page 64: ...ual to become thoroughly familiar with this vehicle Pay particular attention to all Notices Cautions Warnings and Dangers 56 2Five Owner s Guide Fig 2 Serial Number on Front Frame Fig 3 Serial Number...

Page 65: ...tention to all Notices Cautions Warnings and Dangers VEHICLE IDENTIFICATION NUMBER VIN The Vehicle Identification Number VIN is located on the far left side of the header Ref Fig 4 It may be necessary...

Page 66: ...tions Warnings and Dangers 58 2Five Owner s Guide VEHICLE DATA PLATE The vehicle data plate is located on the inside surface of the canopy strut Ref Fig 5 The data plate con tains information concerni...

Page 67: ...cess A 4 concentration of hydrogen gas is explosive and could cause severe injury or death Charging must take place in an area that is adequately ventilated minimum of five air exchanges per hour To r...

Page 68: ...mmended that approximately 20 stops with moderate braking from 20 mph to 5 mph should be made without coming to a complete stop This procedure will assure that your new brakes will function to their f...

Page 69: ...r breaking the connections to the battery while charging Do not open or disassemble charger Do not operate charger if the AC supply cord is damaged or if the charger has been damaged in any way refer...

Page 70: ...been engaged the receptacle LED shall perform a 3 second RED GREEN self test flash The receptacle LED will then flash SHORT GREEN to indicate CHARGING 80 and a low charge current shall be applied for...

Page 71: ...d into a grounded receptacle The optional charging AC cord is equipped with a polarized connector that fits into a matching receptacle on the vehicle The receptacle is located on the driver side of th...

Page 72: ...ions recommended by the battery manufacturer 2 Make sure the charger connections to the battery terminals are tight and clean Check for any deforma tions or cracks in the plastic parts Check the charg...

Page 73: ...ing from loss of vehicle control the following warnings must be observed When driving vehicle consider the terrain traffic conditions and the environmen tal factors which effect the terrain and the ab...

Page 74: ...key to OFF position and remove the key Make sure that the direction selector is in correct position before attempting to start the vehicle Always bring the vehicle to a complete stop before shifting t...

Page 75: ...speed When the regenerative braking system is activated by this sequence of events the motor generates power that is returned to the bat teries When the vehicle speed is reduced below the maximum by...

Page 76: ...on if the key is turned on while the accelerator is depressed Starting and Driving All vehicles are equipped with an interlock system that disables the controller and prevents the vehicle from being o...

Page 77: ...ake will be released Coasting Uncontrolled coasting does not occur with this model However this is not a substitute for the brake which should be used to slow the speed of the vehicle quickly This mod...

Page 78: ...nd Windshield Always keep arms and legs inside of the vehicle when the car is moving The top and windshield are designed to provide protection from the elements but the operator and passen gers may no...

Page 79: ...E 73 Vehicle Cleaning 73 REPAIR 75 Lifting the Vehicle 76 WHEELS AND TIRES 78 Tire Repair 79 Wheel Installation 80 LIGHT BULB REPLACEMENT 81 Headlight Bulb Replacement 81 Turn Signal Bulb Replacement...

Page 80: ...arning Codes 92 Hardware 93 CAPACITIES AND REPLACEMENT PARTS 94 PERIODIC SERVICE SCHEDULE 95 BATTERY CHARGING AND MAINTENANCE 98 Batteries 98 At Each Charging Cycle 101 Monthly 101 Electrolyte Level a...

Page 81: ...use any abrasive or reactive solvents to clean plastic parts It is important that proper techniques and cleaning materials be used Using excessive water pressure may cause severe injury to the operato...

Page 82: ...ted surfaces Occasional cleaning and waxing with non abrasive products designed for clear coat automotive finishes will enhance the appearance and durability of the painted surfaces Corrosive material...

Page 83: ...reduce the possibility of severe injury or death from a vehicle falling from a jack Always place chocks in front and behind the wheels not being raised Be sure the vehicle is on a firm and level surf...

Page 84: ...l the wheel chocks in front and behind each front wheel Center the jack under the rear axle tube next to differential housing Raise the vehicle and position the jack stands under the frame where the l...

Page 85: ...on to all Notices Cautions Warnings and Dangers To raise only the front or rear of the vehicle place the wheel chocks in front and behind the wheels that are not to be raised The jack may be left unde...

Page 86: ...r applied intermittently to seat beads Due to the low volume of the small tires overinflation can occur in seconds Never exceed the tire manufacturer s recom mendation when seating a bead Protect face...

Page 87: ...Wrench ft lbs 1 Use caution when inflating tires Due to the low volume of the small tires overinflation can occur in seconds Overinflation could cause the tire to separate from the wheel or cause the...

Page 88: ...e than 85 ft lbs 115 Nm torque It is important to follow the cross sequence pattern when installing lug nuts This will assure even seating of the wheel against the hub With the valve stem to the outsi...

Page 89: ...s portion of the bulb Headlight Bulb Replacement Make sure that the vehicle key switch is in the OFF position and the key has been removed For vehicles equipped with lights mounted in the cowl locate...

Page 90: ...ide MAINTENANCE PROCEDURES Turn Signal Bulb Replacement Make sure that the vehicle key switch is in the OFF position and the key has been removed 1 Remove the two Phillips head screws 7 that secure th...

Page 91: ...nings and Dangers Taillight Brake Light Bulb Replacement Make sure that the vehicle key switch is in the OFF position and the key has been removed 1 Remove the two Phillips head screws 10 that secure...

Page 92: ...lways check that the vehicle and contents are adequately secured before transporting The rated capacity of the trailer or truck must exceed the weight of the vehicle see GENERAL SPECIFICATIONS for veh...

Page 93: ...au th or ize d m od ific at io ns ca n re su lt in SE RI O US IN JU RY or da m ag e to th e ve hi cle an d wi ll vo id th e wa rra nt y W AI T 30 se co nd s af te r re co nn ec tin g ba tte rie s BE...

Page 94: ...th the vehicle key when the center pin snaps into place the rivet can be removed repeat the process for each remaining rivet Turn the splash shield over to reveal the instructions for releasing the pa...

Page 95: ...iary Power line 3 and remove the weather pack seal 4 from the connector 2 Locate the Primary Power line connector 1 and disconnect it from line 2 3 Connect the Auxiliary Power line 3 to the Primary Po...

Page 96: ...of this manual to become thoroughly familiar with this vehicle Pay particular attention to all Notices Cautions Warnings and Dangers 88 2Five Owner s Guide MAINTENANCE PROCEDURES Fig 1 Controller Spla...

Page 97: ...ding all notes cau tions and warnings in this manual Never depress the accelerator pedal with drive wheels off the ground Wear eye protection when working on the vehicle Use extra care when working ar...

Page 98: ...king soda dissolved in 1 quart 1 liter of water and flushed with water Aerosol containers of battery terminal protectant must be used with extreme care Insulate metal container to reduce the possibili...

Page 99: ...FTING THE VEHICLE for proper lift ing procedure and safety information Tire Inspection Tire condition should be inspected per the Periodic Service Schedule Inflation pressures should be checked when t...

Page 100: ...ing 12818 Battery Voltage High 1001 Power Reduction to Motor 12833 Battery Voltage Low 1002 Motor Speed Sensor 20753 15V Supply Low Voltage 1003 Controller Default Parameter 20755 Sensor Power Error 1...

Page 101: ...marked hardware is Grade 2 Table 1 Torque Specifications and Bolt Grades ALLTORQUE FIGURES ARE IN FT LBS Nm BOLT SIZE Grade 2 1 4 5 16 3 8 7 16 1 2 9 16 5 8 3 4 7 8 1 Unless otherwise noted in text ti...

Page 102: ...ng a lost key the number on the key must match the number on the ignition FLUID QUANTITY Rear Axle Lubricant Mobil 424 Gear Oil 25 oz 740 ml Brake Fluid DOT 3 As Required Table 2 Capacities ITEM PART...

Page 103: ...750 miles 1250 kms QUARTERLY 1500miles 2500 kms SEMI ANNUAL 3000miles 5000 kms ANNUAL REPLACE AFTER Tires pressure condition of tires and rims Hardware loose or missing Reverse Warning Indicator Overa...

Page 104: ...500 kms SEMI ANNUAL 3000miles 5000 kms ANNUAL REPLACE AFTER Brakes check fluid level in master cylinder 3000 mi 5000 km Brakes smooth operation of pedal stopping distance Brakes aggressive stop test d...

Page 105: ...kms MONTHLY 750 miles 1250 kms QUARTERLY 1500miles 2500 kms SEMI ANNUAL 3000miles 5000 kms ANNUAL REPLACE AFTER Rear Axle oil leakage noise loose or missing hardware Rear Axle drain and replace fluid...

Page 106: ...sion that could result in severe personal injury or death keep all smoking materials open flames or sparks away from the batteries Hydrogen gas is formed when charging batteries Do not charge batterie...

Page 107: ...te in a battery is an acid solution which can cause severe burns to the skin and eyes Treat all electro lyte spills to the body and eyes with extended flushing with clear water Contact a physician imm...

Page 108: ...PROCEDURES Aerosol containers of battery terminal protectant must be used with extreme care Insulate metal container to prevent can from contacting battery terminals which could result in an explosio...

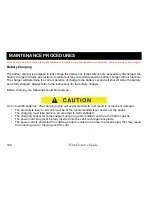
Page 109: ...e A battery has a maximum life therefore good maintenance is designed to maximize the available life and reduce the factors that can reduce the life of the battery At Each Charging Cycle Before chargi...

Page 110: ...will leave approximately 1 4 to 3 8 6 to 10 mm of space between the electrolyte and the vent tube The electrolyte level is important since any portion of the plates exposed to air will be ruined beyon...

Page 111: ...gas will force it out of the vent tube and battery cap The water will evaporate but the sulfuric acid will remain where it can damage vehicle components and the storage facility floor Sulfuric acid l...

Page 112: ...t be distilled or purified by an efficient filtration system Even if the water is colorless odorless tasteless and fit for drinking the water should be analyzed to see that it does not exceed the impu...

Page 113: ...es The electrolyte in a battery is an acid solution which can cause severe burns to the skin and eyes Treat all electrolyte spills to the body and eyes with extended flushing with clear water Contact...

Page 114: ...hut off when the battery set is fully charged Always refer to the instructions for the battery charger Before charging the following should be observed Do not overfill batteries The charging cycle wil...

Page 115: ...ians should repair or access high voltage wiring battery packs and associated systems To prevent battery explosion that could result in severe personal injury or death extreme care must be used with a...

Page 116: ...l of this manual to become thoroughly familiar with this vehicle Pay particular attention to all Notices Cautions Warnings and Dangers 108 2Five Owner s Guide MAINTENANCE PROCEDURES Fig 2 Battery Conn...

Page 117: ...floor After hosing down the batteries a residue will be left on the batteries which is conductive and will contribute to the discharge of the batteries To prevent battery damage be sure that all batt...

Page 118: ...me conditions After batteries are clean and dry the terminals should be coated with a commercially available protectant Aerosol containers of battery terminal protectant must be used with extreme care...

Page 119: ...aintained and prevent discharge In winter conditions the battery must be fully charged to prevent the possibility of freezing A fully charged battery will not freeze in temperatures above 75 F 60 C Al...

Page 120: ...112 2Five Owner s Guide Read all of this manual to become thoroughly familiar with this vehicle Pay particular attention to all Notices Cautions Warnings and Dangers Notes MAINTENANCE PROCEDURES...

Page 121: ...ON AND WARRANTY To register your vehicle go to http www ezgo com For warranty information go to http www ezgo com For Genuine E Z GO Parts Accessories contact your local E Z GO dealer or visit www sho...

Page 122: ...REGISTRATION AND WARRANTY Read all of this manual to become thoroughly familiar with this vehicle Pay particular attention to all Notes Cautions Warnings and Dangers Notes...

Page 123: ...1 Accessory Plug 12V 43 At Each Charging Cycle 101 Axle Rear 91 B Batteries 98 Batteries Cleaning 109 Battery Charging 106 BATTERY CHARGING AND MAINTENANCE 98 Battery Compartment 51 Battery Disposal 1...

Page 124: ...Brake Light Overhead 49 Brake Light Bulb Replacement Taillight 83 Brake Light Turn Signal 49 Brake Master Cylinder 51 91 Brake Pedal 41 Brake Parking 38 68 Braking Pedal Up 67 Braking Regenerative 67...

Page 125: ...S WARNINGS AND DANGERS NOTICES 4 Charger Receptacle On board 51 Charger On board with DC to DC Converter 51 CHARGER ON BOARD WITH DC TO DC CONVERTER 61 Charger Understanding the 62 CHARGING AND MAINTE...

Page 126: ...51 Cup Holder 45 Cycle At Each Charging 101 D DANGERS NOTICES CAUTIONS WARNINGS AND 4 DEFECTS REPORTING SAFETY 18 Direction Selector Key Switch 41 DC to DC Converter On board Charger with 51 DC TO DC...

Page 127: ...rror and Warning Codes 92 F Feature High Pedal Disable 68 FEATURES 37 FOUR PASSENGER SPECIFICATIONS 2Five 27 Front Seats 47 Front Turn Signals 47 G GENERAL 3 General Information 37 GENERAL OPERATION 8...

Page 128: ...rab Rear Passenger 49 Hardware 92 Hauling 84 Hazard Switch Turn Signal 45 Headlight Bulb Replacement 81 Headlamps 47 Headlight Switch 43 High Pedal Disable Feature 68 High Low Speed Switch 41 Hill Sta...

Page 129: ...TLE PAGE NO I IDENTIFICATION NUMBER VIN VEHICLE 57 Information General 37 INITIAL USE BEFORE 59 Inspection Tire 91 Installation Battery Removal and 107 Installation Wheel 80 Instructions Maintenance 6...

Page 130: ...ictograms 69 Level and Water Electrolyte 102 License Plate Holder 49 Lifting the Vehicle 76 Light Overhead Brake 49 LIGHT BULB REPLACEMENT 81 Light Bulb Replacement Head 81 Light Bulb Replacement Tail...

Page 131: ...uctions 64 MAINTENANCE BATTERY CHARGING AND 98 MAINTENANCE ROUTINE 91 MAINTENANCE SERVICE AND 89 Master Cylinder Brake 51 91 Meter State of Charge 43 Mirror Rear View 45 Mirrors Side View 45 Monthly 1...

Page 132: ...with DC to DC Converter 51 ON BOARD CHARGER WITH DC TO DC CONVERTER 61 On board Charger Receptacle 51 OPERATING THE VEHICLE 65 OPERATION GENERAL 8 Operation Seat Belt 17 P Parking Brake 38 68 PARTS C...

Page 133: ...NO Pedal Brake 41 Pedal Up Braking 67 PERIODIC SERVICE SCHEDULE 95 PICTOGRAMS LABELS AND 19 Pictograms Labels and 69 Plate Holder License 49 Plug 12V Accessory 43 Power Loss Total In Case of 85 Prolon...

Page 134: ...Storage Compartment 49 Rear View Mirror 45 Receptacle On board Charger 51 Regenerative Braking 67 REGISTRATION AND WARRANTY 113 Release Handle Rear Storage Compartment 49 Removal and Installation Bat...

Page 135: ...urn Signal Bulb 82 Replacement Taillight Brake Light Bulb 83 REPORTING SAFETY DEFECTS 18 Restraint Front Hip 47 Restraints Rear 49 ROUTINE MAINTENANCE 91 Run Tow Switch 51 S SAFETY DEFECTS REPORTING 1...

Page 136: ...SERIAL NUMBER LOCATION 55 SERVICE AND MAINTENANCE 89 SERVICE SCHEDULE PERIODIC 95 Side View Mirrors 45 Signal Bulb Replacement Turn 82 Signal Brake Light Turn 49 Signal Hazard Switch Turn 45 Signals F...

Page 137: ...a Hill 69 State of Charge Meter 43 Steering Wheel 45 Storage Compartment Rear 49 STORAGE BATTERY PROLONGED iii Storage Prolonged 112 Switch optional Windshield Wiper 45 Switch Headlight 43 Switch High...

Page 138: ...re Inspection 91 Tire Repair 79 TIRES WHEELS AND 78 Top and Windshield 70 Tow Switch Run 51 Total Power Loss In Case of 85 TRANSPORTING VEHICLE 84 Turn Signal Bulb Replacement 82 Turn Signal Brake Lig...

Page 139: ...the Charger 62 USE BEFORE INITIAL 59 V Vehicle Cleaning 73 VEHICLE CLEANING AND CARE 73 VEHICLE DATA PLATE 58 VEHICLE IDENTIFICATION NUMBER VIN 57 Vehicle on a Hill Starting 69 Vehicle Lifting the 76...

Page 140: ...TIONS 4 WARRANTY REGISTRATION AND 113 Water Electrolyte Level and 102 Wheel Installation 80 Wheel Steering 45 WHEELS AND TIRES 78 Windshield Wiper optional 47 Windshield Wiper Switch optional 45 Winds...

Page 141: ...INDEX 19 2Five Owner s Guide INDEX Read all of this manual to become thoroughly familiar with this vehicle Pay particular attention to all Notes Cautions Warnings and Dangers Notes...

Page 142: ...2Five Owner s Guide INDEX 20 INDEX Read all of this manual to become thoroughly familiar with this vehicle Pay particular attention to all Notes Cautions Warnings and Dangers Notes...

Page 143: ......
Page 144: ...6 800 241 5855 I Fax 706 796 4540 I www ezgo com e mail ezgo textron com I 2010 E Z GO Division of Textron Inc Read all this manual to become thoroughly familiar with this vehicle Pay particular atten...

Reviews: