SAFETY
Page B-3
Repair and Service Manual
Read all of Section B and this section before attempting any procedure. Pay particular attention to all Notices, Cautions, Warnings and Dangers.
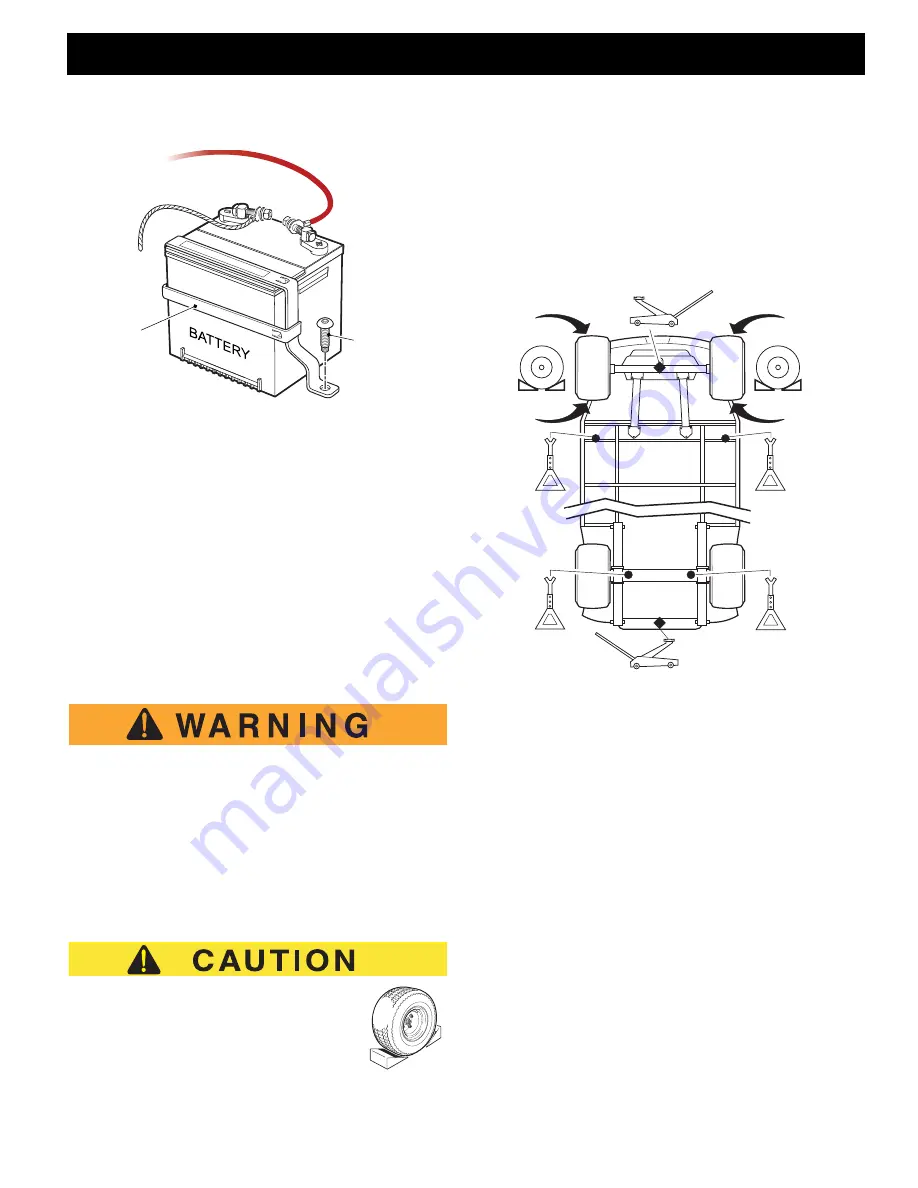
Fig. 1 Battery Removal
Connect the positive (+) battery cable first.
Connect
negative (-) battery cable last.
Be sure to remove all corrosion from terminals and hard-
ware. After installing battery, coat terminals with com-
mercially available terminal protectant.
LIFTING THE VEHICLE
Tool List
Qty.
Floor Jack.................................................................... 1
Jack Stands ................................................................. 4
Chocks ........................................................................ 4
Some servicing operations may require the front, rear or
the entire vehicle to be raised.
To prevent possible injury or death resulting
from a vehicle falling from a jack, be sure the
vehicle is on a firm and level surface. Never
get under a vehicle while it is supported by a
jack. Use jack stands and test the stability of
the vehicle on the stands. Always place chocks
in front and behind the wheels not being
raised. Use extreme care since the vehicle is
extremely unstable during the lifting process.
When lifting the vehicle, position jacks and
jack stands only on the areas indicated.
To raise the entire vehicle, install chocks in
front and behind each front wheel (Ref. Fig.
2). Center the jack under the rear frame crossmember.
Raise the vehicle and locate a jack stand under the
outer ends of the rear axle.
Fig. 2 Lifting the vehicle
Lower the jack and test the stability of the vehicle on the
two jack stands.
Place the jack at the center of the front axle. Raise the
vehicle and position jack stands under the frame cross-
member as indicated.
Lower the jack and test the stability of the vehicle on all
four jack stands.
If only the front or rear of the vehicle is to be raised,
place the chocks in front and behind each wheel not
being raised in order to stabilize the vehicle.
Lower the vehicle by reversing the lifting sequence.
B
BATTERY
TIE DOWN
TIE DOWN
SCREW
BATTERY -
View from Underside of Vehicle
Center of
Front Axle
Flat Portion
of Frame
Outside End
of Rear Axle


