Revised: 7/22/2015
4 of 8
By: HA
11.
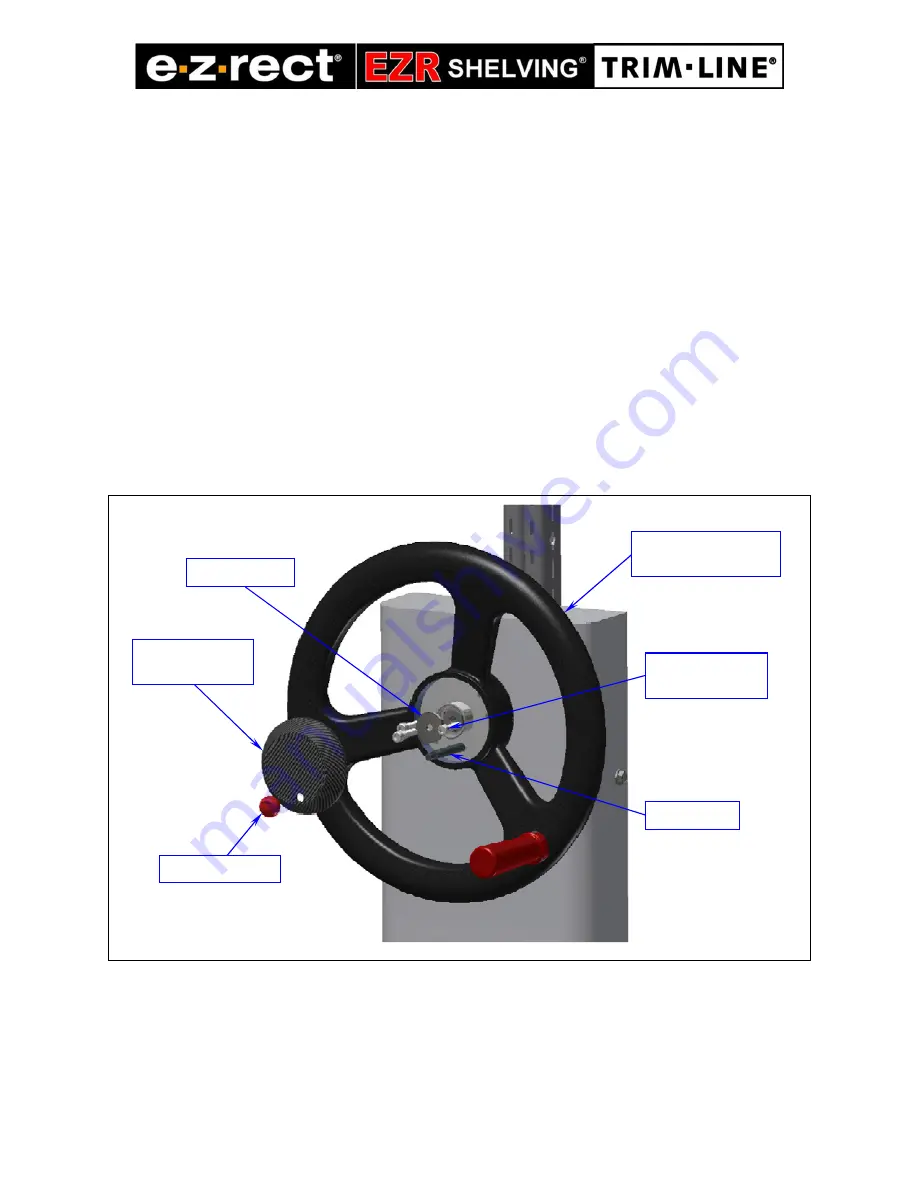
Loosely secure the drive handle on to the drive spindle with the washer ring and socket head
cap screw. Then, fasten the two socket cap screws into the two adjacent holes. Tighten all
three cap screws.
12.
Align the locking pin with the drive handle centre cap hole and press the cover until it snaps
into place.
13.
Install the threaded ball knob on to the end of locking pin. See Figure 5.
14.
Test the drive handle assembly by turning the drive handle while locking/unlocking the
locking pin. The Shelving Unit should slide to either side when the pin is in unlocked position
(locking pin disengaged from the crank block). Note: Refer to previous steps if further tower
chain tension adjustment is required.
Drive Handle
Assembly
Washer Ring
Threaded Knob
Locking Pin
Socket Head Cap
Screw (3x)
Drive Handle
Centre Cap


