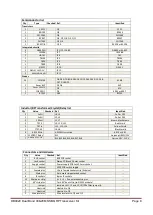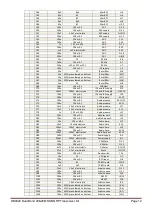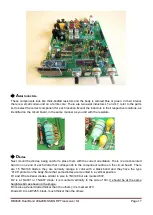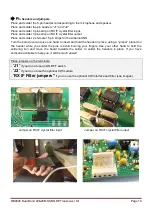
DB4020 Dual Band 40&20M SSB QRP Transceiver Kit
Page 16
ASSEMBLY
You can use the “individual parts list” or the “value/quantity parts list.” Using the “value/quantity parts list”
is the quickest way to mount components since all the circuit board components of the same value or
type can be placed one after the other. However, you will need the “individual parts list” to know how
each component is identified and its location on the circuit board. Depending on your personal
experience, you may prefer the individual parts list and feel more confident using it.
The 252-quadrant component layout map makes it very easy to find the location for all the components.
After mounting each component, it can be marked off in the “checked” column.
It is highly recommended that an inventory be taken of all the components to make sure that everything
can be located and is ready for assembly. Each builder may have his/her own method of organizing the
components. One suggested method is to use a block of Styrofoam packing material and poke the
components into it. The components can be sorted by type, value and size (ohms, micro-farads etc.).
RECOMMENDED ASSEMBLY SEQUENCE
R
esistors
The resistors are installed first. Mount all resistors and trimmers P1, P2, P4 and P6
P3 and P5 are the RF attenuator and volume potentiometers respectively; which should not be installed
yet.
Refer to the parts list, and select the first resistor, R1. Bend the leads as close to the component body as
possible (otherwise, they will not fit well into the holes), and place them into the appropriate holes
according to the component outline printed on the circuit board. Be careful to avoid confusing the
resistors with the axial inductors which are a bit thicker.
All of the resistors have a light-colored body and a gold band on one end. Inserting the resistor leads into
the holes, push down on the body of the component so that it rests flat on the board, hold it in place, and
then slightly bend the leads to keep the resistor in place. Then turn the board over and solder the leads
to the printed circuit trace. Make sure that the resistor body lies flat on the board so that its leads are as
short as possible. Please read the notes about soldering, as poor soldering is the most common cause
for a kit failing to work for the first time. After soldering the component leads, cut off the excess length as
close to the joint as possible. Mount the next resistor in the parts list in the same manner and continue
until all the resistors are mounted.
The values which are in decade increments can be easily confused, such as 470, 4K7 and 47K, so be
sure to verify the colors before soldering the component in place! If you are in doubt, use a multimeter to
check the resistance value.


