!
Install the remote control battery
P
ower
S
witch
Geomagnetic
calibration
(Compass
calibration)
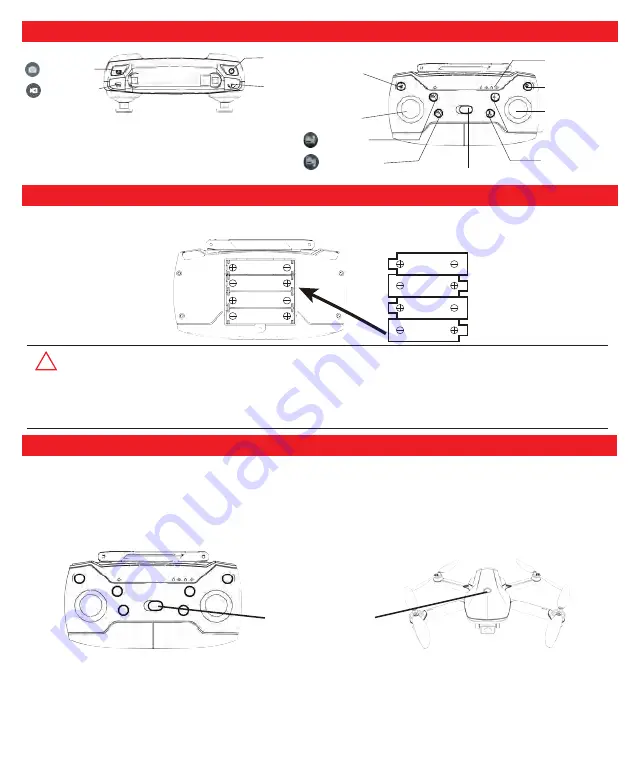
Remote control
power Indicator
One key return
Headless mode
One key take-off
Camera up
Camera down
Throttle
joystick
Direction joystick
Switch
Controller function introduction
Remove the remote control battery cover, install the 4 Pcs AAA batteries(Not provided in the package) correctly according to
the positive and negative terminals indicated by the remote control, and then re-install the battery cover.
● The remote control uses 4 “AAA” non-rechargeable batteries or “AAA” rechargeable batteries. (Not provided in the
package)
● Pay attention to the polarity of the battery when installing or replacing the battery.
● Do not mix different conditions or types of batteries.
● Used batteries should be removed in time, and discarded batteries should be thrown properly.
● If you do not use it for a long time, please remove the battery to avoid damage to the product caused by battery
leakage.
Step 1 :Insert the battery into the battery slot of the drone. Press the power button of the drone for two seconds to turn it on.
The indicator light of the drone flashes quickly and then flashes slowly. Put the drone on the horizontal ground or glass. (Do
not place the drone on the grass or on uneven ground to prevent the grass or sand from getting into the motor and causing
damage to the motor.)
Step 2 :Turn on the remote control power switch, the indicator light of remote control and drone turn solid, the synchronization
is completed.
Tips: Long press the speed control button and turn on the remote control switch at the same time.The left joystick will become
the direction joystick, and the right joystick will become the throttle joystick. (right-hand mode)
-4-
Synchronize the drone with the remote control.
Take picture
Record video
Surround
mode
Speed
adjustment
1.5V AAA
1.5V AAA
1.5V AAA
1.5V AAA
1.5V AAA
1.5V AAA
1.5V AAA
1.5V AAA
Summary of Contents for 0036847
Page 1: ......


