background image


Page | 38   


11 . UPD ATING  FIRMWARE 

Firmware is the software running on the HD Media Center, which adds additional functions and 

features to the device. We will frequently release firmware update to continue bring more 

functions to the HD Media Center.   

To update a firmware, you will need a USB pen drive to store the necessary firmware 

information. 

a)  download the latest firmware. 

b) 

Unzip the file and copy ‘install.img’ file to the root directory of the USB pen drive. 

c) 

Insert the pen drive to any of the USB port on the media center. 

d)  Go to 

SETUP -> MISC -> USB UPGRADE


e)  If a correct firmware is recognized by the system you will be asked to proceed further. 

Press 

OK

 to precede flashing. 

f) 

Depends on your display device, the screen may REMAIN BLACK, The firmware 

flash will take a few minutes, so please be patient and DO NOT turn off the power. 

After a successful flash, you shall see a setup page appearing on your screen

. If you 

want to monitor the progress of the update process please disconnect the 
HDMI/component cable and use the composite cable during the upgrade process.


g)  Finish setting up and reboot 

Summary of Contents for PLAY M18

Page 1: ...EAGET User guide EAGET PLAY M18 3D ANDROID FULL HD MEDIA PLAYER ...

Page 2: ...TALL HDD OPTIONAL 3 2 CONNECTION 5 3 POWER ON OFF 8 4 REMOTE CONTROL 8 5 SETUP 13 6 HOME MENU 18 7 BIT TORRENT 29 8 STREAMING VIA NETWORK 32 9 STREAMING VIA UPNP DLNA SERVER 33 10 ANDROID APK INSTALLATION 35 11 UPDATING FIRMWARE 38 ...

Page 3: ...edia Center takes any standard 3 5 HDD up to 3TB of capacity 1 1 HDD INSTALLATION a To access the drive bay simply remove the hot swap HDD drive tray on the side of the Media Center b Mount your HDD with provided screws to the drive tray and simply slide it back in to the bay 1 2 HDD FORMAT For users who wish to install a new SATA HDD into the player first you need format the hard disk on the play...

Page 4: ...ge can be also accessed via Setup System Format menu A password needed when you try to format the HDD please refer to 3 1 5 MISC for more details about the password b Press the up down button to adjust the capacity of time shift buffer Press the left right button to select Next and the OK button to confirm c Select Format press OK and then hard disk format will start ...

Page 5: ... YOUR TV AND AV RECEIVER There are many ways connect your HD Media Center to your home entertainment system Depends on your setup we recommend following connection methods For connecting directly to TV Composite Video with RCA Audio Components Video with RCA Audio HDMI For connecting to AV receiver Composite Video with RCA Audio Components Video with RCA Audio or S PDIF Toslink Coaxial Digital Aud...

Page 6: ... let your router automatically assigned IP address to the device For setup manually select Manual DHCP and Manual DNS for customized settings For wireless connecting to your home network a Connect USB Wireless Adapter or a compatible WIFI adapter to one of the USB port b Once connected a short prompt will indicate the device is now connected with a USB WIFI adapter c Go to Setup Network Wireless S...

Page 7: ...ptop computer s USB port d Once connected your operating system will automatically recognize your Media Center as an external storage device You can now manage the drive like any other external storage device 2 5 CONNECTING A USB DEVICE a Make sure the player is powered on b Plug in the USB pen drive USB external HDD USB Optical Drive etc to any of the USB port on the device c Browse the contents ...

Page 8: ...he initial boot screen you should be promoted to the home screen after a brief moment 3 2 POWER OFF AND STANDBY To completely turn off the power to the unit switch the rear toggle switch to the O Position Or you can put the unit on standby by either pressing the RED POWER button on the remote or press the power button on the front of the panel Upon standby the power indication will turn RED 4 REMO...

Page 9: ...nected Storage Device then safely remove it Press and hold for 2 seconds to eject disc if an optical drive is plugged in i e USB CD DVD ROM 2 Mute Press to mute audio output 3 EPG Only available for DTV Model Press to view the Electronic Program Guide ...

Page 10: ...ttings 8 Bookmarks Add Mark to the files which have already viewed 9 Previous Press to go the PREVIOUS file or chapter Press for PREVIOUS page during file browsing 10 FR Press to FAST REWIND Press repeatedly to go 2x 4x 8x 16x 32x rewind speeds 11 Setup Press to access SETUP at any time Press return to exit 12 FF Press to FAST FORWARD Press repeatedly to go 2x 4x 8x 16x 32x rewind speeds 13 Guide ...

Page 11: ...nd subtitle options Subtitle supported SRT SMI SUB SSA 18 Play Pause Press to PLAY and again to PAUSE 19 Repeat Press REPEAT to change repeat setting to Repeat Title Repeat ALL or Off 20 Green Press to access file options to copy move rename or delete Press to access other options when prompted on the screen 21 Red Press to pop up the file List Menu Press to access other options when prompt on the...

Page 12: ...urn Press to RETURN to the previous screen when navigating the menus 32 OK Press to confirm or play the selected file 33 Display Info Press to view the information of current playing track or file 34 Stop Press to STOP playback 35 Yellow Press during browsing to enter COVER ART MODE available only when folder jpg file is available in the video folder Press when prompt to access other options 36 Bl...

Page 13: ...R RW Auto Play If you system has plugged in DVD R RW loader enable this option will auto play when an audio video disc is inserted Screen Saver This setup is to enable or disable the screen saver function You can choose when the screen saver will start upon idle and the display weather it s default your own customized photo album or Flickr DLNA DMR This setup is to enable or disable the DLNA DMR f...

Page 14: ...e installed HDD IMPORTANT DOING SO WILL REMOVE EVERY THING ON THE DRIVE BD Navigation This function is to support Blu Ray Navigation features when play from a file Factory Default Restores back to factory default settings 5 2 AUDIO Night Mode This option allows the media center to cap it s maxim sound output during a late night HDMI Output This is the HDMI audio output option LPCM Linear pulse cod...

Page 15: ...ting lets you choose the screen output ratio including Pan Scan 4 3 16 9 picture in 4 3 screen mode will fit to 4 3 Letter Box 4 3 16 9 picture in 4 3 screen mode will shrink but keep aspect ratio with black bars on top and bottom 16 9 16 10 native 16 9 or 16 10 ratio TV System This item can choose TV system options include NTSC PAL 480P 576P 720P 50Hz 720P 60Hz 1080i 50Hz 1080i 60Hz 1080P 50Hz 10...

Page 16: ...tting allows manual configuration of IP DNS Gateway Subnet addresses Wireless Setup For WIFI connection only Wireless network should be automatically scanned you can select the desired network to connect to If any wireless security present you will be prompted with an on screen keyboard to enter the necessary authentication information Press RED on remote to enter Advanced configuration Press GOTO...

Page 17: ...BT Samba safety This option will require log in to access the media center via remotely Default User Name admin Default Password 123 Note Pls do not run mutiple software at the same time 5 5 MISC Version Info Show the current Firmware Version info Network Info Show the current Network Information Online upgrade This option is currently NOT AVAILABLE USB upgrade This option lets you update media ce...

Page 18: ...wse all VIDEO files here sorted by alphabetical order This function requires SCAN STORAGE see setup function to index all available files before it can be displayed correctly Music You will be able to browse all AUDIO files here sorted by alphabetical order This function requires SCAN STORAGE see setup function to index all available files before it can be displayed correctly Photo You will be abl...

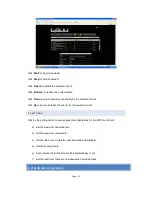
Page 19: ...ere you can manage your device s setting and general setups 6 1 1 HOME MENU STATUS Status indicator these icons are used to indicate the status of represented service such as network HDMI WIFI connections and etc Network shows if a network cable is connected to the box Wireless shows if a wireless adapter is connected to the network HDD show if an internal HDD is being detected by the media center...

Page 20: ...lter options All Music Photos and Movies LEFT RIGHT Move cursor LEFT RIGHT to select devices folders or files PREV NEXT Go to previous next page ENTER Enter or confirm the selected item CONFIRM Add the selected files to the playlist RETURN Return to the previous menu OPTION In the OPTION menu you can change viewing mode to Thumbnail List Preview All Media Movies ...

Page 21: ...wing options to allow improved viewing experience when going through a large collection of files You can change your viewing options at any time simply by pressing the OPTION button on your remote to bring up the navigation menu Here you will have a few viewing options at your convenience All Media This mode will display all recongized files Movies This mode will only display recongized video file...

Page 22: ...lbum cover a movie poster and etc List View this mode will let you view a single pane up to 8 files in vertical mode This mode will display full file name and extension an ideal view mode for long file names Preview this mode is great for movies and music a two span viewing mode with left pane displaying a large folder icon if a folder is selected displaying detailed file information In this mode ...

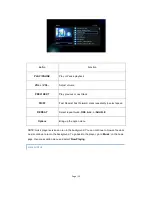
Page 23: ...ct any displayed files to start execute the playback The following buttons can be used to navigate the menu PLAY MOVIE FILES Button Function PLAY PAUSE Play or Pause playback SLOW Play video in slow motion press repeatedly to select speed VOL VOL Adjust volume ...

Page 24: ... ZOOM Zoom in out the image DISPLAY Display file information GOTO Display playback search function A B Set beginning and end point of a section RETURN Return back to previous mode AUDIO Select audio track during playback SUBTITLE Set subtitle options STOP Stop playback OPTIONS Bring up the option menu GUIDE Instant access to Guide menu PLAY MUSIC FILES ...

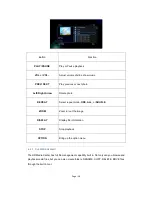
Page 25: ...press repeatedly to select speed REPEAT Select repeat mode ONE ALL or SHUFLE Options Bring up the option menu NOTE music player service can run in the background You can continue to browse file while music continue to run in the background To go back to the player go to Music on the home page then press option menu and select Now Playing VIEW PHOTOS ...

Page 26: ...AT Select repeat mode ONE ALL or SHUFLE ZOOM Zoom in out the image DISPLAY Display file information STOP Stop playback OPTION Bring up the option menu 6 3 2 FILE MANAGEMENT The HD Media Center has full file management capability built in Not only can you browse and playback media files but you can also create folders RENAME COPY DELETE MOVE files through the built in tool ...

Page 27: ...der and files via local network or USB connection 6 3 3 CREATE A PLAYLIST You can create your own playlist for music and photos on local devices such as internal HDD USB Storage Device or Flash Memory NON Networked Sources NOTE Playlist can only be applied under Music and Photos management CREATE A MUSIC PLAYLIST Go to Music Press the RED button on the remote then you will be prompted by the follo...

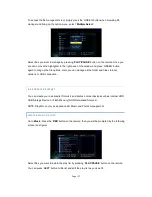
Page 28: ...u can save the playlist as a default play list or make a new name for it by press the Rename which will bring up the onscreen keyboard to type in a name that s best suitable for the playlist you just created then press OK to confirm Press OK again with the new playlist name You can continue to create more playlists or simply hit RETURN to exit CREATE A PHOTO ALBUM ...

Page 29: ...ou can save the playlist as a default play list or make a new name for it by pressing the Rename which will bring up the onscreen keyboard type in a name that s best suitable for the playlist you just created then press OK to confirm Press OK again with the new playlist name You can stay in the playlist name to continue create more playlist or simply hit RETURN to exit 7 BIT TORRENT The HD Media C...

Page 30: ...68 1 10 in your web browser s address bar from your desktop or laptop PC to enter the Neighbor Web Page see figure NOTE Password will become effective when Login Control is turned on The default user name is admin and the default password is 123 7 2 BIT TORRENT DOWNLOAD The Bit Torrent client is running in daemon mode a process running in the background so you can download while playback any media...

Page 31: ...on Add New Torrent Click Browse to upload a torrent file and click Yes to confirm 7 3 MANAGING THE DOWNLOADS The Bit Torrent Download page also allows you to start stop delete torrents set priorities and the current download status ...

Page 32: ... increase the priority for the selected torrent 7 4 SETTINGS Click on the setting button to access general configurations for the Bit Torrent Client a Set the maximum download rate b Set the maximum upload rate c Set the idle hours to start the next download automatically d Set the seeding hours e Set to delete the finished torrent files automatically or not f Set the maximum number of simultaneou...

Page 33: ...Password Domain Host Name and Specific IP information Select OK to confirm Cancel to cancel and Simple Detail to switch between viewing options c To change or modify an existing entry Select Modify to bring up the shortcut s information Change and modify as needed then select Cancel to cancel and OK to accept the changes d Select the shortcut you added and press the ENTER button to confirm Next ti...

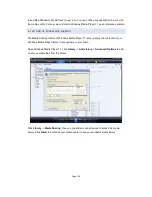
Page 34: ...ia Sharing feature of Windows Media Player 11 lets you enjoy the contents of your Windows Media Player library from anywhere in your home Open Windows Media Player 11 click Library Add Library Advanced Options to add or remove media files from the library Click Library Media Sharing then you can allow or deny devices to access the media library Click Allow to authorize your media center to see you...

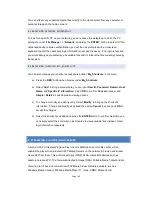
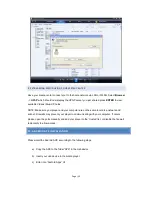
Page 35: ...nd your computer are on the same local area network and subnet Firewalls may prevent your player to communicating with your computer If occurs please open the ports manually and add your player to the trusted list or disable the firewall temporarily to allow access 10 ANDROID APK INSTALLATION Please intall the Android APK according to the following steps a Copy the APK to the folder APK in the Usb...

Page 36: ...Page 36 d Click OI file Manager e Click Continue f Click mnt then click usb mounts ...

Page 37: ...Page 37 g Click sdb1 and find the apk you want to install and click h Click Install and wait for 20s i Choose open to play or done to exit ...

Page 38: ...B pen drive c Insert the pen drive to any of the USB port on the media center d Go to SETUP MISC USB UPGRADE e If a correct firmware is recognized by the system you will be asked to proceed further Press OK to precede flashing f Depends on your display device the screen may REMAIN BLACK The firmware flash will take a few minutes so please be patient and DO NOT turn off the power After a successful...

Page 39: ...own the POWER button on the front panel for 5 seconds DO NOT RELEASE f Switch on the rear power switch to the ON position and continue to hold down the front power button for about 5 seconds then release g Your TV MAY immediately enter into the up grade process Please make sure DO NOT power off the HD Media Center and DO NOT REMOVE the pen drive Note to view the update process if your TV turns bla...

Reviews: