background image

Eagle Solutions, ©2008, Tracker Operator Manual Page #10

Eagle Solutions, ©2008, Tracker Operator Manual Page #11

Checking Oil Levels and Filters

Check oil levels prior to starting engine.  Refer 

to engine owner’s manual for the proper procedure. 

DO NOT OVERFILL OIL LEVEL; to do so may 

cause  damage  to  the  engine  and  may  elevate 

harmful emissions.  Use 10W30 oil.  Always check 

oil  daily  before  using  the  machine  (see  “Daily

Maintenance”).

Be  sure  the  carburetor  air  filter  is  free  of  dust, 

oil, etc.  Dirty filters are the most frequent cause of 

elevated toxic emissions.

Check  recoil  dust  filter.    Clean  or  replace  if 

necessary.    See  the  instructions  in  the  engine 

owner’s manual.

Adjusting Handle

Your  machine  is  equipped  with  an  adjustable 

handle for comfort and use.  Most find it necessary 

to  adjust  the  handle  to  “belt  height”  for  optimum 

control.  A 9/16 wrench is used to loosen and tighten 

the pivot points. 

The  handle  folds  over  the  engine  to  facilitate  a 

compact  transport  space.    However,  leaving the

handle  loose  when  operating,  allows  the  operator 

to fold the handle while using the Tracker in tight

spaces. 

Installing the Fuel Cylinder

1.  Take machine to well ventilated area.

2.  Check cylinder for overfill.

3.  Place cylinder on the machine in tank holding 

area and secure the strap.

4.  Connect fuel cylinder to the machine using the 

“Rego” connection.  Tighten hand tight.  Do not 

use a wrench or pliers or cross thread the Rego 

connection.

5.  Open the service valve slowly.  Be alert for the 

odor of propane that may indicate a leak.

6.  To remove the cylinder, reverse the procedure.

Strip Brush Or Pad Driver 
Installation & Inspection 

1.  Place  transport  wheel  on  Tracker  &  install 

safety chain.

2.  Lying  on  floor,  grip  strip  brush  or  pad  driver 

with both hands.  Firmly twist in a left to right 

rapid motion. 

3.  Remove and inspect.

4.  Reinstall in similar motion.

5.  Remove transport wheel.

Transport Wheel Installation, 
Removal

1.  Position  one  operator  at  Tracker  handle, 

pressing down to lift front end of machine.

2.  Second  operator  removes  or  installs  transport 

wheel.

3.  When  installing  transport  wheel,  position 

so  that  the  chain  on  the  transport  wheel  that 

holds the secure pin is in the front, away from 

the  Tracker.    This  assures  that  the  wheel  is 

positioned properly, allowing ease of movement 

when pushing the Tracker to storage.

Starting Machine

1.  Check  fuel  cylinder  for  overfill  and  install 

cylinder on machine.

2.  Install both strip brushes or padded pad drivers 

onto machine.

3.  Remove  transport  wheel.    Store  in  a  secure 

location.

4.  Place machine on level surface and check for 

correct oil level.

5.  Lower splash guard skirt to floor level.

6.  Slowly  open  the  service  valve  on  the  fuel 

cylinder. 

NOTE: Opening the service valve too 

quickly may cause the excess flow valve to stop 

the  flow  of  propane.    If  this  occurs,  close  the 

valve, wait a few seconds and re-open the valve 

SLOWLY!

7.  Choke engine and engage starter with throttle in 

‘slow’ position. 

5.  When  engine  starts,  ease  the  throttle  back  to 

running  position.   

NOTE: Do not run engine 

with the throttle in the choke position!  Excessive 

harmful emissions will be produced putting you 

in harm’s way!

7.  Increase throttle.  Centrifugal clutch will engage 

and  brushes  will  begin  turning.    Continue 

increasing throttle to 100% position as machine 

moves forward.

Operating Machine

WARNING!  Be careful not to allow the machine to 

come in contact with loose tiles or other obstructions 

on the floor.   If objects are hit by the revolving pad 

they could become dangerous projectiles.

1.  Clear area of all displays.  Remove any dust and 

stickers from floor.

2.  Prepare  stripping  solutions  according  to 

instructions on the chemical label.

3.  Apply  solution  to  the  floor  using  a  mop  or 

solution spreader.  KEEP FLOOR WET WITH 

SOLUTION!

Machine Set-Up & Operation

To Order Parts Call 1-888-702-5326 - https://monsterfloorequipmentparts.com

Summary of Contents for 680022

Page 1: ...Eagle Parkway Adairsville GA 30103 800 633 0519 or 770 773 3875 Fax 770 773 9903 www EagleFloorSolutions com email customerservice eaglefloorsolutions com Solutions Model 680022 680267 680570 d e r P a r t s C a l l 1 8 8 8 7 0 2 5 3 2 6 h t t p s m o n s t e r f l o o r e q u i p m e n t p a r t s ...

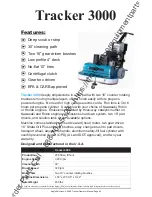
Page 2: ...hes easy change brush to pad drivers transport wheel adjustable handle aluminum safety fill fuel cylinder with overfill prevention device OPD UL and DOT approved and two year warranty Designed and manufactured in the U S A Tracker 3900 Production 20 000 sq ft hour Engine Speed 3 200 rpm Cleaning Path 30 Brush Speed 320 rpm Brush Size Two 16 counter rotating brushes Machine Dimensions L 53 x W 30 5...

Page 3: ...ction 11 Transport Wheel Installation Removal 11 Starting Machine 11 Operating Machine 11 Stopping the Machine 12 Emergency Stopping 12 Cleaning the Machine 12 Storing the Machine 12 Transporting the Machine 12 Maintenance 12 Daily Maintenance every four hours of operation 13 Weekly Maintenance every 20 to 50 hours of operation 13 Monthly Maintenance every 80 hours of operation 13 Quarterly Mainte...

Page 4: ...on in this manual before operating or servicing this machine Check fuel cylinder for overfill before taking it into the building or placing in storage Install fuel cylinder in a well ventilated area Be aware of propane gas leaks if odor is present Make sure carburetor air filter is clean before starting engine Never run engine with throttle in choke position Never allow water to contact hot engine...

Page 5: ...er than air approximately 1 5 times the specific gravity of air Therefore if propane leaks from the fuel system or cylinder it will lay close to the floor and seek low places like under doors It also doesn t puddle but instead vaporizes and dissipates into the air Because it is released from a pressured container as a vapor propane can t be ingested like gasoline or alcohol fuels Propane is a non ...

Page 6: ... are found in gasoline HC emission Also the environmental impact of propane hydrocarbon emissions is much smaller than that of gasoline However hydrocarbon derivatives are responsible for the characteristic smell which is often a nuisance when propane engines operate indoors Emissions OSHA has set a CO Permissible Exposure Level PEL at 50 parts per million PPM over a time weighted average of eight...

Page 7: ... or cracks on the container surface rusting particularly on the bottom of the cylinder missing cylinder foot ring collar or valve cover manufacture or recertification date and OPD valve These are things that can render the cylinder unusable and dangerous Cylinders are only usable for 12 years from the date of manufacture and must be recertified every 5 years Checking a Cylinder for Overfill Always...

Page 8: ...ate on the collar to be assured it has not passed its recertification date twelve years Emergency Situations with Propane Pressure Relief Valve Vents Cool the cylinder as quickly as possible using water or a fire extinguisher on the body of the cylinder If the propane vapor from the pressure relief valve should ignite do not attempt to extinguish the flame It is consuming the propane gas as it is ...

Page 9: ... store it outside in a secure approved cabinet Servicing or adjusting the propane fuel system should only be done by a trained service technician Never attempt to adjust the fuel system of a propane engine If equipped with an emission monitoring or controlling system never attempt to disconnect it or circumvent it Never attempt to bypass or disconnect the kill switch or any other safety devices Li...

Page 10: ... approved cabinet Clean and inspect air and dust filters Servicing the Machine Planned maintenance is the responsibility of the operator It includes Checking oil level Checking and cleaning air and dust filters Keeping machine clean and lubricated Reporting any damaged or worn parts to supervisor See Maintenance section for servicing intervals and instructions Servicing or adjusting the propane fu...

Page 11: ... Transport Wheel Installation Removal 1 Position one operator at Tracker handle pressing down to lift front end of machine 2 Second operator removes or installs transport wheel 3 When installing transport wheel position so that the chain on the transport wheel that holds the secure pin is in the front away from the Tracker This assures that the wheel is positioned properly allowing ease of movemen...

Page 12: ...achine After use the underneath of the Tracker may be hosed down for cleaning by standing the machine in an upright position 1 Remove the propane cylinder 2 Two operators should firmly grip the front of the Tracker and lift until the machine is upright 3 The stripping brushes or pad drivers may then be easily removed and the under belly of the Tracker may be cleaned 4 Care should be taken when low...

Page 13: ...clean cooling fins Quarterly Maintenance every 250 hours of operation Perform all monthly maintenance items Have engine checked by an Authorized Service Center including emissions check Propane Fuel System Repairs and adjustments to the fuel system can only be made by an authorized properly trained and certified service technician Improper adjustments will cause increased toxic emissions of carbon...

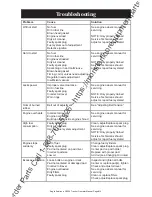
Page 14: ...burned rubber Belt out of adjustment See Adjusting Belt Tension Engine overheats Incorrect oil level Engine overloaded Build up of dirt inside engine shroud See engine owners manual for servicing High fuel consumption Faulty spark plug Dirty air cleaners Improper fuel system adjustment Clean adjust replace spark plug See engine owners manual for servicing NOTE Only properly trained Service Technic...

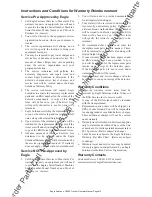
Page 15: ... changes as described in the engine manufacturer s operator manual See information on the Planned Maintenance Kit at the end of the manual Some states do not allow limitations on how long an implied warranty lasts and or do not allow the exclusion or limitation of incidental damages so the above limitations and exclusions may not apply to you THIS WARRANTY IS IN LIEU OF ANY OTHER WARRANTIES EXPRES...

Page 16: ...ou will need to provide the Engine Serial Number Machine Serial Number Model Number and Proof of Purchase i e invoice 2 You will also need to provide documentation for all repair related charges 3 Your claim will be reviewed to determine if it is covered by our warranty policy If approved a Return Goods Authorization RGA number will be issued for defective parts and an RGA form will be faxed to yo...

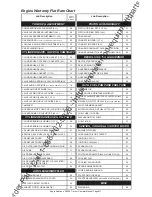
Page 17: ... 2 VALVES 1 CYL 1 8 CHOKE VALVE S THROTTLE VALVE S INCLUDES CARB R R 0 6 VALVE LAPPING OR VALVE GUIDES ALL 2 6 MAIN JET S FLOAT OR VALVE INCLUDES CARB R R 0 6 CAMSHAFT 1 3 FLOAT CHAMBER GASKET 0 3 ROCKER ARM OR PUSH ROD 1 ARM OR ROD 0 4 SOLENOID VALVE OR FUEL CUT VALVE 0 3 ROCKER ARMS OR PUSH RODS ALL 0 6 FUEL TUBE TO CARB 0 2 CYLINDER CRANKCASE OIL PUMP DIAPHRAGM FUEL PUMP 0 2 CYLINDER BORING HON...

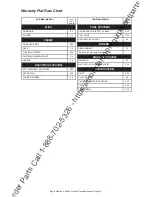
Page 18: ...REPLACEMENT 1 5 FLEXIWALL SHIELD 0 25 See Engine Warranty Flat Rate Chart FLEXIWALL SHIELD MOUNT 0 5 EXHAUST SYSTEM HANDLE 0 5 MANIFOLD 0 5 ELECTRICAL SYSTEM MUFFLER MOUNTING BRACKET 0 25 BATTERIES BATTERY BOXES 0 25 DRIVE SYSTEM KEY SWITCH 0 25 BELTS 0 25 WIRING HARNESS 0 5 CLUTCHES 0 5 PAD DRIVERS STRIP BRUSHES 0 25 PULLEYS 0 25 TENSIONERS 0 25 Warranty Flat Rate Chart d e r P a r t s C a l l 1 ...

Page 19: ...Eagle Solutions 2008 Tracker Operator Manual Page 19 d e r P a r t s C a l l 1 8 8 8 7 0 2 5 3 2 6 h t t p s m o n s t e r f l o o r e q u i p m e n t p a r t s ...

Page 20: ... carburetor air filter element carburetor foam pre filter and clean oil and filter today Kit includes 2 quarts of oil 1 oil filter 1 recoil dust filter 1 carburetor air filter element 1 carburetor foam pre filter Engine PM Kit Part Honda 680426 Robin 680508 Kawasaki 13hp 680713 Kawasaki 17hp 680428 Features Planned Maintenance Kit Don t Forget P O Box 350 100 Eagle Parkway Adairsville GA 30103 800...

Reviews: