7
Quick Initialization
If you don’t want to wait for the Auto Search, then you can speed up the
initialization process by using the “Quick Initialization” feature. To do this,
first turn the unit on, then press the MENU key. The screen shown at right
appears. Now press the down arrow key until the “GPS SETUP” label is
highlighted. Press the right arrow key. The “INIT GPS”
(Initialize GPS) label is highlighted. Press the right
arrow key.The Quick Initialization label is highlighted.
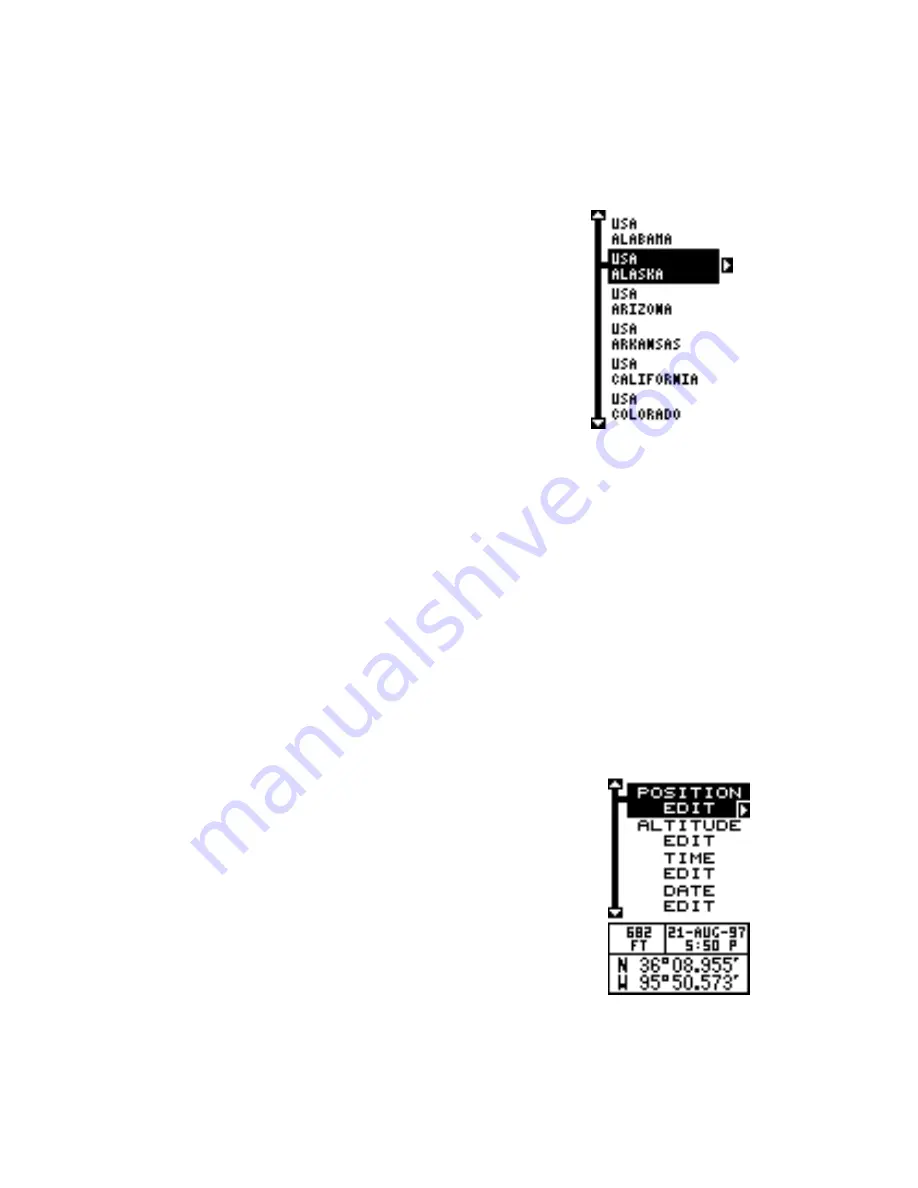
Press the right arrow key. The screen at right ap-
pears. All of the states in America are listed, along
with most of the countries in the world. Using the up
or down arrow keys, highlight the state or country
that is closest to your location, then press the right
arrow key. The unit returns to the initialize GPS menu.
Press the EXIT key three more times to erase the
menus. The unit returns to the satellite status screen.
Using the quick initialization method loads a position that’s close to yours
into the GPS receiver. It should now have position, time, and date, thereby
giving it the data it needs to determine which satellites are in view. Once
the satellites are known, the receiver searches for only those satellites,
making a lock much faster than an auto search method.
Full Initialization
There are occasions when you will want or need to manually initialize the
unit by entering the position, elevation, time, and date. To do this, press
the MENU key, Now press the down arrow key until the “GPS SETUP”
label is highlighted. Press the right arrow key. The “INIT GPS” (Initialize
GPS) label is highlighted. Press the right arrow key. Now highlight the
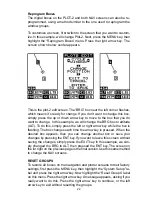
“FULL INIT” label and press the right arrow key. The
screen at right appears.
This is the full initialization screen. The position, alti-
tude, time, and date the GPS receiver is currently us-
ing to find the satellites shows at the bottom of the
screen. To update these settings to the current values,
simply highlight the desired label using the up or down
arrow keys, then press the right arrow key. The posi-
tion label (see at the top of the next page) was se-
lected in this example.
To change a number in the position, highlight it using the right arrow key,
then use the up or down arrow key to change its value. The left arrow key
acts as a backspace. When the position is correct, press the ENT key.
Summary of Contents for Expedition II
Page 1: ...INSTALLATION AND OPERATION INSTRUCTIONS Expedition II TM...
Page 60: ...56...


