14
Plotter
The plotter lets you see your course and track
from a “birds-eye” view. If you’ve recalled a way-
point, the plotter show your star ting location,
present position, and destination. However, you
don’t have to recall a waypoint to use the plotter.
To use the plotter, simply press the MODE key,
then press the up or down arrow keys until the
“Plot” label is highlighted. Press the EXIT key to
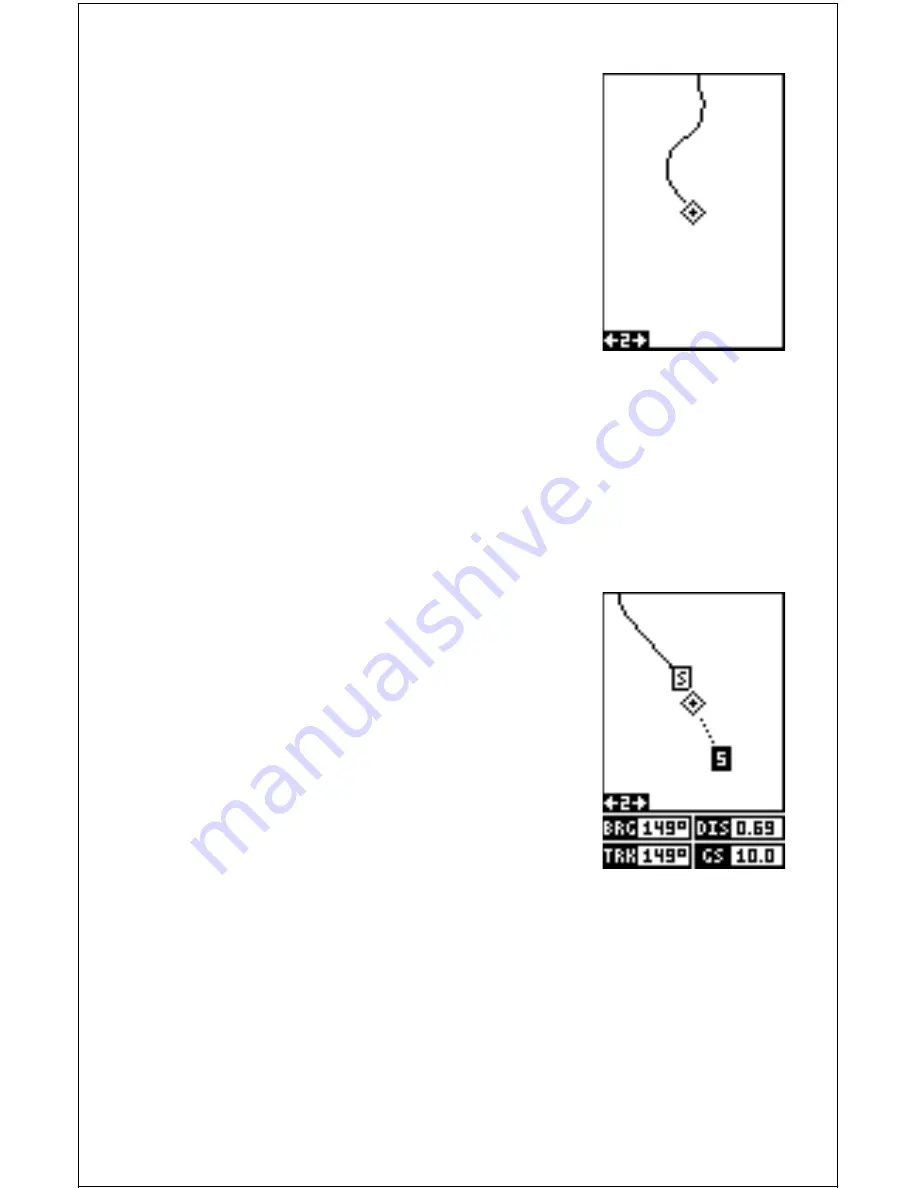
erase the mode menu. A screen similar to the one
at right appears. This is plot-1. The diamond flash-
ing in the center of the screen is your present
position. The solid line extending from the diamond is your track, or path
you’ve travelled. The plotter’s range is shown in the lower left corner of
the screen. In this example, the plotter’s range is two miles from the left
edge of the screen to the right.
There are two different plotter screens available. Plot screen number 1
shows by default. Your current position displays at the center of the screen
as a cross surrounded by a flashing diamond.
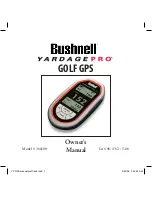
To view the other plotter screen, press the MODE
key. Press the up or down arrow key to move the
black box to the "PLOT" label. Now press the right
arrow or left arrow key to select plot-2. This screen
(as shown at right) has navigation data displayed
at the bottom of the screen in digital numbers.
This data is active whenever you’ve recalled a way-
point. Press the EXIT key to erase the mode menu.
This screen shows bearing to waypoint (BRG),
distance to waypoint (DIS), ground speed (GS),
and track (TRK).
Use the Z-IN and Z-OUT keys to enlarge or reduce the plotter area. This
changes the plotter’s range. The available ranges are: 0.1, 0.15, 0.2, 0.3,
0.4, 0.6, 0.8, 1, 1.5, 2, 3, 4, 5, 6, 8, 10, 15, 20, 30, 40, 60, 80, 100,150,
200, 300, 400, 600, 800, 1000, 1500, and 2000 miles.
Cursor
Pressing an arrow key while the plotter is on shows two dotted lines that
intersect at your present position. These dotted lines are called a “cursor”
and have a variety of uses.


