Note:
• During recording, the metronome function will not automa-
tically start. If user needs to start the metronome function,
user can press [CLICK] button before recording instead of
pressing it after recording.
• The metronome sound can not be recorded.
• If user is not satisfied with the recorded result, press
[RECORD] to restart recording.
(Note: this module supports the recording function, but not
saving function. The recorded data will cover the former data,
and all the data will not be saved after the module is powered
off).
Play the recorded song
1. Press [START/STOP] button twice to replay the recorded
song, and meanwhile [START/STOP] button and [RECORD]
LED lights up.
2. After replaying, [UTILITY] button and [RECORD] LED lights
off.
7. SET UP
Press [UTILITY] button to enter into practical setting, then into
the following menu gradually.
((Sensitivity Crosstalk Curve Local On/off))
Trigger sensitivity
1. Press [UTILITY] button to enter into the trigger sensitivity
setting. The display shows letter [E] first, and the sensitivity
level next.
2. Strike the pads to select proper sensitivity.
3. Use [-DATA+] button to adjust the trigger sensitivity (01-08,
non-recycle) . The higher the value means higher sensitiv-
ity.
Crosstalk rejection
Strike a pad (trigger) and the vibration may cause crosstalk.
1. Press [SET UP] button continuously to enter into trigger
sensitivity setting. The display shows letter [O] first and the
crosstalk rejection level next.
2. Use [-DATA+] button to adjust the trigger sensitivity rejec-
tion level C 01-16,non-recycle) The higher value means
higher rejection level.
Trigger curve
1. Press [SET UP] button continuously to enter into trigger
curve setting. The display shows letter “CU” first and the
trigger curve number next.
2. Use [-DATA+] button to select the trigger curve C 1-6,non-
recycle). This will change the relation between force and
the loudness.
• CURVE 1: Small dynamic response. Select this curve and it
delivers high but stable volume.
• CURVE2: The standard setting to deliver natural signal.
• CURVE3: Compared to CURVE2, low striking force causes big
volume change.
• CURVE4: Compared to CURVE2, comparatively high striking
force causes comparatively big volume change.
• CURVES: Compared to CURVE2, comparatively high striking
force causes very big volume change.
• CURVE6: The striking force causes extreme volume change.
((CURVE1 - CURVE2 - CURVE3 - CURVE4 - CURVE5 - CURVE6))
Save the set-up
Press [SAVE] button to save the 3 setting mentioned above:
sensitivity/crosstalk rejection/striking force.
Local control
Press [SET UP] button to enter into the local setting. It shows
the local control status:
“Lon” for ON or “Lof” for O F F. Use [-DATA+] button to switch.
Refer to the following figure for the local control setting :
Local control: used to control the connection of trigger detec-
tion and the audio source sequencer. In the default ON status,
the two modules are connected. Striking the pad will generate
EAGLETONE E-TOUCH ELECTRONIC DRUMS
User’s manual english
14
U
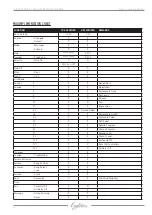
MIDI IMPLEMENTATION CHART


